Breasts: A Natural and Unnatural History opened my eyes to many aspects of that which have always been in front of me. Florence Williams does a great job of describing her subject matter in scientific detail but layman's terms.
She starts out with a history of mammals and the importance of breasts to infants and the species. She describes the breast itself-- from its makeup to its development over the course of one lifetime, as well as its social history and the history of implants. She went an interviewed the first woman who had an implant, and even went to see a doctor about an implant for her-- to get some experience with the process. All of this she describes with the detachment and professionalism of a journalist.
She talks about breastfeeding, and about the impact of industrialization and chemicals on breast milk and breast tissue. This was, for me, who is nursing my second baby, the most fascinating part of the book. She did an experiment by getting her own exposure to toxins measured before and after a mini plastic avoidance period, and the results were amazingly significant. This section was so stunning to me that I went out and bought glass jars to cart around my kids' snacks in instead of little plastic snack traps. I have also been trying to pay attention to where we use plastic and am thinking of trying to remove more plastics from our lives and our home. The impact of them on us, and our developing children (especially girls) is really stunning, and she lays it all out and cites numerous studies beyond her own experiences.
Along the same vein, Williams discusses medications such as the pill and their impact on the breast. She discusses breast and ovarian cancer, and a block of men with breast cancer who all lived on the same contaminated land in their youth. The discussion is all at once riveting and enlightening. She ends with more discussion about the future of breasts and our lives.
I really enjoyed reading this, and highly recommend it. I think men and women both would learn from this book, and its style is so approachable that you are getting hard facts without having to wade through too much extra information.
Pin It
Monday, September 17, 2012


Sunday, September 16, 2012
Make your own Cayenne Pepper

These are Cayenne Peppers, fresh from the Farmer's Market.
I threaded them together and hung them in a hot spot in the kitchen.
They will sit there to dry until they are crumbly, then I will crush them and store them with my spices. Yum!
Pin It
I threaded them together and hung them in a hot spot in the kitchen.
They will sit there to dry until they are crumbly, then I will crush them and store them with my spices. Yum!
Saturday, September 15, 2012
Book Review: A World of Dumplings
My older son and I were staring at each other last week, on a long afternoon, and I decided we should cook something. Cooking helps us both stay focused, since it is project based and we each like to have "jobs." We made Tibetan Momos from my Tibetan cookbook, and steamed them up. He was excited that the contractor we had at the house ate four of them and liked them, and he promptly ate a few, then his little brother ate a few. Buoyed by the experience, I bought a book on little stuffed dumplings from around the worrld. It is called A World of Dumplings.
A World of Dumplings is a gem of a book. It is all at once a nice read and full of recipes that I want to make.
The author does such a nice job of organizing this book. He goes around the world, region by region, and describes the dumplings. He intersperses anecdotes about his experience with the dumplings that are funny and easy to relate to. They are such nice stories that I didn't mind that he didn't actually travel the world in search of dumplings-- he merely searched his hometown and New York City.
The recipes themselves are easy to follow and those I've tried have been tasty. The ingredients are also simple: the only spice I didn't have was sumac and a quick internet search found me that once so now we can try the Greek dumplings.
If you are looking for a nice read, and some new recipes, look no further than A World of Dumplings by Brian Yarvin. Pin It
A World of Dumplings is a gem of a book. It is all at once a nice read and full of recipes that I want to make.
The author does such a nice job of organizing this book. He goes around the world, region by region, and describes the dumplings. He intersperses anecdotes about his experience with the dumplings that are funny and easy to relate to. They are such nice stories that I didn't mind that he didn't actually travel the world in search of dumplings-- he merely searched his hometown and New York City.
The recipes themselves are easy to follow and those I've tried have been tasty. The ingredients are also simple: the only spice I didn't have was sumac and a quick internet search found me that once so now we can try the Greek dumplings.
If you are looking for a nice read, and some new recipes, look no further than A World of Dumplings by Brian Yarvin. Pin It
Friday, September 14, 2012
Rocks as a Sandbox Toy

We recently went to Rock City at Mt. Diablo State Park, which is a large area of natural caves and big rocks for the kids to climb in and around.
Needless to say, the preschooler was quite taken by the place.

So what did we have to do when we got home?

Make Rock City in the sandbox, of course.

We are really liking the rocks as a natural alternative to plastic as a toy in the sandbox.

Thursday, September 13, 2012
Red-dish Cabbages in the Garden

These are looking like they are almost ready!
They have been growing in a shady spot in one of the garden beds for a few months and have escaped the slugs and bolting... they look almost ready to harvest!
Pin It
They have been growing in a shady spot in one of the garden beds for a few months and have escaped the slugs and bolting... they look almost ready to harvest!
Wednesday, September 12, 2012
Making NY Sour Dill Pickles at Home - Fermented Pickles

We were at the Farmer's Market a few weeks ago and I asked our favorite veggie vendor for cucumbers. He said "pickling or regular?" A taste memory went off in the primal part of my brain and I kept thinking about the NY Sour Dills my grandfather used to make.
"Pickling." I said. "Four pounds."

I went home and looked up his recipe, then looking in my Joy of Pickling book. My copy of my grandfather's recipe seemed like the proportions were off -- they were likely transcribed wrong at some point - so I used the ones from my pickling Bible.

After calling my neighbor/ gardening buddy and establishing that neither of us grew dill this year, we had to make a trip to Whole Foods for the herb.
Materials in hand, my preschooler and I assembled pickles.

Here they are, ready to sit for 2-3 weeks.

Here they are after 3 weeks and after being taste tested. They are delicious!
I have been eating them chopped up in my salads (butter lettuce, spinach, carrots, cucumber, radishes, pine nuts, dried cherries, diced pickles). I have them to a friend to taste and she said the flavor was spot-on but they could use some refrigeration to make them crunchier and to give more of a bite to the initial skin break.
They were also fun to watch change from cucumbers into pickles in the clear glass container we usually use to make Kombucha. They also seem like a food everyone likes and is familiar with, so I can get tehe fermented goodness into my family! I am definitely going to make these again.
Tuesday, September 11, 2012
Cooking with Kids: on the BBQ
My little one had so much fun with this cooking project last week that he made us do it again this week.

We got a whole fish and had the fish monger slit it open and loosen the guts. He didn't remove them because the little guy wanted to see everything, and they are actually quite easy to remove after looking at them, and not as gross as I'd always thought they would be.
We put some lemon and dill this week, and lemon and reosemary last week, and my son wrapped the fish in foil.
Then he wrapped peppers in another packet, and peaches with butter and cinnamon in another, and apples and butter and cinnamon in another, and bananas and cinnamon and butter in another, and eggplant - I had rubbed salt into it and let sit for 15 min then patted it dry- in another foil packet. Last week we also did little potatoes and salt.

We got a whole fish and had the fish monger slit it open and loosen the guts. He didn't remove them because the little guy wanted to see everything, and they are actually quite easy to remove after looking at them, and not as gross as I'd always thought they would be.
We put some lemon and dill this week, and lemon and reosemary last week, and my son wrapped the fish in foil.
Then he wrapped peppers in another packet, and peaches with butter and cinnamon in another, and apples and butter and cinnamon in another, and bananas and cinnamon and butter in another, and eggplant - I had rubbed salt into it and let sit for 15 min then patted it dry- in another foil packet. Last week we also did little potatoes and salt.

We put the BBQ on high with the lid closed for 10 minutes to heat up. Then I loaded it up with foil packets. I cooked them for 10 minutes per side, then opened them up.
We ate them right out of the foil, except the peppers, whose skins we peeled off then I sliced them.
Yum!
Monday, September 10, 2012
DIY Halloween Costumes
It's hard to believe it's time to start thinking about Halloween. But back-to-school is here and Halloween is close on its heels.

As an avid home sewer for my children, I always find the idea of making them an intricate Halloween costume hard to swallow. It can be a lot of effort, and they only wear it once or twice. Plus you can find nice costumes at consignment stores for $5 or $10. You can't even buy the fabric for that, let alone the time you would spend! Although now that they are getting older, the holiday will be more memorable, so I am feeling ready to make the big kid something to remember-- if he wants it.


So where should I look for ideas?
There is always the blogosphere. A search for "DIY Halloween Costumes" or "Kid Costume Tutorial" shows a ton of ideas for one kid or the whole family. Everything from a dragon tail to a Dr. Suess family has been written about. My favorites are the add-ons like the hats and tails. That way, your kid won't be too hot or cold, especially since the weather here is so variable then... and mostly hot. One year, we put our son in a Raiders Jersey and went to a party and it was so hot he couldn't even keep that on (That idea, by the way, was inspired by a trip to Target and trying to only purchase something we would use again).
Another option is going to a local fabric store. JoAnn's has a number of options. You can sit and look through pattern books and choose a pattern, then buy the material and sew something up. They also sell ready-made costumes there (how opportunistic- for those who are inspired then decide not to do it).
You could also look through your child's books for a character, or choose an animal or object they like, and go from there. I tend to shy away from the sexualization (the skimpy dresses for the girls and the swords for the boys) of the holiday, especially for the little ones, and gravitate towards the animals and objects like balls, fruits and vegetables.
You could also look to found objects and used items for inspiration and draw an idea from what you have around. A kid could be a package being delivered from UPS and all you'd need to do was take a package and put arm and head holes in it and duct tape it over the shoulders. You could take balloons and strap them to the child to be a bunch of grapes. They could also be an Olympian and just put on their favorite ballet leotard or a bathing suit and you could make a medal from ribbon and a circle of cardboard with glitter.
For the littlest ones, though, especially without siblings to dress with a theme with, there are such cute non-mobile baby costumes. Who can resist a tiny baby as a pumpkin? Or in a pumpkin? I saw a woman with a newborn one year dressed in brown with leaves in her hair (a tree) and her baby in a Moby carrier with her baby in an owl cap. So cute.

Whatever you end up deciding to do for Halloween, it is fun to participate somehow
Pin It
Tuesday, September 4, 2012
How to do a Mei Tai Hip Carry
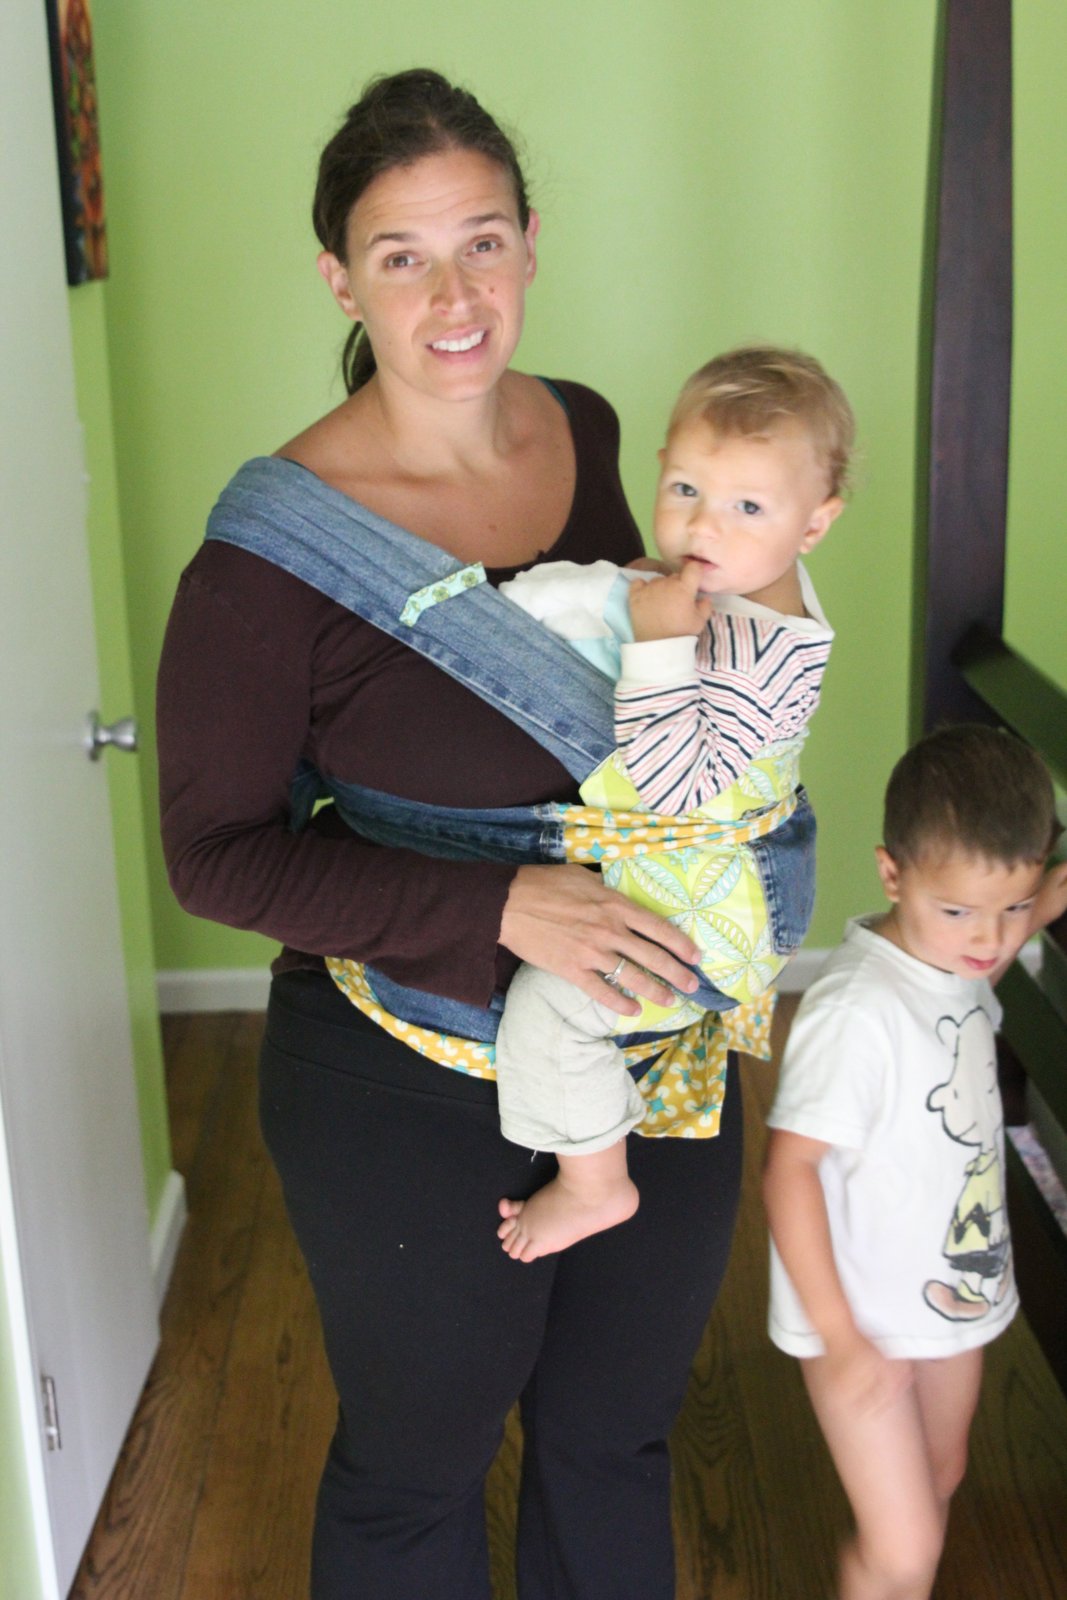
The Mei Tai carrier can quite easily be used as a hip carrier (in addition to it being great at back and front carries). My guess is that this works best after baby gets substantial head control-- maybe around 5 months or so. The model in these photos is 15 months old.

To do this, first tie the waist. Bring the carrier front to the hip and hold the child there (through the carrier).
Then pull one top strap over the shoulder and the other around the body (at the top of your ribs). Cross behind baby's back and tie these, either behind your back or behind baby.

You should feel the weight just lift off, and you will have quite a bit of mobility as well.
Monday, September 3, 2012

Subscribe to:
Posts (Atom)
LinkWithin
