Showing posts with label Tutorial. Show all posts

Monday, April 27, 2015

DIY Kids' Work Bench - Woodworking

We needed a workbench for the kids that was at their height and sturdy and actually made for working.  Check out this article on the power of the woodworking bench for little kids.

We actually put this bench together a few years ago out of some scraps of pressure treated wood on top and on the sides but then last summer added the cross supports on the bottom (front and back) and painted it.  The cross supports make the legs much more sturdy.


The kids use this bench for hammering nails into and drilling screws in and out of. They spend countless hours hammering in and pulling out, and drilling in and drilling out.

 The bench usually also has a clamp-on vice at one end so the kids can make things with other pieces of wood.  That cooler, surprisingly, gets a lot of action by the kids so it has stayed there as well.

Here is a good large DIY workbench tutorial from Ana White you can make smaller if you'd like something more specific.  Her stuff is great.

v Pin It

Sunday, April 26, 2015

Simple Twenty Minute Tote with Exterior Pocket Tutorial

These are so quick, and they are quicker still if you choose not to include the exterior pocket.


First, choose a piece of fabric to fold in half as the main body fabric and cut it to square it up (actually it is a rectangle, but you need to make the corners square).  Then choose a pocket size and fabric, and cut the pocket and the straps.  The straps will be about 14" by 2".  Check your length by imagining holding the bag.

Press the edges of the pocket under on all four sides.  Stitch the top hem.  Pin it to one side of your main tote piece.  Stitch it around the three unsewn sides.

Now fold up your bag and stitch the two sides together.  Press the top hem under and stitch it.


To make the straps, which are 1" wide,  press them inwards with the edges hidden inside.  Then  stitch up and down both sides.  Next, pin and attach the straps to the bag using a box stitch in four places. Make sure the attachments across from each other are actually directly across from each other.


Pin It

Wednesday, June 4, 2014

Tutorial: DIY Upcycling old Shelves into Boxes to Cover Irrigation Valves (DIY Valve Cover Box)

We have been talking about making/ buying boxes for a long time for the front and back of the house where the irrigation valves are.  We wanted boxes to protect the valves from the sun in the summer breaking down the plastic, and from the cold in the winter, making them burst.

Granted, this winter we are coming out of was colder than most, but it did cause us to wrap the pipes after repairing the front valves, then replacing one of them for suspected minor freeze damage which was revealed when we recently turned them back on.  I also thought it would look nicer/ tidier to hide the valves.

Rear Irrigation Valves - BEFORE
Front Irrigation valves- BEFORE
Rear Irrigation Valves - AFTER
Front Irrigation Valves - AFTER

So-- the boys and I got to work.  We measured the areas, and found some old boards in the scrap pile.  These particular boards came from the garage cabinets we recently pulled out (and gave away on craigslist- did I mention how much I love craigslist?).  We kept them, thinking they would come in handy.

We started with the rear irrigation area.  Here are the measurements and my crude drawing and building plan.  I did it in pencil on one of the boards.  This cut list is missing my posts- I wanted 4 which were 24" tall (I used new 2x4s leftover from the greenhouse project).
The next step was to measure and label the boards.


 Then I cut them with the circular saw and gave them to my elder assistant to assemble.  We used 2" screws.


We did the spacing between the boards using a board as a spacer, then removing it.


We measured it against the valves before adding the back two posts (carried it there and back).


The littler helper had to make his own box out of scraps.


 Then we moved on to the front irrigation area.  We measured, I drew the box and made a cut list, then got to measuring and cutting from our scrap pile.


I did the cuts, and we assembled the box.  


You will notice both boxes have the top piece that isn't as wide as the entire box.  The scraps fell this way, and I opted not to make a thin strip on either box.  They are easier to carry this way, and having it not all the way flush with the wall doesn't interfere with the sun-blocking capabilities.  If you run into the same issue, it's your call (obviously).  I thought it was insignificant.  


Another thing you will notice is that the 2x4 posts take up room on the inside of the box.  This only mattered to us on the front box, where there is a pressure reducing valve poking out slightly to the right below the spigot.  I opted not to put in the fourth post for this reason-- I wanted more clearance for that valve.  To check for this, I measured each box against the actual space with only the front posts attached.  After it fit and I had a feel for the space, I attached the back posts (or not).  The advantage of the back posts is that they help keep the side panels flush-- especially when using upcycled wood, as we were.


 Then we primed the boxes.


Then we painted them.


Then we painted them again.


Then we turned them over and primed them and painted them again.  I wanted to make sure the wood that would be on the mulch would be protected from rotting, especially since the area is fairly moist.


Voila! 

 I MAY put a little plant or something on the shelf.  Stay tuned.  The color looks slightly off-- our exterior paint color is slightly off because our house is made of shingles and they were stained, not painted.  I need a few days to get used to them.  The front box also looks slightly askew- I may need to put a brick or something under that right side.

Rear Irrigation Valves - AFTER
Front Irrigation Valves - AFTER

Pin It

Thursday, July 18, 2013

Widening Pant Legs

 
My younger son happens to be obsessed with this fabric.  He only wants to wear the "apples" fabric (he is two).

So I only had enough left in my 'stash to make him a pair of shorts.  I made them.  Then they were too narrow in the legs.  So I made a slit on each leg and sewed in a triangle on each side.

Viola!  Favorites immediately!
Pin It

Saturday, April 13, 2013

Tutorial: Make Robeez Elastic Wider


  1. Clip elastic but make sure that you are holding one side and you have a safety pin attached to the other side do it doesn't get lost in the shoe.
  2. Use a zig zag stitch and connect 2" of thin elastic to both sides of the existing elastic (the ends you cut).
  3. Slide it around inside until the elastic is even again.  Now you can keep your child in the Robeez without marks on their ankles (did you know they size up to age 5?)!
Pin It

Saturday, December 8, 2012

DIY Sunglasses Case

 
This was so easy to make.

It is a rectangle of fabric sewn on three sides.  On the top, I took a toggle which I had already with a rope piece and folded it into the hem.  Then I stitched around it, leaving a rough opening which is hardly visible and through which the toggle moves.  I left it rough because this will likely not be washed.

Super easy and keeps those lenses from getting scratched!
Pin It

Tuesday, October 16, 2012

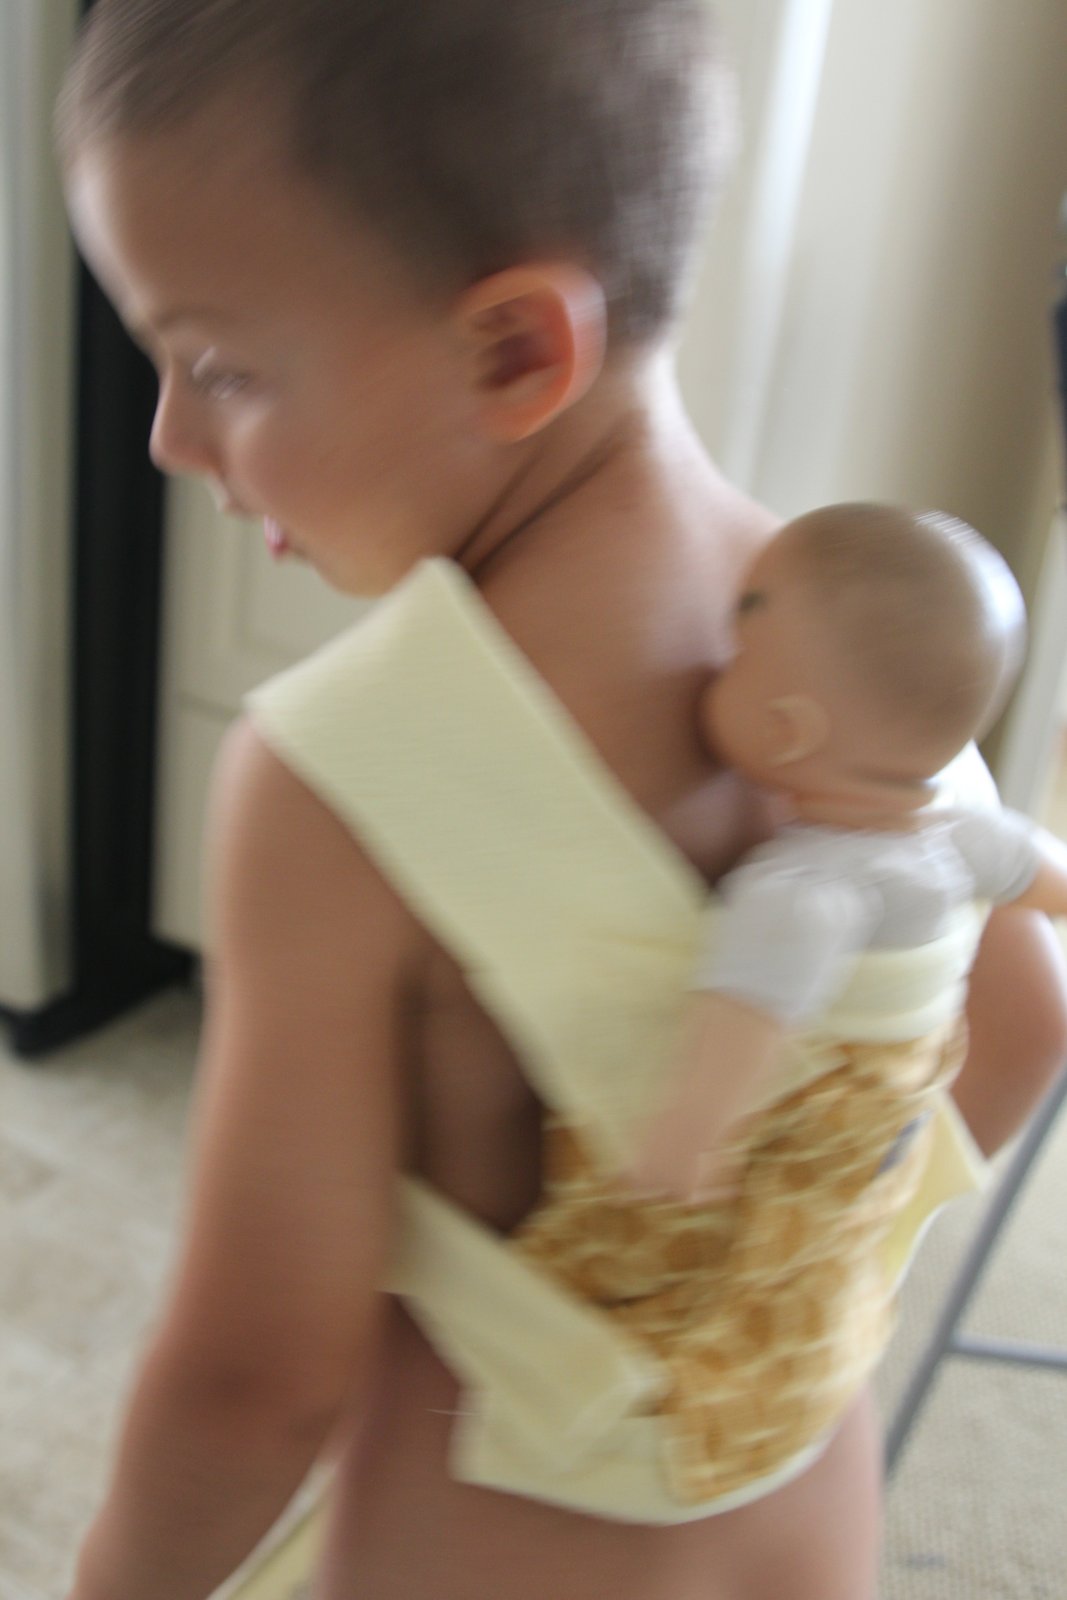
DIY Child's Ergo Baby Doll Carrier Tutorial

 
This was super easy to make and is a front and back baby doll carrier.  It isn't exactly an Ergo, because it doesn't have a waistband and the straps cross.   But the little guy doesn't seem to mind (They sell Ergo doll carriers if yours does!).

To make it, I measured across his body and hemmed that piece of fabric (the yellow fleece on the top and bottom are for decoration only- at the wearer's insistence).  I then added a pocket and label.

Then I cut the strap fabric across the width of the piece I had.  I then held it against his body again with the baby inside.  I pinned the straps on and crossed them behind his back.  Then I stitched them on.  I did a variant of a box stitch, but it would hold with far less.  I didn't hem the straps because fleece doesn't fall apart at the seams.

Then I measured for snaps and added them, making sure to hide additional layers of fabric at the snap locations so they wouldn't pull through when being used.

When I put it on him, he wanted it to also be a back carrier- like my Ergo.  Love it!
 
Posted by Picasa

See this project again here.
v Pin It

Sunday, May 6, 2012

Tutorial: DIY Buttonhole Elastic with Snaps

I needed some buttonhole elastic but the shop in town didn't sell it!  She suggested their snap tape and a light went off.  Ah HA!! I could make my own!

In this example, I made it in two lengths for the two pairs of pants I was making.

First, take FOE (foldover elastic). I bet that ribbon or even bias tape would work.  Hem the ends.
Add one side of the snap to the pants.
Add the other side of the snap to the elastic.  Add another snap (or two) in 1" increments. 
Lace it through.

You could leave it snapped to hold it in place, or stitch the ends of the elastic to the pants if you don't want to lose it ever.

Voila!
Posted by Picasa
Pin It

Thursday, April 12, 2012

Tutorial: Wool Sweater into Kid's Vest and Cap

This is a cashmere sweater I got a Goodwill ages ago.  I used the sleeves as pants a while back.
Below is a description of how it then also became a vest!  And  two caps.
The arms are a bit wide and loose.  To remedy this, I could slide in a bit of elastic (use the bias binding as a casing).  I think I will just leave it, though.
I wanted to keep the existing neckline.  To gauge the width and arms, I laid an existing vest pattern onto the sweater.  You could just as easily use a shirt or vest that fits.
I also wanted to make sure there was room for a cap underneath.
Then I cut the sides based on the "pattern".  Note I kept the neckline intact.
Here it is with both sides cut out.
Then I used a cap as a "pattern" and made sure to add room for the seam allowance.
To bind it, I made bias binding tape out of an old sheet.  I stitched it to the edges of the sleeve and bottom. 
The I tucked it over, widened my stitch length from 2.5 to 3.5, and made sure to catch the bottom edge as I topstitched, thus encasing the binding and vest edges.
Here it is with the edges bound.
Then I stitched up the sides once with a straight stitch and once with a zig-zag/ faux serge.  You could also use a real serge.
I love using a chain stitch and feeding multiple seams in a row without cutting them apart to save time and thread.
I put my label over the existing label.
Here it is!
To make the caps, I stitched the fronts and backs together, then used a zig zag on the edge of the one that  was cut from the rest of the sleeve.  I don't love how it turned out.
 
Posted by Picasa
Pin It

LinkWithin

Related Posts Plugin for WordPress, Blogger...