Showing posts with label Lamorinda. Show all posts

Friday, February 27, 2015

DIY Veggie Boxes & How to Start Your Backyard Garden

Spring! What better time to get started on that backyard veggie plot you've been meaning to do?  It is so fun with kids to plant seeds and veggie starts, and watch them grow, and pick and eat the spoils. 

But where to start?


1. Choose a location

The first thing you need to do when deciding to put in a backyard veggie box is to determine what space you have available.  Veggies do best with as much sun as possible; and, if this isn't possible, full morning sun is better for your box than afternoon sun.  A south-facing spot close to the house is where gardeners often like to put their boxes, since the veggies get extra protection from the house and lots of sun.

Also think about your daily view outside and where you spend your time outside.  There are conflicting theories on where to put your box based on this.  One theory says put it in plain view so you will see it and be inspired to work on it, and the other says to put it out of view so it doesn't look bad on the years you decide not to plant anything.  I am in the camp to put it in plain view and in a place where you spend time outside.  Then you can weed or water as you pass by instead of it being a chore.

Have some garden that could be spruced up?  Think about some perennial edibles as landscaping.  These are fruits and veggies that come back year after year.  A great low option in a full sun area is strawberries.  These send out runners with new plants every year, and kids love picking the ripe fruits.  They give fruit all summer long, and into the fall.  Mid-height are asparagus.  Did you know that these plants will produce every spring for up to 20 years?  A great higher option is blueberries.  We have also had great luck with golden raspberries.  These gems give twice annually.  Artichokes are an unusual-looking perennial that can actually be placed in an area with deer and survive.  Currants are also delicious and deer resistant, and can be part-shade.  Or how about replacing a decorative tree with a fruit tree?  Figs, persimmons, pluots, and plums do great in our area.  Or do you have any blackberry plants back there?  Learn how to trellis and manage the canes to keep them from becoming a nuisance, since they are delicious.

A backyard herb box is another perennial spot that could stand to be close to the back door, if you have sun there.  A bit of fresh rosemary, thyme, sage, and oregano will go a long way in your cooking.  Keep some mint- in a pot- and it makes summer drinks sparkle.  Annual herbs like basil and chives are worth replanting every year (they die with the frost).


2. Determine the Size and Number of Boxes

Make sure you think about how far across you want to reach into the box, and space between your box or boxes.  As a rule of thumb, three feet should be enough so that you can still move between your boxes when they are overloaded with zucchini and tomatoes int he heat of summer.  I also don't like to go wider than four feet across, so we can reach in two feet from each side.  You never want to step on your dirt.  You could keep them at three feet wide for smaller arms.  We used to use old half wine barrels as veggie boxes; they are a great size.

3. Choose your Box Materials and Set it Up

Are you going to buy a kit?  Half wine barrels?  Another reused object?  You don't need to go much deeper than 6", though a foot or more in depth is common.  How about Trex or redwood?  All of these work.  The only real recommendation I have is not to use pressure treated wood, or wood with old lead paint on it, since the area will be kept moist and any chemicals in the wood will get into the soil and your food.

If you are going to build a box, they will cut the wood for you at Home Depot, and show you which screws to use, or which corner brackets.  You don't even really need a bottom; weed cloth under the dirt will do just fine.

4. Choose your Dirt

Ah, dirt. So much to say about dirt.  I read about a mix of a third vermiculite, a third mixed compost, and a third peat moss and am happy with it.  We add compost every year, the the peat moss and vermiculite keep it fluffy.  We also have to turn the soil every year to break up roots.

I have a friend who changes out her soil every year or two, and swears by the mix at Orchard.  Another book I read says to use ages horse manure as your base, and add other types of compost as you add the plants (by "types" and "mixed" for compost here, all I mean is that the source of compost is not all from one thing-- different veggies and foods and manure all mixed in give more nutrients to the soil).  They give away aged manure for free at Sienna Ranch if you want to give that one a try (it's in the back of the parking lot).

Every gardener you ask will give you a different answer about what to use.  They will all agree it is the heart of your veggie garden's success.

5. How are you Going to Water?

You can irrigate.  If you add a veggie system to your existing irrigation, I recommend giving it its own program.  When it is hot, you will want the water to go on daily.  When it's cooler, you can miss a day or two.

Some say to water by hand for this reason.  The thought is also that you will look at the veggies every day as you are watering, and pick weeds, or harvest, or thin seedlings, or whatever else needs to get done.

If you add irrigation, think about if you want to use drip or sprinklers.  The sprinklers can also be bubblers in the middle, or a middle circle sprayer, or half arcs on both sides.  The shape of your box will largely determine the spraying needs of your box.  I get frustrated with sprayers when my chard grows big in front of the sprayer and blocks the water from getting to the plants in back.  I get frustrated with my drip lines when I am planting and need to plant at the exact spot where the water comes out of the drip line.

If you have more than one box, make sure you put easy shut-off valves on each box for your irrigation.  This way, you can easily water some boxes and not others, depending on what you have planted.

6. Seeds or Starts?

The best advice we got our first year gardening was to buy starts.  Yes, they are more expensive.  But they have also sprouted already and you will get the spacing right (there is a tag on them that says how much space to leave between plants and they have already been thinned out) and it is very satisfying to watch them grow.

Seeds do, however, give you more variety.  There are often six or eight types of tomato starts at the store, but twenty types of seeds.  As you get more experience, too, you can save seeds from your best plants in your little microclimate and grow these every year.

When you buy either seeds or starts, think about what you like to eat.  Who cares about your gorgeous tomato plants if they make your face break out in a rash?  Don't like cucumbers?  Plant something else instead.

7. Pest Control

There is nothing sadder than waking up to check on your newly planed box of starts that you and the kids spent all day shopping for, and planting, and having had slugs eat every plant down to the nub overnight.  Okay.  There are many things more sad.  But this is avoidable.  There is a natural product called Sluggo that you sprinkle around and it keeps them away.  Some swear by leaving open beer cans around for the slugs to drown in.

Read about companion planting.  This is the idea that some plants compliment each other and like to be planted together.  The Native American planted corn, beans, and squash together for a reason.  You often see marigolds with tomato plants.

8. Kids in the Garden

My kids love to help in the garden.  They are 3 and 6 now, and point things out to me in other people's gardens.  It is so satisfying to have the neighbor kids come over and pick strawberries, or eat a warm cherry tomato on a hot day.

I like to give my kids real garden jobs, like turning the soil, carrying things, and harvesting.  We try to make them eat everything they pick (to discourage green things being picked-- they are quick to learn when something is ready this way).  I also keep some jobs to myself, like watering (in a drought), and I did most of the pruning when they were young (although they were able to do a lot with scissors instead of shears at a young age).

I have a kids' sized wheelbarrow for them, and little hand tools, and a small shrub rake.  The actual items, but smaller sized, work well for us.  They each have their own real garden gloves (Orchard sells these) and I have three kneeling pads.  In the tool corral at Home Depot, they sell a waist apron made of canvas for under $1 that is nice for holding supplies.  I have found that my kids love dressing for a job nearly as much as they like doing it.

Good luck!

I hope this gets you off to a good start!  Folks at the nursery are incredibly helpful, and it is so satisfying to have your family grow food at home. Pin It

Tuesday, September 30, 2014

The Growing Trend of Home Winemaking in Lamorinda

THIS ARTICLE WAS WRITTEN FOR THE LOCAL MOMS' GROUP NEWSLETTER AND IS SHARED HERE
-----------------------------

Three years ago, Liz Kelly's daughter was born and she joined Muir Mommies.  One of the many benefits of the group was that husband Tom, who had recently been learning more and more about wines and wine culture, met another dad with a shared interest in wine who had been making it himself for several years.  

Time passed, and Tom decided to partner with his new friend on making his next batch, a Syrah.  The barrel is stored in his friend's Walnut Creek Garage, and is almost ready for bottling.

"He has a chemistry background," Kelly said, whose background is in product management and marketing, "which is incredibly useful for serious home wine making, especially during the fermentation.  We can take samples, and send them off, and he knows how to read the results and we can make changes."

Kelly has recently received a wine certification after finishing a 12-week course in San Francisco.  

"The program is set up for people who want to do wine education, and I want to do that: help educate people about world of wine- it is so infinite- there is no way anyone could know everything about it- and that's what is so fascinating," said Kelly, who starting educating himself when they moved to the bay area.  "The class got pretty deep on all wine regions of the world.  They are so different, with different grapes, styles, and processes."

Even with this new education, Kelly emphasized the importance of scientific knowledge in winemaking.

"Unless you go in, studying the science behind it, you are at a disadvantage," he said.  "You test [the wine] -- and things can happen, and if you know how to read the results, it's really helpful."  

When making their wine, Kelly and his friend researched their grapes, and purchased theirs from a vineyard on the Russian River.


At the Russian River vineyard when Tom Kelly's grapes were being picked last fall. 

"We rolled up in my truck, looking for a half a ton of grapes," Kelly said.  "Typically most commercial wineries won't sell grapes to someone that small.  We were one of 15 or 20 ventures buying from them- and everyone gets the same short notice they are picking- and his staff of pickers goes through the field and you can go with them- or wait- while your buckets are filled."

They chose to buy grapes from that specific vineyard on the Russian River because, "it's impossible to make good wine with bad grapes.  Most of the magic happens in the vineyard."


Anne Cole, second from left, at their First Crush.  
Another Moraga resident, Anne Cole, can be found in her air conditioned shed with her barrels of aging wine.  That is, when she is not teaching group fitness at 24 Hour Fitness or with her children or partner David Eikel.  Eikel is also her winemaking partner and, though she lives on a vineyard, they buy grapes.

"I also have a vintner." Cole explained a vintner is a mentor for winemaking.  She said that when she and her ex-husband bought they property, they intended to make wine, and she started learning then. 

But last year was her first year actually making wine, and she bought 1,400 pounds of grapes and has two barrels that are nearly ready to bottle.  She is going to name the Syrah Damn Good Cookie and the Cabernet Sisters of Steel in honor of her girlfriends from her group fitness Bodypump class who helped her with the press and bottling.

"You are the most popular person on the block when you are making wine," Cole said with a laugh.  "The alcohol is already present." 

Additionally, Cole said she loves caring for the grapes, tasting the wine and noticing how it changes in the oak.
Cole and Eikel doing their First Crush.
Her vintner is Christopher Lynch, whom she met because their children are classmates at Bentley.  He explained they use semi-neutral, or slightly aged, oak barrels because they don't want too much of the flavor of the barrel to get into the wine, though it depends on the variety of wine you are making.

"You could [age the wine] in a glass carboy," Lynch said.  This is a five gallon growler style jug with an airlock. "I started with those when I started making wine eight years ago in my basement in Oakland, but moved up in the world to barrels because they let a little air in and a little air out.  This improves the flavor as well."

Lynch's business is helping home winemakers start making wine.  He calls it Temescal Creek and charges a flat fee to mentor you in your winemaking cycle for a year.  This includes the grapes and equipment, as well as his knowledge.  

"And I prefer to be called a Garagiste," Lynch said. "It's the garage winemaking [yeast] movement."  With a French accent, it is a word play on garage-yeast.  Lynch continued,  "We make wine in the garage.  The garage is a good temperature for fermentation, punching the cap, and then pressing the wine.  I store wine in my basement since that temperature is more consistent.  Though you could store it anywhere." 

In addition to being a winemaker, Lynch studies oenology and viticulture at UC Davis.  Lynch recommends a chemistry for winemakers class for any budding winemakers.  The Lamorinda Wine Growers Association is another resource.  Though Lynch's best advice?

"Call me.  I'll do it with you."

In addition to the DIY appeal of making wine at home, Lynch's student Cole says she wants to be able to control what's in the wine.  

"My wine is natural. I don't want chemicals or additives in it," Cole said.  "Producing a natural product is important for me.  For example, there is sediment on the barrel because it's been sitting for a year.  I won't filter the wine- the tannins in the bottom are good for the wine- they are tasty- some people even put them on cheese."

"I am also making a by-product - sugar scrubs - from my wine. It smells like the grapes- not alcohol," said Cole.  "I also want to dry the skins with the seeds and make flour."

Cole said winemaking is fun and that everyone should try it.  Her kids, 9 and 11, help by pressing, helping to top the barrels off, and helping to put nitrogen on top of the wine in the barrels.  They also punched the grapes while fermenting and will soon help with the bottling.


Tom Kelly after they finished pressing the grapes.
Kelly thinks that when his daughter, now 3, is older, she will be able to help by stirring the barrel and pushing down on the grapes. 

"It's a cool experience," said Kelly of winemaking.  "I want to keep doing it."

"Some people paint," said Lynch, who has continued to make his own wines in his basement in addition to his vintner duties.  "This is my art."


As an urban vintner, Christopher Lynch labels his wine by hand.

HOW WINE IS MADE AT HOME (THE STYLE OF WINE WHICH IS AGED IN A BARREL AND MADE AFTER PURCHASING GRAPES)~my summary,with many thanks to Christopher Lynch, Anne Cole, Tom Kelly and ye olde Internet~

  1. Decide on what kind of wine you are making.
  2. Order your grapes in July.
  3. Pick up your grapes between September and November.  The exact timing depends on the vineyard.  As harvest gets closer, the vineyards are measuring the grapes for sugar content and acidity daily.  They will give you one to three days' notice.
  4. Use a crusher/ de-stemmer to take the stems out and split the grapes. *Note: you can rent or purchase all equipment at More Beer! in Concord or Oak Barrel Winecraft in Berkeley.
  5. If you are making a red wine, add the yeast into the bucket, and stir it.  Then punch it down multiple times daily for ten days (it will get bigger like bread when it rises).  This is called fermenting.  Then press it with a wine press. Barrel it for a year or more. Bottle it.  You can taste it or take samples to send away at any point (During fermentation, your samples will help you make changes.  When it is in the barrel, your samples will help you determine when it can be bottled). 
  6. If you are making a white wine, press before fermenting, and then continue otherwise.
  7. There are many ways to make a rose.  One is to let it sit for three to four hours, then press it and continue otherwise (since the color of the wine comes from the skin of the grape).  Another way is to bleed some off of a red a few weeks into its aging and bottle it as a rose then.


Pin It

Wednesday, July 2, 2014

Monthly Garden To-Do List: Year in Review (School Calendar)

September
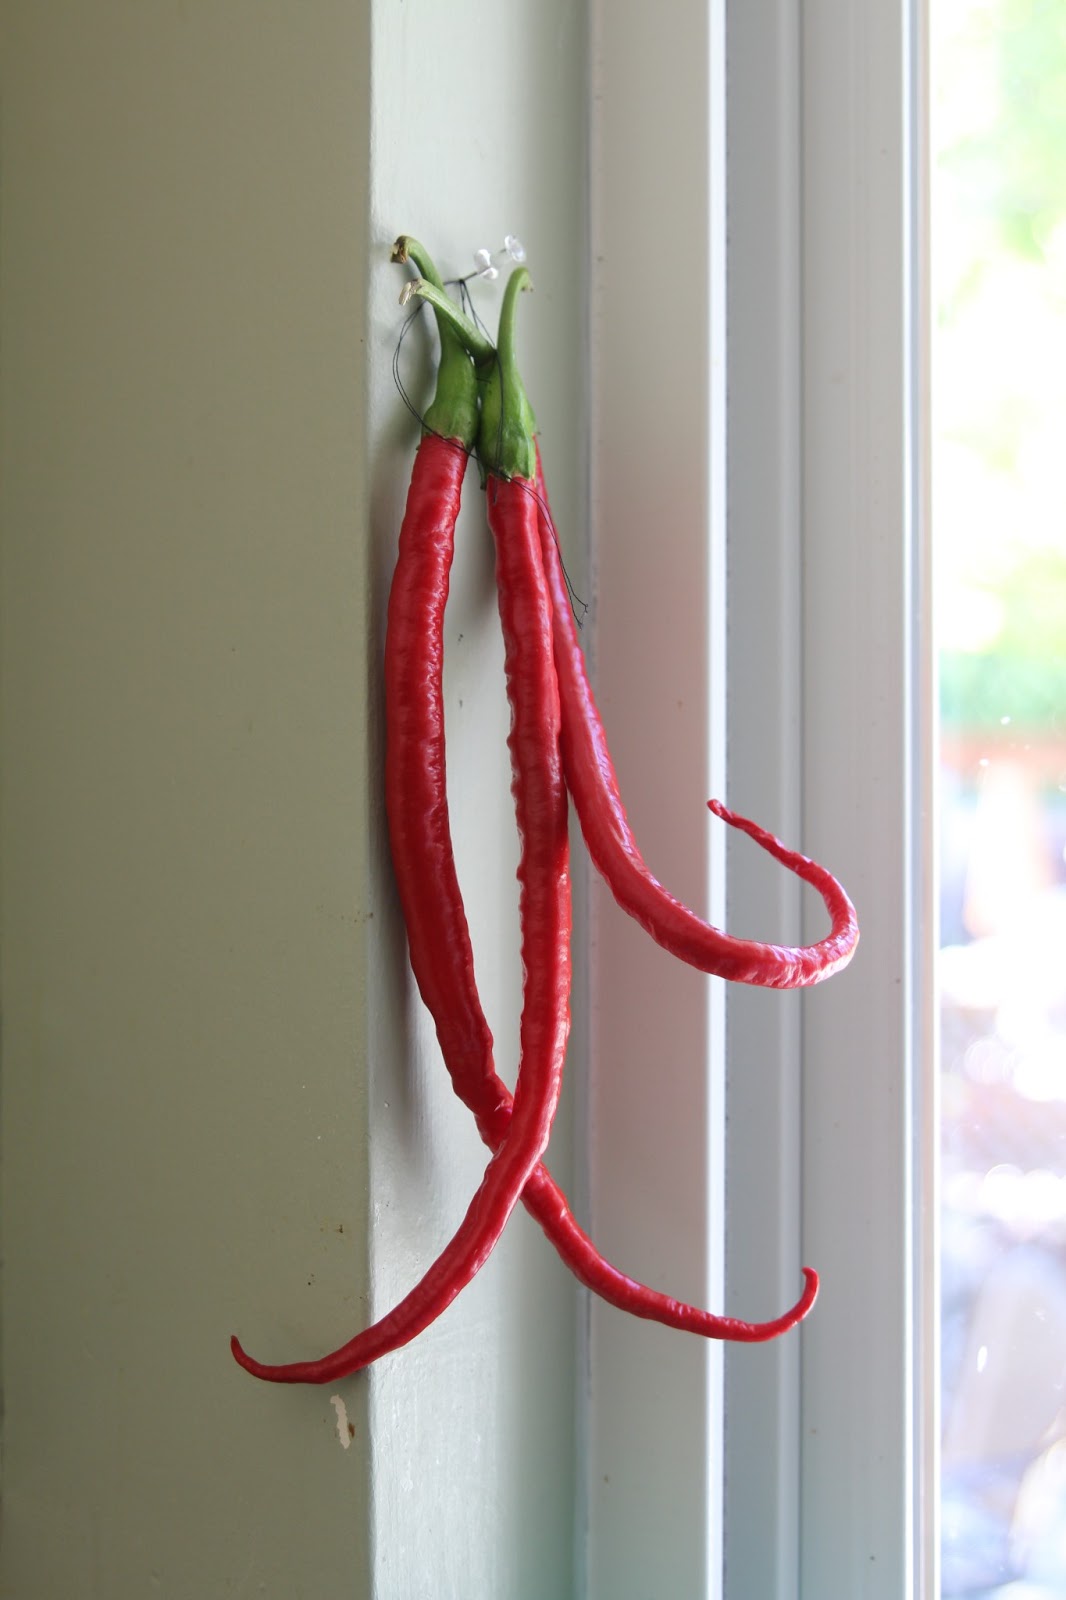
Dry your hot peppers, eat figs and zucchini, prune blackberries, plant lettuce and snap peas and winter veggies, plant garlic, make sure narrow trees are protected from deer.

October
Clean gutters, mulch garden with fallen leaves or start a leaf mold compost bin, eat kale and chard, harvest winter squash (pumpkins!). Prune the raspberries after you eat them all (twice annual task).

November
Eat persimmons, store winter squash, order bare root trees, prepare veggie boxes for winter (plant winter veggies or mulch them), plant bulbs for spring.

December/ January
Make applesauce, sauerkraut, split the strawberries and plant bare root fruit trees.  Pay attention to the nighttime temperatures and cover your citrus and avocado trees with frost blankets or tarps. Turn off your irrigation.

February
Last day of frost: February 18th: take your frost blankets off then.  It's also time to start seedlings inside, and do spring pruning of fruit trees (but take the cuttings inside to enjoy the flowers).

March
Eat green garlic, plant your summer veggies into your boxes (turn the compost then also add some extra), enjoy the magnolias and the flowering bulbs, plant wildflower seeds and poppies before the last rains.


April
Pick (and possibly eat) those dandelions, enjoy the California Poppies, strawberries, and perhaps some wild plums, make your last cabbage sauerkraut of the year. Turn back on the irrigation. Prune the raspberries after you eat them all (twice annual task).

May
Plant sunflowers, pick lavender.

June
Pick then braid garlic, pick little zucchini so the plant keeps producing, start that summer harvesting.  Strawberries!

July/ August
Harvest Time! Eggs, Basil, Tomatoes, Figs, Pluots, Cucumbers (make pickles!).

Pin It

Tuesday, July 1, 2014

Monthly Garden To-Do List: July/Aug


Finally!  Harvest time: Tomatoes, Basil, Cucumbers, and Zucchini!  Try to keep cool out there!

One of our favorite mid-summer meals is steak with a Cal-Prese salad (Tomatoes, Basil, Avocados, and an Olive Oil and Balsamic Vinaigrette).  Nothing beats garden-fresh tomatoes (and having a use for all that basil!).

We also love making our own full-sour dill pickles.  We use the recipe from The Joy of Pickling but there are a ton of recipes out there. 

Our wild plum trees are ready just about this time of year.  There are at least three varieties: deep red, yellow/ green, and red.  We use a cherry pitter to get the pit out, and eat these by the handful.  They also make fabulous jam, sorbet, and torte.

HOT out there!

This was our 3rd year harvest from our Dapple Dandy Pluot tree, the most fruitful in the garden.  For perspective, we planted a dozen trees that same year, and the next most fruitful had 6 fruits.  This bowl shows less than half of what the tree produced that summer.  And they were delicious.

The kids debated the peaches from our Saturn Peach tree's harvest (which didn't "Saturn" but was delicious)-- which was best.  

We have had great luck with alpine strawberries, both in red and alpine (white) varieties.  These don't travel well, but fall off the plant in the garden and are delectable out of hand.

Both pf these buckets are full of August apples- from an early-season tree.  Keep an eye out.  Also look for the sunflowers and their varieties.

Our chickens love the long days and reward us by laying almost daily.  Here is a mid-summer cucumber and zucchini as well.  Make sure to pick both before they get too big.

Figs fruit twice per year- once on old wood in late spring, and once on new wood in late summer.  We like to plant our trees and use live mulch; in this case, we used strawberries on rocks with lavender at the corners.  The strawberries crowd out weeds, and the rocks make a nice landing place for the berries (to keep the slugs at bay).  The lavender helps attract bees for pollinating.


What's Ready?

  • Carrots
  • Chard
  • Corn
  • Cucumber
  • Eggplant
  • Grapes
  • Green Beans
  • Kale
  • Lettuce
  • Melon
  • Nectarine
  • Onion
  • Peach
  • Pepper
  • Plum
  • Pluot
  • Radish
  • Strawberry
  • Summer Squash
  • Tomato
  • Turnip


Pin It

Sunday, June 1, 2014

Monthly Garden To-Do List: June

June is a month of HEAT- typically- though what an atypical year we have has so far regarding the weather...

But in past years, we have harvested our garlic, then braided and stored it for the year...  and June has been a month of harvests-- all of the delicious summer vegetables are starting to get ready- and the month can be spent eating zucchini and cherries (how bad is that?).

If you planted garlic in the fall, harvest it when you see the tips have gone brown. Make sure you dry them before storing them for the year.

With your zucchini plants, pick the little zucchinis as they get finger-long so the plant will make more.

When you pick lettuce, you can cut them at the root (about half an inch above dirt-level) and they may regenerate.

Otherwise, enjoy the fruits of your spring planting labor!


What's Ready?

  • Apricots
  • Apriums
  • Beets
  • Cabbage
  • Carrots
  • Chard
  • Cherries
  • Lettuce
  • Onions
  • Potatoes
  • Radishes
  • Strawberries
  • Summer Squash
  • Turnips
Pin It

Thursday, May 1, 2014

Monthly Garden To-Do List: May


Cherries! Blueberries! Strawberries! Peaches!  The summer fruits are here.
  • It's a nice time to plant sunflowers.  These are annuals, but they do drop their seeds and could naturalize, depending on the variety.  Try a few heights and colors.
  • The lavender is flowering.  Cut a bunch and bring it inside.  Lavender has been known to aid in sleep, and it you can also cook with it.  Put some under your pillow to help you sleep.  Or find a recipe and add some in; there is a nice vanilla lavender cupcake recipe online- look for it.


What's Ready?

  • Apples
  • Arugula
  • Beets
  • Broccoli
  • Cabbage
  • Carrots
  • Chard
  • Cherries
  • Fava Beans
  • Garlic
  • Green Garlic
  • Kale
  • Lettuce
  • Peas
  • Radishes
  • Spinach
  • Strawberries
  • Turnips
Pin It

Tuesday, April 1, 2014

Monthly Garden To-Do List: April

April is already the end of Spring.  Some years, it is hot enough to go swimming outside here, and at least to start the water table and sandbox play in the garden.  The Dutch Irises bloom in the background, but the dandelions are in full bloom as well.  The pill bugs are out of hibernation, so go look under a rock and grab one.

Picking wild plums.
What else is going on in the garden in April?

  • The California Poppies are blooming!
  • Strawberries are here.  We love to pick them in our garden, and go pick them at a big farm just inland.  Mmmm. Harbinger of summer.
  • The wild plums are ready, and all over town.  They ripen at different times, depending on the color.  First are the darkest purple ones, then the red ones, then the yellow/ green ones.  All are delicious raw, or we often pit them with a cherry pitter and either make a compote or bake with them.  We've also had luck with wild plum sorbet.
  • It's still a good time to ferment cabbage in the kitchen~ making your own sauerkraut is not only delicious, but a nice way to get your hands "dirty."  There is so much variety of recipes from around the world- check out plain sauerkraut, or Latin American Cordito, or Korean Kim Chee- they are all delicious and high in probiotics.
  • It's also a good month to feed the birds.  Try making a feeder from a pine cone with unsalted peanut butter slathered on it, then rolled into wild bird seed.  You may get birds ~ or maybe just squirrels.
Pin It

Saturday, March 1, 2014

Monthly Garden To-Do List: March


Have you ever tried green garlic? It is garlic, picked early- before the bulb starts to differentiate into cloves.  You cook with it like you do with green onions or leeks, and it is so fresh and mild and delicious, that it is worth scouring the Farmer's Markets for bunches of it in February, March, and April.
Speaking of March, it's SPRING!  Finally!  Hey, time to get naked and plant the veggie boxes.


Don't forget your rain boots.  Just in case.


But really, grab your unpaid labor force, and it's time to add compost to that veggie box, turn it, and plant those seedlings (or seeds- depends on which you prefer).  Personally, we go back and forth depending on the year.  I usually end up not "thinning" enough when I use seeds, so my boxes look better when I use starts.  But gardening is much more expensive that way.  Don't forget to leave the seedlings outside for a day near where they will be planted before transplanting them.  This will reduce shock.

What else is going on in March in the Garden?

  • The magnolias are in bloom.  These bright pink blooms adorn the trees before their leaves, and are striking against the skies this time of year.  They are short-lived, so enjoy.
  • The spring bulbs are flowering- enjoy those as well.  Your blueberries will also be putting their flowers out, and the figs will sprout leaves, as will the other deciduous trees.
  • Sprinkle some wildflower seeds before the last rains.  How about some California Poppies?  They are deer-resistant, drought-tolerant, and beautiful.  They also naturalize.
  • You could also plant poppies.  I knew a woman who threw a bunch of poppy seeds into her yard before the last rains, and had a glorious spring garden.


Pin It

Tuesday, February 18, 2014

Biking with Kids in Lamorinda


With Kids Learning/ on their Own Bikes/ Trikes/ Scooters

My kids love going up and down our street.

  1. Your own street! You can even get one of those  "Slow Down" Signs if that makes you feel better, or if your street is busy.  
  2. The trail.  It has so many good sections, and runs from Lafayette to Moraga.  
  3. The stretch of trail from Olympic in Lafayette to Foye/ 4th Street is flat and full of shade, and there is a little shady park on Moraga at 4th for a break (and there is talk of putting a play structure there, too... please email the City of Lafayette Parks Director Jennifer Russell at JRussell@ci.lafayette.ca.us if you want to encourage this project!).  
  4. Speaking of the trail, there is a house with chickens in the back (and a chain link fence so you can see them) just west of Hawthorn on the trail where there are always toddlers gathering.  The owner even put a bench on the trail side of the fence, and can be found there chatting to passerby regularly.
  5. Did I mention the trail?  Just over the bridge from Stanley Middle School in Lafayette is an EBMUD set of buildings which are nice to climb on.  And a few steps further, before the big hill down, are some little dirt paths kids like climbing around on.
  6. Another good stretch of trail is from Stanley towards Moraga.  This is full of short flat straight sections with stop signs and not busy streets.  The little ones can race from stop sign to stop sign and always be within eyesight.
  7. Lafayette Elementary School is open to the public whenever school is not in session.  Their playground is flat and paved and huge.  There is an older kids' section and a younger kids' section.  You could use this as a place to bring your kids' bikes so they can learn to ride or play around.  Look around at the elementary schools in your area- my guess is that they are all similar in this regard.
With Kids in Tow

We like to bike all around the area, though we do seek out flat areas, especially as the kids are getting bigger and heavier and not yet on their own bikes all the time.  

Our bike set-up has gone from this (baby seat on bike rack):
to this (trail a bike with one kid):
to this (one kid on bike seat, other in trailer):
to this (Cargo bike for both kids on top):
to this (Cargo bike for both kids on top and their bikes aboard so they can hop on and off and ride alongside as desired):


Tips and Tricks:
  1. Choose the time of day and realize that if it is naptime your kid may fall asleep.  Just like in the car, you will need to determine if you can transfer the sleeping child or if you will need to keep riding or s/he will wake up.  
  2. I found an awesome double kickstand from Xtracycle so the bike is extremely sturdy when I am not holding it.  This is great for loading and unloading squirmy cargo and for if the kid/s fall asleep and will stay asleep on a parked bike but not stay asleep if you try and move them.
  3. Try finding a bag or pannier that will work with your bike and kid set-up so you can use the bike for errands (and for carrying a snack/ diaper bag-type gear).  We found a front handlebar bag to be great with a baby seat.  We used the trailer's trunk area with the trailer, and the cargo bike has bags that go below the seats.
  4. Keep their feet tucked away from your legs.  If their feet touch your leg every stroke, it is uncomfortable (if not unsafe).  
  5. Use a flag when the kids are in the trailer or trail-a-bike.  Motorists aren't expecting a long bike, so the flag helps keep everyone safe.
  6. Find warm gear for the kid/s for the bike.  You are working up there and stay a bit warmer in the winter, but they will need an extra layer in back.  My kids like fleece balaclavas under their helmets.
  7. In the summer, don't forget sunscreen!
  8. The trail goes so many useful places.  Google Maps has a bike icon you can click on to give you biking directions to places and makes use of the trail.  It takes longer but the isolation from cars is really nice.
  9. Map your route in advance.  Pay attention so you don't need to check your phone when you are traveling.
  10. On the weekends, the trail is PACKED.  If you actually want to get somewhere quickly, try another route.  Otherwise you will be constantly ringing your bell.  Though this could be a good job for the kids in back if I would get them their own bells back there.
  11. Consider biking instead of the car. It is often just as quick, or only a few extra minutes, especially once you and the kids have a routine established.
  12. When the kids are little, find a way for them to have a lovey (or similar object) accessible.
  13. When they are older, it is surprisingly easy to drag a kids' bike behind an adult bike.  Doing this lets the kid hop on and off your bike and his bike as he gets tired (aka meltdown avoidance).  
  14. Don't forget to bring a lock (and an extra cable if you have kids' bikes or a trailer with you).  Then you can stop if you want to explore somewhere.
  15. My kids like to hop off and walk sometimes and I can walk the bike.  I love giving them the exercise and getting them used to moving their bodies in a useful way (in addition to the fresh air!).
  16. LAYERS.  This is a bit of an obvious one for California, but sometimes a bike excursion takes a while (especially if you let it turn into an adventure), so it's always nice to keep the kids comfortable.
  17. Always keep a bike light on hand.  This is in case it gets dark when you are out.
  18. Likewise, I always keep a minimal first aid kit and baby carrier on my bike (a pouch sling for my toddler- I have had it in there since he was a baby- just in case we get stranded and need to walk home).  I also keep an allen wrench, tissues, and a packet of almonds.

My little one likes to fall asleep when we bike to pick up his brother from school.  Yes, that's a pillow in his lap.

Pin It

Saturday, February 1, 2014

Monthly Garden To-Do List: February

It's February in the Lamorinda Garden.  This is a time when it is still cool enough for the winter veggies and warm enough to plant seedlings.  Plus, it's still raining and the turkeys are still strutting around.  Those first blossoms of spring come this month with the plums, crocuses, and some daffodils.  Keep a lookout for the first asparagus as well.

What to do this month?

  • Start those summer veggie seedlings.  You can do it inside or out-- look on the back of the seedling packets for which to start in seed trays and which to start in the ground.
  • The last day of frost is February 18th in our area.  Remember that date for when you can take off your frost blankets for the year, and when planning which crops can go into your boxes and when.
  • Keep picking your winter veggies- those cabbages, kale, spinach, and the like are still delicious.
  • Look for some plum buds on the wild plum trees around-- when you do your pruning, take some inside and put them in a vase.  Wait a week or so, and they make a glorious arrangement.  
  • Do your spring pruning - your stone fruit could use a trim, I'd guess.
  • Enjoy those bulbs you planted in the fall.
  • Keep dry!  Your garden is loving the moisture from the rains; make sure to keep your irrigation system off for the winter.

We like to protect the seeds we start outside with an old screen.  The birds love seeds!

Don't forget to water seedlings inside.  You can get a special tray where they soak water from below so you won't disturb their baby root systems.

Pin It

Sunday, December 1, 2013

Monthly Garden To-Do List: December/January

We have a short frost season here and it is upon us.  Now is the time to keep an ear out for when it is due to frost and protect your citrus and avocado trees, especially the smaller ones.  You can also turn off your irrigation, and plant those new bare root trees.

What's Ready?
  • apples
  • arugula
  • beets
  • bok choy
  • broccoli
  • cabbage
  • carrots
  • celery
  • leeks
  • lettuce
  • mandarin oranges/ citrus fruits
  • onions
  • spinach
  • sweet potatoes
  • turnips

Kitchen Tasks

  • Make more applesauce, apple butter, and apple crumbles.
  • Use that slow cooker for some hearty soups. Try some new veggies that are ready now, like turnips.
  • Don't forget those cabbages.  They make great soup, meat wrappers, and sauerkraut.  They are high in Vitamin C and fiber, and store well.

That's a lot of sauerkraut fermenting!

Garden Tasks
  • Split your strawberries.  Look at the plants and by now the babies that have shot off should have their own roots growing.  You can let them stay and root where they are, or clip them when their roots are about an inch long and plant them elsewhere.
  • Plant bare root trees!  Plants do better when they are transplanted when they are dormant.
  • Turn off your irrigation - the rains are here!  Turn it back on when a week or 10 days have passed since the last rain.  You are probably safe to have it off from mid-November through March or longer.
  • Keep an ear out for when it is due to frost and cover your citrus and avocado trees.  Bouganvellia also needs to be covered, as do smaller birds of paradise and other various plants (you should find out which of your plants are not frost-tolerant).  There is special frost cloth that allows sun in and raises the temperature a few degrees inside so the plants are less likely to die on those really cold nights.
  • Don't forget to take the basil inside if you want it to be a perennial; if not, it will die after the first frost.  

Happy Holidays and Happy New Year!
Pin It

Friday, November 1, 2013

Monthly Garden To-Do List: November


November is a time to be grateful and it is also the month when Americans have our harvest festival of Thanksgiving.  Traditional Thanksgiving foods come right from the garden and are placed in the horn of plenty in the center of the table and fallen leaves adorn the house.  

What I love about Lamorinda this time of year are the turkeys that flock along my street every morning, the males strutting their feathers and the females pecking along.  We counted 40 one day! 

You can start to see your breath in the air, and the trees are naked-- except the glorious persimmon tree with its ripe fruit beckoning bright orange on bare branches.


What's ready?

  • apples
  • arugula
  • beets
  • bok choy
  • cabbage
  • carrots
  • celery
  • gourds
  • green beans
  • kale
  • leeks
  • lettuce
  • onions
  • peppers
  • persimmons
  • pomegranates
  • radishes
  • spinach
  • sweet potatoes
  • tomatillos
  • turnips
  • winter squashes (pumpkins, butternut squash)


Kitchen Tasks

  • Store your squashes in a big bowl- you can keep them until you need to dust them (about 4-6 weeks or longer).  Play with some butternut squash soup recipes, or make a Thai curry with chunks of pumpkin in the sauce.  
  • Keep those persimmons and love them up!  The pointy ones are astringent and can make you pucker if you eat them too early.  Wait until they are as soft as a water balloon, then freeze the pulp for later, eat it raw with a spoon, or use it in a bread/ cake/ cookie recipe.  We have also made delicious persimmon sorbet, persimmon fruit leathers, and persimmon mint smoothies.  If you freeze it before all the astringent taste is gone, it will defrost without that tang.  The round ones are for eating like an apple, but also are great sliced thin on salads with pecans, walnuts, and/ or beets.
  • Try beets 101 ways. They are amazing fresh if you haven't had them.  What about: steamed, as the base for muffins/ brownies, roasted, shredded on salad, shredded and mixed with carrots and a vinagarette as a salad?  Don't forget those greens.  They are as delicious as nutritious.
  • Apples are still fabulous- try making applesauce, baked apples, or just eating them plain.  You could also make and store apple butter.  Or, of course, make an apple pie for Thanksgiving.
Kid Jobs
  • Did you know pumpkins and gourds float in water?  Try this with the kids in the bath.


Garden Tasks
  • Order bare root trees (Orchard 20% off if ordered by Dec 1st). 
  • If you aren't doing a winter garden, decide how you want to overwinter your boxes.  Straw hay?  Cover crop?  Nothing?  Alamo Hay and Grain sells bales of hay, but make sure to bring the kids because they also have chicks, ducks, and rabbits year-round and they let the kids play with the chicks.  It's a great outing.  
  • Make sure your winter garden is growing by trimming the kale, and picking your produce when it is ripe.  Don't discount the ability of your summer crops to keep growing-- one year, we had a chard plant grow HUGE over the winter and we ate from it the whole time.  
  • Look at your strawberries. If you haven't cut the babies off the runners yet, check and see which ones have roots forming and cut them and move them to another spot if you'd like.  They do best when the babies' roots are over half an inch long.
  • Plant your bulbs for the spring. Home Depot sells huge bags of daffodils and tulips.  Pay attention to which ripen 1st, 2nd, and 3rd so you can have flowers all spring long.  Daffodils and irises can be planted in deer zones.
Happy Thanksgiving!
Pin It

Tuesday, October 1, 2013

Monthly Garden To-Do List: October

October!  Happy fall!  It is still a bit hot out here in the East Bay but the weather actually cools down by the end of the month to leave us with not knowing if Halloween night will be hot or cold; it could go both ways in the Bay Area.  But the garden is still going strong (last year we still had backyard strawberries in October).  This month is about transitioning from the warm to cool veggies, and getting the house and yard ready for the rains.

This is also great month to find a pumpkin patch (or just a pumpkin somewhere- there are nice ones at the Walnut Creek Farmer's Market, Trader Joe's, and Orchard Nursery to name a few local spots), and read a pumpkin book.  My son loves "The Pumpkin Patch" by Elizabeth King.  She follows a seed into a pumpkin at the market.  We planted our pumpkin seeds in July and have spent a lot of time watching them flower and grow leaves "like big hands," as she says in the book.  We also discuss organic versus conventional farming when she mentions that the seeds are coated to prevent underground insects eating them before they germinate.

What's Ready?
  • apples
  • arugula
  • beets
  • bok choy
  • cabbage
  • carrots
  • celery
  • green beans
  • kale
  • leeks
  • lettuce
  • onions
  • peppers
  • persimmons
  • radishes
  • spinach
  • tomatillos
  • turnips
  • winter squash (pumpkins!)

Kitchen Tasks

  • make apple sauce (bake apples in homemade broth with a stick of cinnamon then mash it up) 
  • make some sauerkraut; experiment with different flavors from around the world with cabbage as the base (Latin American Cordito is our family favorite next to plain)
  • find some good persimmon recipes- or try them raw (the pointy ones need to be soft or try the round ones in salads). My kids go crazy for the pointy ones when they are soft like a custard- they love them with a spoon after I cut the top off.
  • make green enchilada sauce from the tomatillos and freeze a batch of it for mid-winter
Sheet mulching 
Garden Tasks
  • clean the gutters before the leaves get wet and soggy
  • use the fallen leaves as mulch around your plants (mulching your soil keeps weeds out and gives bugs a place to live- plus, it looks more polished).
  • it's also a good month for sheet mulching - it's still warm enough to be outside and it hasn't started raining yet (probably).  Sheet mulching is where you cover an area of the yard with newspaper or cardboard, then compost or manure, then a thick layer of wood chips (local tree companies are happy to drop off free chips).  It will then be transformed with water and time from whatever it was before (weeds, lawn, etc.) into rich fluffy garden soil.  All you need to do is wait about two years.  While it is decomposing, the mulch will attract beneficial insects and spiders to help your soil and garden thrive.
  • keep taking leaves off the kale and chard and they should give all winter long
Happy fall! 


Pin It

Sunday, September 1, 2013

Monthly Garden To-Do List: September


Welcome to Indian Summer in the Lamorinda Garden!  This month, it is usually hot but by the end of September, it can be getting cool.  No freezing temps are expected for the month, but we actually need jackets by the end of the month.  Garden tasks for September tend toward wrapping up summer and getting ready for cooler temps.


What's Ready?

  • Black currants 
  • peppers 
  • zucchinis/ summer squash
  • green beans 
  • figs (second fruiting)
  • pears
  • tomatoes will keep going until the first frost
  • apples
  • basil
  • celery
  • eggplant
  • grapes
  • melons
  • nectarines
  • onions
  • plums
  • pluots
  • winter squash
  • blackberries 


Kitchen Tasks

  • hot peppers can be dried
  • the wild plums should be finished; if not, pick the last of them and make some sorbet or chutney


Garden Tasks

  • prune the blackberries after they are done fruiting- only remove the canes which bore fruit this year
  • keep taking leaves off the kale and it will keep giving 
  • plant those winter veggies~ all the cruciferous veggies like cabbage, broccoli, cauliflower, brussels sprouts, and kale (if you don't have some in already- plus, it is much sweeter in the cold months).  You can use seeds for these if you start early enough in the month.  
  • You could also try for some fall veggies like snap peas and lettuces- if it's not too hot this year.  If it is looking to be very hot, you can still plant them- just do it where there is partial shade (the shade of another veggie in the same box is enough to protect these plants).  I'd do these from starts if you didn't plant them last month.
  • plant the annual garlic - anywhere in the garden, especially under your roses because the deer hate the smell of garlic but love the rose odor- a clove now will be a bulb next summer (you will be able to tell when it is ready when the greens dry up)
  • Make sure your trees in deer zones with narrow trunks (biceps width or smaller) have wrapping of some sort- otherwise the male deer will rub the velvet off their growing antlers on your trunks and rub the bark off
  • fill the hot tub (or empty it, clean it, and re-fill it)
Most of all, enjoy the fruits of your summer labor!  You should be sick of zucchini by now!  You should also still be able to keep enjoying those fresh caprese salads all month and also add back some crisp, fresh apples (ah, the Gravenstein!  Harbinger of fall).  Nights are still warm enough to be out, but maybe in the hot tub or under a heat lamp instead of just with a chilled beer.  The sunsets in September are getting earlier, but are still our best of the year.  


Pin It

LinkWithin

Related Posts Plugin for WordPress, Blogger...