Having pets that give back makes caring for them a lot easier. Except that we intentionally didn't name them, and spend time with our toddler counting eggs instead of chickens. This is because we weren't sure how many of the chicks would make it to maturity, either because they turned out to be roosters instead of hens, and because of the chance that they would become another animal's lunch or dinner.
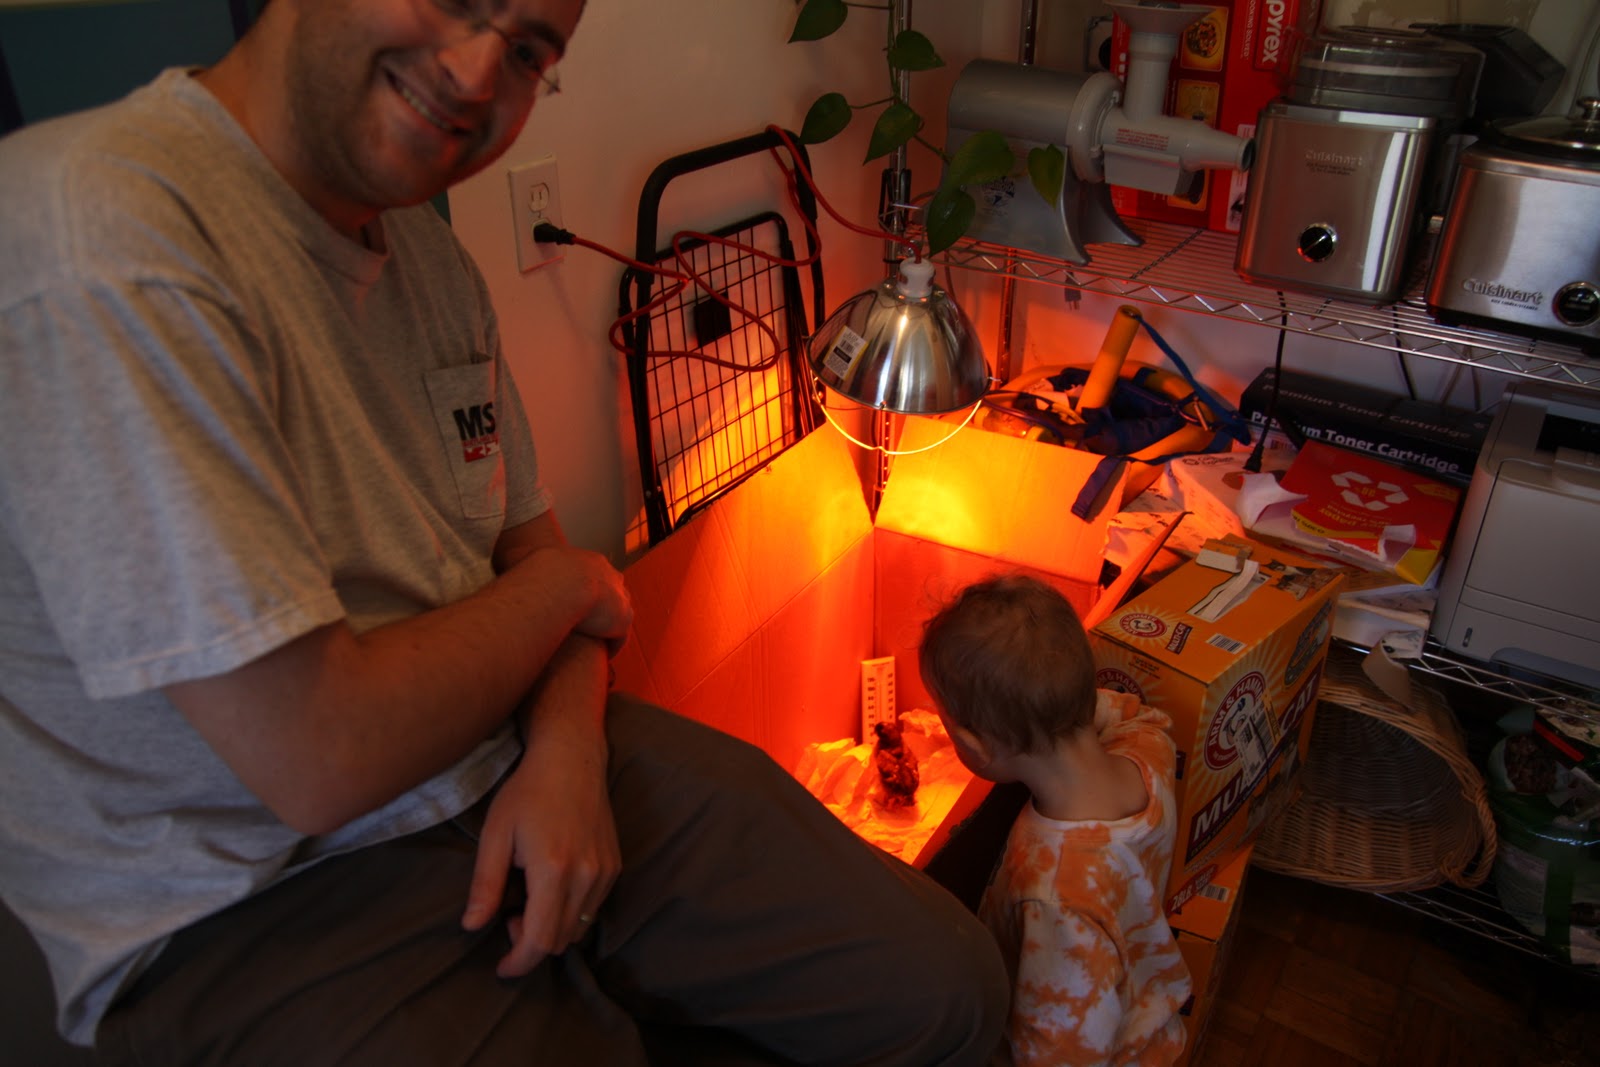
We got six chicks last spring, and raised them in a cardboard box with a
heat light
over it for a few weeks. Then we moved them outside to the coop with the heat light, and only let them out while supervised. We now have five chickens (we lost one to a neighborhood cat when it was about 10 weeks old and we left them unattended in the back yard). We had wanted four, but five is nice because we usually have eggs to give away. And these are tasty, nutritious eggs. The yolks are more orange and they taste richer. We get about four eggs per day. Hens are supposed to slow production through the winter, but that wasn't the case for ours this year. You can trick their body clocks into thinking the days are longer with artificial lighting, but we chose not to do this.
 |
| After the chicks were moved into the coop, but still young enough to use the heat lamp and the chick feeder and waterer. They were just starting to feather out. |
But chickens typically only lay this much for a year or two, so we haven't been faced with the question of what to do with them when their production slows. Chickens can live up to 10 or 12 years if treated properly. Most are only allowed to live for two to three years, and their owners start raising the next batch of chicks about six months before the anticipated slowdown so as not to be without eggs. Some chicken owners "harvest" their hens and make a slow cooked, home grown meal, and others try to find them a good home elsewhere. On many of the commercial operations, hens only live for a year, in small cages with artificial lighting, since their production is highest their first year.

We also give the hens all of our scraps (except avocado, which is bad for bird livers over time), so we feel like we are using our scraps again before they become compost. Another benefit is their poop, which we "harvest" into our compost to age it before feeding it to the veggies. As a result, our veggies grow better with the help of the balanced compost. We like thinking that our lives are a bit more sustainable with the help from our chickens.
Our toddler LOVES feeding and watching the chickens, as do his buddies. Taking care of them is part of our daily routine, and we like to think it is helping to teach him responsibility. He also likes to pet them. Kids of friends of ours with chickens like to hold and carry their chickens around. The more that chicks are handled when they are little, the more they are used to it and grow up more like traditional domesticated pets.

Daily chores include carrying scraps to the hens, checking their nesting boxes for eggs and to make sure they are free of poop, and letting the chickens out of the coop and into the yard for the day. We recently moved (so we have had two chicken set-ups over the course of the year), and our old coop had a run attached. We didn't let them out daily, although we let them out on occasion. As they got bigger, they were let out less frequently as they started to eat our veggies and roost (and poop) on the patio furniture. In the new house, they have a coop and smaller run, but we also fenced off a small portion of the yard so that they can roam more and we can choose to join them or not. I think that chicken interest in vegetation differs by what you have growing in the yard. They can fly up to five or six feet up, and across a bit. We usually check for eggs again mid-day, then in the evening they put themselves to bed in the coop, and we go out after sunset to close the coop door. You could easily skip the mid-day egg check. It is important to clear the eggs out regularly, though, lest the hens get "broody," meaning they will sit on the eggs instead of eating bugs and laying an egg per day.
 |
| This hen is wondering what we are doing in her area. |
Weekly chores include filling their water and food. Monthly, we "harvest" the poop from under the roost bars and make sure the nesting boxes have enough hay in them. Twice per year, we clean the coop more thoroughly. Depending on coop design, some also use an annual scrub-down.
Coop design is essential to living happily with chickens in the yard. We found that all parts of the coop and run must be accessible for cleaning, and tall enough to stand in while cleaning. The roost bars need to be at least a foot away from the nesting boxes, or else the hens will poop in them as they are asleep at night on the roosting bars. The nesting boxes need to have an egg door that is accessible without going into the run or yard (imagine going out in your slippers in the morning to fetch breakfast). The entire thing needs to be predator-proof (who needs a fox slipping into the hen house at night for a meal?).
 |
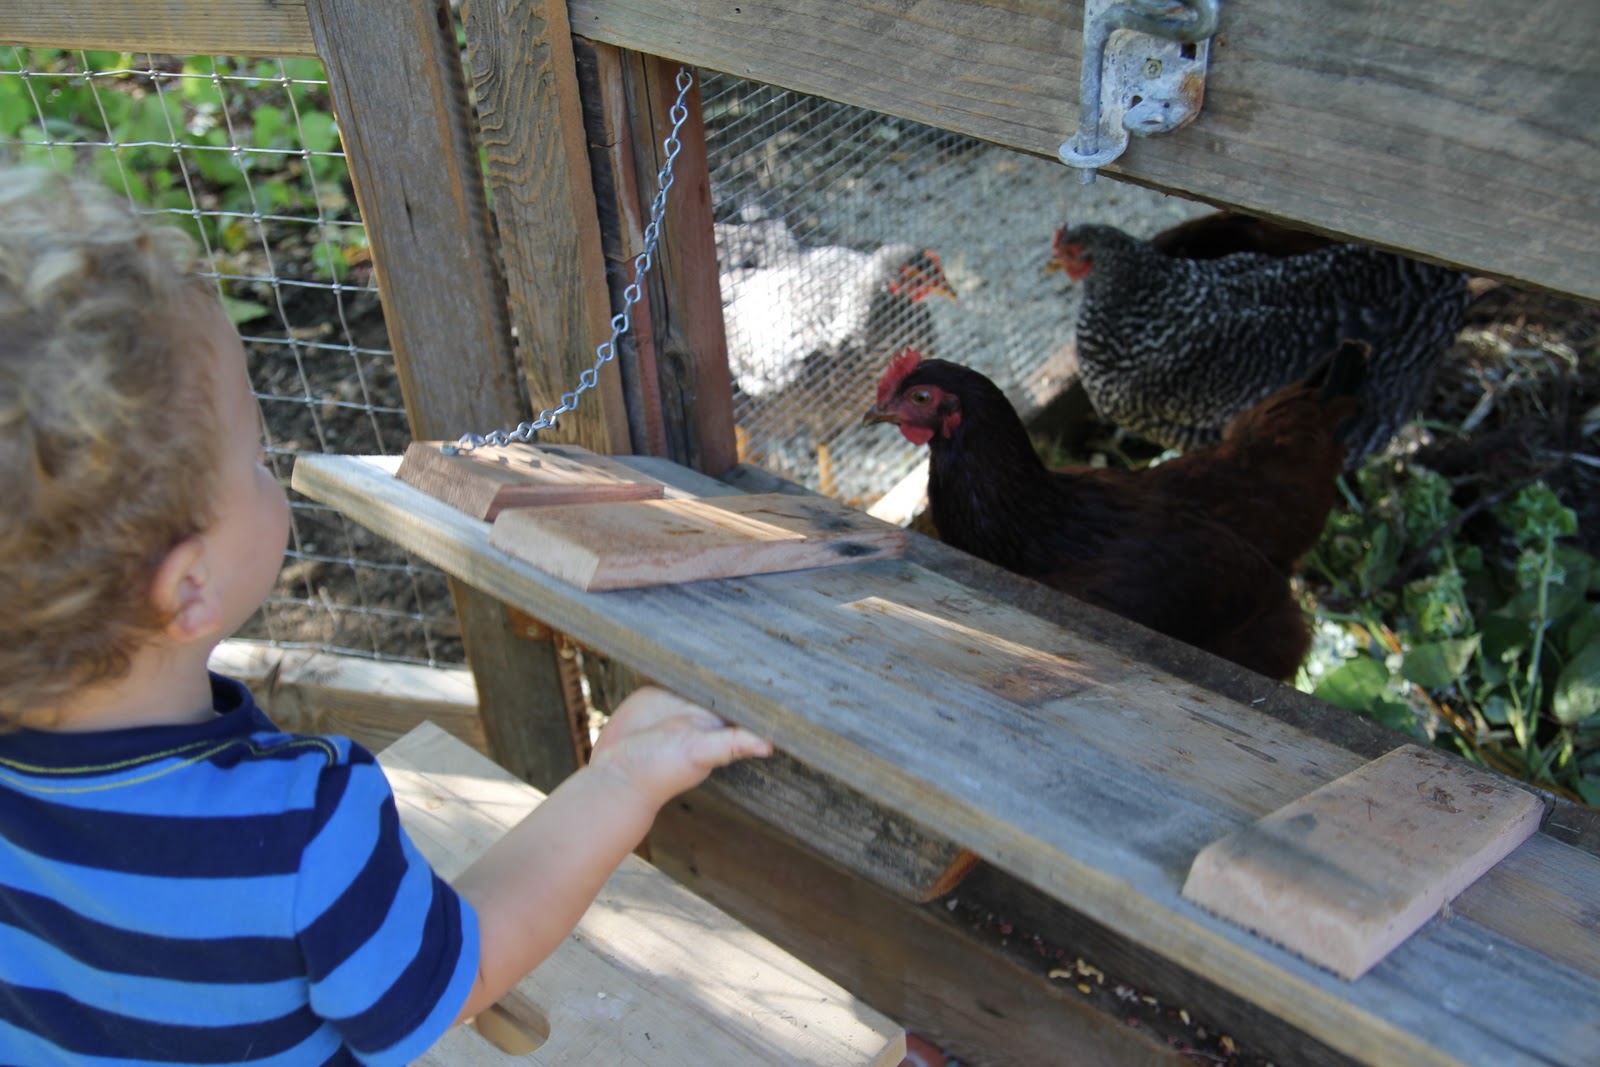
| Looking through the food scrap deposit door, you can see the ramp for the hens to get up into the roosting area. |
The area under the roost bars can be solid or mesh. Our first was solid with wood shavings and our current coop is mesh. Our work load has diminished incredibly with this one change. Having a mesh floor allows the poop to fall through to the ground, so we only need to clean one area instead of two. We also give them scraps just below the roosting area, which means they are turning our compost as they scratch around. It also means that we only need to clean that area semi-annually. We were cleaning the area with the wood shavings weekly to try and keep flies at bay. Another useful addition in our current coop is to have an easy-open door to put our daily scraps into that the chickens don't try and get out of at the same time. The old coop had me constantly keeping them away with one foot while trying to feed them with one hand and to hold the baby with the other hand. Here, I can open a waist-high small door, drop the food in, and be on my way.
 |
| The new coop. The door on the left is the gate to the chicken yard. The little guy is looking into the compost deposit door. The lower door is the clean-out for the compost area. The door to the whole coop and enclosed run are inside the yard area. |
Run size and yard accessibility are also important considerations. If you don't want them in the yard, you may want a larger secure run. If you intend to let them out daily except when you are on vacation, a smaller run would suffice. They just need shelter from the rain and heat. It is also nice the have some pea gravel or similar so that when the ground is soaked, their chicken feet are able to get some relief. There are many pre-fab coops for sale, depending on your needs. The Eglu
 is supposed to be a great starter coop. You could also buy plans online
 or design one yourself. You could also hire a custom coop to be built for you by a company such as My Urban Farm (in the bay area).
 |
| The old chicken coop. Notice the run is too short to get into to clean while standing, and the coop door (on right) opens onto a plywood floor with vinyl and wood mulch. |
When deciding on a chicken breed, size, personality, egg color, and egg-laying frequency are all considerations. Some are also known as heritage breeds, or have a distinct look to them. Bantams are small chickens, and the rest are known as standard. Chickens are also bred to be good layers, good for eating, or dual-purpose.
We chose two each of
Rhode Island Reds,
Barred Rock, and
Aracuna. We chose Rhode Island Red because we wanted heavy layers. They started laying first, and are lay daily and are quite savvy (i.e. they find all the treats we throw to the chickens like slugs and tomatoes first). The Barred Rock were supposedly friendly and lay well, and we found this to be the case. They are the ones who like to follow us around, and want our toddler to pet them. The Aracuna lay different colored eggs-- they are also known as "Easter Eggers." Each hen always lays the same color egg, but each hen of this breed can lay a different color. This is the type of chick we lost one of as a juvenile. The one who remains lays green eggs, and is at the bottom of the pecking order. She seems to be the least savvy of the bunch.
In addition to the ones we chose,
Buff Orpingtons and
Australorps are very popular for people with small children, as they are known to be extremely gentle and reliable layers. Other considerations include if you want your hens to be able to raise their own young, or if you intend to brood successive batches of chicks every few years in a brooding box (the cardboard box with heat lamp that we kept indoors that I mentioned earlier).
 |
| Checking out the new arrivals. |
Brooding chicks is easy, but they lose their cute factor fairly quickly, as they feather out within a few weeks. And they don't start laying for six months. To brood them, all you need is a cardboard box and
heat lamp. We lined the box with a scrap of vinyl flooring to make it easier to clean. We used shredded newspaper to line the box. You could also use wood shavings. We also had a thin dowel across the sides to help them learn to roost. They eat special
chick food
out of a
small feeder 
and drink regular water out of a
small watering dish
. After a week or so, they can have greens and be let out onto the lawn for supervised "field trips." We found them to flock together and go as a group everywhere together, as chickens don't like to be alone, so plan on having a few chickens, not just one. After a few months, you can move them outdoors, and gradually increase their outside and unsupervised time.
 |
| A supervised outing early on. |
Local ordinances vary. In Lafayette, CA, you are allowed "approximately four chickens." According to municipal code, the coop must be located in the rear yard of the principal structure, and be set back not less than 60 feet from the front property line and from any street line and shall be not less than 55 feet from any point on an adjoining parcel of land, at which point the exterior wall of a dwelling unit either exists or could legally be constructed. Fenced pasture or coop shall not be located nearer than ten feet to any property line. The same coop rules extend to Moraga, CA, although variance permits may be granted. In Orinda, CA you may only keep chickens on residential lots of 20,000 feet or greater in size. Coops shall be set back not less than sixty feet from the front property line or any street line, and shall be at least forty feet from any side or rear property line.
Walnut Creek, CA permits chickens in certain areas only. They are allowed in the R-40 District subject to the following conditions, and in the R-8, R-8.5, R-10, R-12, R-15, and R-20 Districts, they are conditionally permitted with the granting of a Minor Use Permit, subject to the following conditions: Land must be at least 40,000 square feet, unless the parcel is immediately adjacent to public open space, and contains at least 20,000 square feet; one animal is allowed for each 20,000 square feet of land; the coop cannot be closer than one hundred feet to any public street nor closer than fifty feet to any interior lot line; no fence or chicken coop shall be located within fifteen feet of any side or rear property line or within one hundred feet of any front property line or be located within fifty feet of any building used for human habitation; and, chickens shall be accessory to the residential use of the property. Permits may be granted to have more animals and waive the distance requirements. They also state that any permit may be revoked if any conditions are not strictly adhered to, or if the keeping of chickens is found to be detrimental to the peaceful enjoyment of property or improvements in the neighborhood.
Before deciding to get chickens, do a little legwork. Are you ready to buy a fly swatter ? Do you have 15 minutes per day, and an hour per month to spend on the task? Check and see if the local ordinances have changed at all, and feel out your neighbors. Hens are quiet, except when they are laying an egg. They sit and "bok bok" until it comes out. Do you want a rooster (you'll need to read much more if you make that decision). How many chickens do you want? Is there a place on your property that would be appropriate for a coop and run? How would you feel about them running around your yard (they don't potty train)? And mostly, are the fresh, nutritious, wholesome eggs worth another few additions to the family?
Resources:
Alamo Hay and Grain: Sells baby chicks for $2.50 and they always have a tub of chicks the kids can play with. They also sell all the necessary supplies, including organic feed, hay for the nesting boxes, and the appropriate feeders and such. Their staff is knowledgeable and will load your car. 3196 Danville Blvd. in Alamo (925) 837-4994
My Urban Farm: Local contractors to help you plan then will build you a coop. Michael and Dana Yares (707) 338-8967 or
michaelyares@myurbanfarm.net
[Note: This article is for the local paper... edited to add some more photos and links]
Pin It

 from his collection and I couldn't resist the temptation to make them into non-waterproof side-snapping training pants. I modeled the pattern after Poquito Pants, which I LOVED using when my son was young. They fit on his hips, and trim, so that he wore them for many months and I didn't feel like they hindered his movement at all. At $18 each, I didn't buy enough of them (by the time I realized how great they were, he was too big for their greatness), and hope my version works as wonderfully as the original.
  to attach the FOE
 , and I used a zig-zag stitch. I left each edge open as she did, then folded them over at the end and zig-zagged across the rough edge to keep it from fraying (she serged here). The original of these had hardly stretched FOE, and I only lightly stretched mine to imitate this. Maybe this is how the real Poquito Pants have such a long life for babies (so many months' of use at a time when babies grow and change a lot).
 . On the back, she attached three sets of two snaps. I recall not using them all when my son was young, and when I spaced mine one inch apart, as I do when making diapers, the area covered by snaps was the same on mine as hers (i.e. hers were spaced more closely than I thought was necessary). So I did two sets on the back, and can go back and add a third row if necessary. I think that my FOE ended up being pulled more tightly than hers, and perhaps the third row of snaps makes up for some of the lack of pulling on hers??? I am curious how this modification will end up working out.


 and FOE (


 and switch them out.
 (aka oilcloth) from her Love line on the inside. I used
  for the exterior pieces. On the inside, I added a key fob using a
  (I attached it just where the flap and body meet). Instead of velcro and magnetic snaps, I used


 on a
on a  ? We put an old magazine in between the layers so the paint wouldn't go through, and it kept us busy for a bit. I think it's cute, too...





 : Invaluable resource for in-depth knowledge about coop design, chicken life cycle, and eggs.
 fron
fron 