Wednesday, February 29, 2012

Book Review: Real Foods for Mother and Baby

I often read a book and find the information useful but contradictory to other things I have read or other of my established viewpoints.  This was not the case with Real Foods for Mother and Baby.  Nina Planck has written a book which covers the essentials of foods for pregnancy, nursing, and introducing foods.  She has also expanded on food a bit, and touches on exercise and parenting.  

She starts by describing what real food is.  Then she discusses traditional and modern fertility foods, then goes on to pregnancy foods, then nursing foods, then foods for baby.  She tries to simplify, and her main message is to eat real food, and make sure and eat meat as well.  She touches on some "hot" topics like drinking while pregnant, and raw milk, and exercise.  She has done her research, and cites her arguments thoroughly.  

Interestingly enough, her research base is very similar research to mine and she has come to similar conclusions. She cites Clapp (the researcher who says to exercise throughout pregnancy, and hard), Dunstan (the researcher who says your preverbal baby has something specific to say and shows you how to hear it), Price (the dentist who researched traditional foods and concludes to avoid white sugar and white flour, and to add cod liver oil and raw butter from cows fed on spring growing grass), Pollan (the writer who coined the term "nutritionism") and others.  

She also says that a pregnant woman is told so many things, and gets worried, which I agree with.  There is too much information out there, and too many choices.  She says that if it is real, eat it.  If not, skip it.  She goes into a bit more detail in the pregnancy section, attempting to steer pregnant ladies towards nutrient-rich foods in the first trimester, calcium-rich foods in the second trimester, and omega-3 (fish) rich foods in the third trimester to parallel the baby's development.  

I agree with most of her points on foods and the like, but disagree that you can't keep your children from eating sugar beyond a year.  I think kids will eat when they are hungry and will eat what they are used to seeing, be it sugar or chopped liver.

Overall, I found this book easy to read but also well researched and cited.  She cites her own experience a bit more than needed in the book, though.  If her sample size was larger than one small child, it would have been more useful to hear about her experiences.  The book was informative but modest. It would be a good addition to any prenatal library.  I will gladly recommend this to pregnant friends.


Pin It

Tuesday, February 28, 2012

Custom Woven Labels for your Homemade Sewing Projects

It took me a while to find nice labels for my sewing projects.  I tried using printed labels, and had them done on a place on Etsy.  I was so disappointed when they started ripping off the edges, and when they faded.

I started looking for woven labels, and finally found a place.  Worldwide Label made me these adorable labels.  They were so easy to work with, and have a ton of fonts and colors.  The labels are sturdy and strong, and I have a zillion of them and didn't spend that much for them.


As far as my size tags, I bought a ton of them in bulk from Celtic Cloths ages ago. They are woven as well.  When we got bigger than XL, I bought a small batch of 2T/ 3T/ 4T to hold me over until I can re-use the XS/ S/ M/ L/ XL again. I got them on Etsy and they are fine. I overpaid for them a bit, so I am not going to recommend them.

But having labels in general is quite satisfying.  Size labels are a must when sewing kids' clothing, especially if you plan on saving your items for future progeny.  Labeling your items with my tag just makes me smile. Pin It

Monday, February 27, 2012

Kids' Activity Idea: Decorating a Box House


This box house we made has turned into a pretty fun ongoing project.  


 In addition to going in and out of it, and hiding things in it, and "plugging" things into its outlets, we keep adding onto it and making more details. 

For example, we had to paint it the other day.  Then we used glue as caulk and stuck decorations onto it.  There are now q-tips on it, and cotton balls and art pom-poms as "Christmas Lights." We even cut a book drop into it.

We have just started making little brother his own house. It is basically the same, but smaller.  

These projects have been pretty fun low-budget entertainment.
Pin It

Sunday, February 26, 2012

Pattern Review: Treasure Pocket Pants from Sewing for Boys

This was my first attempt at the Treasure Pocket Pants from Sewing for Boys, the new book by the Patterns by Figgy's gals.  I was quite impressed that they turned out nicely.  


My only glaring error was with the waistband.  When I flipped the contrast waistband from inside to outside, I didn't make it flush.  As a result, I didn't have space for the double casing.  I also didn't understand where to put a decorative button (one of the options), so I opted against it (I just found a sew along by one of the authors which shows this detail- FYI).  The faux fly is ADORABLE, and the pockets are just the right size for hands or treasures, and in a great location.  The topstitching is such a nice detail as well, as is the contrast facing under the hems.


Having made one of their patterns before (the Dapper Dillinger Trousers), I knew they ran big, so I made these in a size smaller than I would have otherwise.  They fit perfectly (or shall I say: my size 4 kid is in size 2/3 perfectly).  The legs are wide, but not in a bad way.  My son, who chose the fabrics and who chose this pattern to make first when we looked through the book together, absolutely loves them.

Below is my second attempt at the pattern.  These are quite possibly the cutest pants I have ever made (and I have made a LOT of pants- maybe around a hundred pairs by this point).  I got the waistband right this time and man, is it cute.  Photos really don't do justice to these pants.  We went out in this outfit, and multiple strangers (adults and children, actually) commented on how cute they are.

I ran into the same issue with the hem facing on both pairs, with it being a tad too small and having to stretch it to fit.  This would have been fine but for that you then need to flip the pant and do the seam that is an inch up.  On both pairs I neglected to pull the fabric here and got bunching and folding.

I love that the hem for the pocket is hidden, and doesn't scratch my son's leg, nor does he feel it when reaching inside.  However, the width of the two pieces that make this pocket weren't the same for me, so I ended up cutting to even them up (no big deal, just something extra).  I thought using bias tape to make the pocket top was quite clever.

I wanted a serger to finish my seams on these, though I used a zig-zag like I always do.  I just thought these were such cool pants that I didn't want them to look homemade at all.


All in all, these are great.  They took me a little while to make, but I think they will get faster and faster each time.  Tracing the pattern off the book's pattern sheet was annoying compared to the ease of printing and cutting from pdf patterns, and the weight of printer paper compared to tracing paper when actually cutting the fabric was less nice.  I also think the accuracy is better in a pdf than my tracing skills (two chances for error rather than one).  

You are going to see my boys in these for a while.
Photobucket Pin It

Saturday, February 25, 2012

Recipe: Jerusalem Artichokes (aka Sunchokes)

I had forgotten I planted Jerusalem Artichokes, and was a bit annoyed when what I thought were sunflowers took over a part of the veggie box last summer.  They grew big, with tiny tiny sunflowers on top.

Much to my delight, we have started getting the boxes ready for planting again, and discovered a box full of these tubers.  I found a recipe in Nourishing Traditions and got started.

I boiled my sunchokes for 10 minutes.  Then I added the juice of a lemon and boiled for 5 more minutes.  

I was going to do more, but these were so delicious that we stopped there. The kids couldn't stop gnawing on them. They tasted like artichoke hearts.


Pin It

Friday, February 24, 2012

More Baby Legs

This is my second time making Baby Legs myself (here is the first post). I used this tutorial again.  Again, I am really happy with the result.  
Here they are, finished.  I got the ladies' knee-high socks at Target for $2.50 each.


We use them all the time.  The baby sleeps in them at night-- it makes diaper changes easier.  We use them a lot during the day as well~ either under pants or solo, and with a diaper or without.

Posted by Picasa
Pin It

Thursday, February 23, 2012

Organizing Patterns - Binder and Plastic Sheet Covers

When I first started sewing, I would print the pdf patterns I was using and throw them away after each use.  BUT then I found I was printing the same ones over and over- plus, it is hard to keep track of where they are all stored online.

Then I started keeping them.  I kept them in a pile, then I kept them in manila folders by type.  This also got messy, especially since some patterns require more than one sheet of paper.

My solution has been binders with plastic sheet covers and making my own dividers with write-on tabs.
 What I have done is sort the patterns by category; for example, bags, baby patterns, child patterns, and adult patterns.  Each pattern gets its own sheet protector.  If I have the same pattern in more than one size, then each size gets its own protector (most of mine are organized this way- I rarely buy standard non-pdf patterns).

Within the binders, they are organized by type; for example, pants or underwear or diapers.  I have made labels for each of these types using a sharpie on a write-on tab.

I have found this system far better than anything I have come up with previously.  Another idea of an improvement would be to have binders by type (diapers, pants, bags, etc.) then tabs by size (infant, baby, toddler, adult, etc.).
Posted by Picasa
Pin It

Wednesday, February 22, 2012

Garden Planting Primer

With the last frost date of February 18th in our area, it's time to start thinking about the spring and summer gardens.

I go back and forth on if seeds or starts are better to start a garden.  The advantage of starting with seeds is the process.  You can start earlier, and therefore garden longer.  Maybe this is also a disadvantage!  

If you start seeds inside, then you need to transplant the seedlings and possibly subject their roots to shock.  You also need to decide on the best medium to sprout the seeds.  Some gardeners swear by vermiculite, but I have had little success with it for seeds.  I have done better with potting soil.  I think I may try compost and dirt this year, or maybe the same mix that I use in my veggie boxes (a third vermiculite, a third peat moss, and a third compost).  BUT~ if you sprout and grow seeds, then the kids can watch and water and learn the process more intimately... especially if it is cold and rainy outside; I feel like the smell of dirt and the green plants growing triggers something in their brains to calm and balance them (or maybe it is just in mine!).

If you start seeds outside, then they need to be started after the last frost date in your area (February 18th in mine), and protected from the birds.  We use a screen over the whole box to keep the birds out, but this is more difficult when half the box is planted and you only add seeds to another part of the box.  For example, continuous planting vegetables like radishes and carrots are seeded all summer.  You also need to keep an eye on your sprouted seedlings when they are small and "thin" them, meaning that you need to pull some to make sure there is adequate spacing between plants.  If you don't, they will be stunted.  It is a little hard to explain to a toddler why you can pull some seedlings but he can't.

Tending to the seeds at the end of winter.
"Hardening off" the starts we made from seeds - this means they need to spend a few days outside before transplanting them so they get used to the weather.

The advantage of starts is that they are already, well, started.  You go to your local nursery, and they already know what is growing best at that time of year, you give them a few bucks, and you plant these in the ground and water them.  Starts are a sure way to make you feel like a master gardener!  


As long as you stake up the beans and tomatoes and keep the lettuce shaded in the heat of summer, you are sure to succeed with starts.  My best advice for starts is to use your space and money wisely by planting vegetables that have more than one vegetable or harvest.  For example, a huge plant takes a long time to grow something like one head of broccoli or cabbage.  But one zucchini plant gives and gives, as does a tomato plant.  Lettuce can be sliced off and will regrow, and chard can be harvested inwards leaf by leaf and keep growing.  


We do our herbs from starts, and many keep year after year.  The lavender and rosemary can even grow in the front yard, without deer interference.  We grow the garlic in front, too, thinking the smell will help deter the deer.  We keep the thyme, sage, chives, and parsley in back.  We grow the basil like a vegetable, since it doesn't keep perennially and turns black after the first frost.  We grow mint in a separate pot, since it has a tendency to get weedy.  We grow horseradish in the yard for the same reason.  
This is after planting the seedlings in the veggie box.  We ended up marking our boxes into 1' squares as Mel Bartholomew recommends in his book All New Square Foot Gardening.  He recommends this to maximize space, since it will break your area into manageable segments.  He says that after you visually break up the space, then plant your veggies in the box spaced for the 1' square instead of in rows.
Some vegetables make no sense to buy as starts, though. You need to start your root veggies from seed: beets, carrots, radishes, and the like.  You also need to plant potatoes, garlic, and Jerusalem Artichokes from "seeds" (their tubers- just put them in the dirt and they grow).  Melons and squashes are best from seed, though they also do fine from starts.  In their case, it may actually be more economical to use starts since you only need a plant or two, and a packet of seeds may cost the same as one sprouted plant.  The only reason to use a seed over a start in this case is for the increased variety availability in seeds.  Beans, peas, and corn can go either way.  With corn, make sure you plant at least nine plants so they can cross-pollinate.  With beans and peas, make sure you harvest often.  Either way you go, the more you harvest, the more the plant will produce.

This is in the middle of summer.  It is hard to visualize the abundance of the beans, basil, zucchini, and tomatoes when they are tiny tiny seedlings.  Our toddler LOVED picking beans and hunting for zucchini in this box.  The best zucchinis were the ones we'd spot, huge, at the base of the plant, after looking in that same spot daily, wondering why we hadn't seen them there before.
When deciding which plants go where, there is a bit to be said about companion planting.  We've all seen marigolds at the corners of boxes~ this is to deter insects naturally.  There is also something about corn, beans, and squash.  Read Carrots Love Tomatoes by Louise Riotte to learn more.  Rotating which plants go where year after year, and even throughout the season, helps them grow better.  Find out which vegetables belong in the same families and switch which family is in each section of your box at each planting time.  This rests the soil, since each family pulls different minerals from the soil.


You can control all sorts of pests naturally; for example, slugs can be eliminated with an open can of beer-- they crawl right in and drown.


Also think about going UP when you are planning your space.  Vining vegetables like cucumbers, melons, and peas will happily cling and grow UP if you give them something to hold onto and guide them that.  If you are growing tomatoes or tomatillos and don't want to buy tomato cages, then you can use a big stick or bamboo pole and green plant tie tape and tie the main stalk on as it grows upwards.


Compost is something you can think about year-round.  You can never have enough of it in your backyard garden.  We keep a stackable composter in the yard, and put our veggie scraps, chicken droppings, and garden cuttings into it all year long.  We supplement with compost from Home Depot (we blend their regular compost with steer manure to make it more rich and to keep the soil nutrients varied).


Cool weather vegetables are planted in the spring and fall.  These include lettuce, peas, onions, beets, broccoli, cauliflower, chard, kale, bok choi, radishes, spinach, turnips, chives, potatoes, kohlrabi, and cabbage.  These can grow in the hotter weather if your box is shaded, or if they are grown in the shade of larger plants.  Hot weather vegetables include beans, chili peppers, sweet peppers, corn, eggplant, melons, okra, squash, tomato, tomatillo, basil, radishes, chives, parsley, potatoes, pumpkin, and zucchini.  


Some of our edible garden was planted once, and will grow and grow year after year.  These perennial plants include our fruit trees, but also the asparagus (needs a LOT of compost), mint, horseradish, rhubarb, strawberries, artichoke, currants (these can be grown in the deer zone in the front, too), blueberries (needs annual acidic additions like pine shavings or soil sulfur), grapes, and kiwis.


All in all, the garden should be a fun place to be.  Once it becomes a chore, think of what you can do more or less; for example, do you not like watering?  Irrigate.  Do you detest thinning seedlings? Buy starts.  Do you have a glut of corn, and not like to eat it? Find a neighbor, or plant less.  Above all, remember to plant what you and your family like to eat!  Enjoy the process and take notes.  


Pin It

Tuesday, February 21, 2012

Tutorial: Pant Hem Scraps into Baby Hat


These were cut from a pair of stretchy black "yoga" pants when hemming them.  To size the height of my hat, I stuck these on my baby.  One was too short, so I needed both to make a hat.  I figured it would be warmer that way, too.

I layered them on his head, then estimated how much to overlap by pulling the ends together atop his head.  I put the cut edges together, leaving the hemmed sides up and down.

Then I stitched them together using a zig-zag and making sure to catch the edge in the zig-zag.  This overlap will keep it from rolling. 

Next, I turned it inside out and did the same zig-zag from the inside.  I did this to hide the other end and make sure it wouldn't get wrinkled on his head.

These two lines of zig-zag make a really nice design across the hat.


The last step was to hand stitch along the top, with double thickness of thread, spacing them about an inch apart.  Pull this tight.  This creates the top of the hat.  Then knot it a few times, making sure you like how the gathers look on top of the head.

Here it is on my desk.  You can see the design the zig-zag makes along the outside. 

Here it is on a water bottle.  I have been having the baby wear it with the label in front.  It is a nice weight, and cute.
Posted by Picasa
Pin It

Tips for Two: The Baby Doll

When the real baby was very small, the baby doll for the toddler was invaluable.  Friends told us about the baby doll when I was pregnant, and I scoffed, not knowing its real power until we got one as a gift.

For this I am so grateful.

For a few months, everything we did had to be done to the baby doll as well.  It added a lot of time (the toddler needed help to help his baby), but it was time well spent.  With parallel projects, we were at least involved in the same activities.

The power of imitation is amazing.

Notice Daddy in the real Moby in the background and toddler with his baby in his Moby.

The real baby is asleep, swaddled, in a diaper, on a mat.  The  baby doll also needed to be in a few diapers and on a mat to go to sleep.

We needed the baby doll's Moby again- you can see the real baby in Mommy's Moby.


A baby doll's gotta' eat, you know.  His nursing pillow is an airplane pillow with a cover.
Pin It

Monday, February 20, 2012

5 More Sewing Tips

  1. Always use sharp scissors.  Don't use them for anything except fabric.
  2. When you run across a term you don't understand, look it up.  There are so many YouTube videos and blogs out there that are an amazing resource.
  3. Buy a book or two with patterns that look interesting to you.
  4. Fake it with the fabric for a while.  Use old t-shirts and any other old clothing you want to get rid of as a free source of fabric.  You can be fancy and call this "upcycling."
  5. Use "chain stitching" when sewing more than one thing of the same type.  This means that you insert the next piece to sew without taking the previous one out.  After they are all done, you snip them apart.  This saves thread and time.
Pin It

Recipe: DIY Vegetarian Sushi

Posted by Picasa

1 cup leftover (or cooled) rice
1 c cooked and cooled veggies (like green beans)
1/2 cup raw veggies (like radish or carrot), cut into matchsticks
1 T sesame seeds
3 sheets Nori

Lay a sheet of Nori flat.  On one of the short sides, place an inch of rice (half an inch tall and two inches wide). In the middle of the rice, layer your vegetables, making sure they run the length of the rice.

Roll from the rice end by rolling the nori with the rice in it, then wetting the seaweed at the place where it will touch the rest of the seaweed.  You can use your fingers in a bowl of water.  Roll all the way to the end, then wet it again to close.

Using a SHARP knife, slice your roll into inch-long pieces.  Sprinkle sesame seeds on top.  Enjoy!

Pin It

Sunday, February 19, 2012

Tips for Two: Special Time


What better way to remind each of your children how special they are than to spend some one-on-one time with them?  The easiest way for us to do this is to spend time with one when the other is asleep or in preschool.  Other moms swear by the pass-off to dad as soon as he gets home-- then everyone can reconnect before dinner together.  Our house is a bit too hectic for that, but we do like to have one-on-one time.

During that "special time," we usually read books.  Other activities could be gardening or sewing together, or making a crafts project, or cooking, or building a tower, or whatever else that child wants. 

 I find doing this daily calms the child and makes them feel, well, special.
Pin It

Saturday, February 18, 2012

Recipe: Curried Pickled Green Tomatoes

This amazing recipe is from Linda Zeidrich's The Joy of Pickling.
2 1/2 pounds green tomatoes, sliced to 3/16" thick
1 medium onion, thinly sliced
2 T pickling salt
2 c cider vinegar
1 1/2 t curry powder
1 t turmeric
1/2 t dry mustard
1/2 t ground cinnamon
1/2 t ground allspice

Combine green tomatoes and onion in a large bowl or crock.  Add salt and mix gently.  Let stand at room temperature for 8-12 hours.

Drain veggies, rinse, and drain again.

In a large pot, mix vinegar and spices.  Bring to a boil and add veggies.  Bring to a boil again, and reduce the heat.  Simmer gently, stirring occasionally, until they are just heated- about 3 minutes.

Pack into quart mason jars, leaving 1/2" headspace, and close with 2 piece caps.  Process in a hot water bath for 10 minutes with boiling water.

Store cooled jars for at least 3 weeks before eating.  Store in refrigerator after opening.

Pin It

Friday, February 17, 2012

Tips for Two: The Nursing Station

Having a dedicated nursing station makes as big of a difference with #2 as it does with #1.  By nursing station, I mean a place where you usually go to sit to nurse the baby.  You and baby both know that sitting there means milk.  You have whatever you find useful waiting there: your water, phone (ha), book (ha again), lanolin, nursing pads, little cloths for spit-up, a potty if you EC (diapers if you don't), a nursing pillow or other pillows if you use them, a blanket for baby, baby nail clippers, etc. It's your station! It will change as Baby grows, but you get the point.
Having an older child around just means you need extra stuff at your station.  First, you need it to be big enough for the older child/ren to sit and cuddle if they want to.  You need entertainment for them when there, especially at the beginning when you will be spending a LOT of time there.  Some moms swear by having a basket of dedicated toys that are only used there.  We do best when the older child chooses his activity and brings it in.  Sometimes it is enough for him to be in earshot, and other times he wants me to read to him while I nurse (TIP: teach him to turn the pages himself asap).  

As my baby has gotten older, he is actually having trouble nursing when big bro is around.  I am thankful this has coincided with nursing less frequently; regardless, we have gotten better at activities that my older son can do within earshot so the little guy can have his milk and then see Mr. Interesting later.
Pin It

Thursday, February 16, 2012

Toddler Activity: Cleaning the House Together


What you don't see is the baby in the Ergo on my back and totally entertained and happy.  What you do see is the toddler in his special cleaning apron.  Every day he asks if it is Monday and we can clean the house. I am not making this up.  He loves it.  We systematically go through all the chores, and it takes the whole morning.  His jobs include spraying and wiping various surfaces (including being one step ahead of me and spraying the floor, then I mop behind him), emptying the garbage cans, and stripping the beds.  He also likes sweeping sometimes and vacuuming sometimes.
Pin It

Wednesday, February 15, 2012

Rotary Cutters: Not just for Quilters

Quilters typically use rotary cutters because they can make straight lines easily, enabling you to make lots of squares of the same size.  They are used on top of a self-healing mat, which has lines in inches and at angles, thus helping you cut.  If you lay a metal ruler on top, you can use it to keep the edge of the cutter stable and make a straight line.  Another key to using a rotary cutting tool is to make sure the blade is sharp.  If it isn't, then you end up scoring the fabric and need to go back over it with scissors.

This is a great tool when making small items (anything that will fit on the mat).  The tool easily does angles and curves, and is an asset to any seamstress.

Pin It

Tuesday, February 14, 2012

Kids' Tablecloth

The little guy needed a tablecloth. He chose the same fabric as we have on our table, and  we cut it to size and went to work.
The piece of fabric happened to have a little piece cut out of it, so we pieced together a hole filler, and them hemmed it up.  Love it!


Posted by Picasa
Pin It

Monday, February 13, 2012

Pattern Review: The Frou Frou Bag


The Frou Frou Bag was fun to make and just challenging enough that I learned something new without getting too frustrated to quit.

I actually learned two things: 1. how to make an adjustable strap; and 2. how to make ruffles.  While learning how to make ruffles, I learned how to make binding.  I have read about it, but not actually ever made it on the bias properly (not that bad, actually... a bit time consuming, but easy enough).

The directions were clear- although in one place, she said to repeat the steps for the large flap for the small flaps, and I put the snap on the wrong side of the flap (long instead of curved side) because I was doing it from memory instead of scrolling back up.

The tutorial is loaded with photos, too, which makes it easy to follow.

I stopped following as closely when we got to the interior because she only has two pockets on each side.  So I added a zipper on the inside using this tutorial ~ I loathe a bag without an interior zipper pocket for my wallet.  I also added a key fob inside.

She also has you leave a hole in the lining for turning and I didn't put it together this way.  I don't like bags with exposed seams on the inside.  I knew that closing that hole would make an exposed seam.  Instead, I put the interior inside the exterior and pinned them and topstitched around the whole bag, letting the topstitching close the bag.

All in all, this is a good bag.  It was fun to make, has an adjustable strap and plenty of pockets, and it is cute. Pin It

Sunday, February 12, 2012

Bright Bots Training Pants Review

Before I started sewing my own training pants (re-usable cloth Pull-Ups), I bought a few.  I knew I would be doing EC (this was before baby #1 was born), and I read the Diaper Free Baby and she recommended all sorts of items.  Cloth training pants seemed like a good idea, so I went looking.  I looked at the EC Store, and their cheapest ones were Bright Bots Training Pants.  I bought a few in size small and a few in size medium, and got a bit of use of them with both kids.

I liked them because they are cute, thin, and absorbent enough for one pee, and feel slightly damp from the outside but don't leak.  This lets you know Baby is wet and change him right away, but yet not leak pee all over.  What I didn't like was the long rise and slightly tight waist.  This could have just been how they fit on my babies, but I had to stop using them quickly because of the marks left on their waists ~ and both my babies have been on the non-chubby side. I also don't like the crinkly sound the waterproof layer makes.  I think those two items (the tight waist and crinkly noise) don't make up for the perfect thin-ness and absorbency.  Even at the right price point, I don't think they are the best option.

Pin It

Saturday, February 11, 2012

Recipe: Persimmon Mint Spinach Smoothies

We are working our way through the persimmon glut, and are down to just two more 2-cup bags of persimmon puree in the freezer.  Here is how we are going to finish them off.

Persimmon Mint Spinach Smoothie

2 cups frozen or thawed persimmons
1 banana (fresh or frozen)
2 cups homemade bone broth
1 scoop Green Vibrance
2 T flaxseed meal
1 teaspoon chia seeds
1 teaspoon bee pollen
2 Tablespoons rice protein powder
sprig mint
2 T cacao nibs, optional (add a nice crunch)
1 cup fresh spinach or kale

Pin It

Friday, February 10, 2012

Diaper Free Toddler Class Notes

      These are not my notes; this is a collection of information from a local class. I am putting them here because they are very informative and helpful, especially if you have an older child (i.e. "late start EC").


      How to Start (Late start EC/ Early Potty Training):
      Start with a three day weekend and a sense of humor, lots of potties, a potty for your car, plenty of hydrating drinks and snacks, another adult to help you through the process, the ability to be consistent, loose pants for leaving the house, a “sheepie” in the car seat for traveling.
      1. NO UNDERWEAR!! To get to underwear, here is what to do. When you and your parenting partner happen to notice that your child has been successfully independent with the potty for 2-3 weeks, make an “X” on your calendar on that date. Then count forward 3 full calendar months (for instance, if you put an “X” on August 10, count ahead to November 10) and put a “U” on that date. That is the first day you can try putting your child in underwear. Remember! Underwear feels like a diaper to your child. Fully 35% of the calls I take for coaching are from parents whose child is not being reliably dry because of wearing underwear too soon.   
      2. DO NOT ASK your child if she has to go potty. The answer from small children under 5 is “No!” This isn’t because they don’t have to go. This is their way of establishing their independence from you. Their using the potty does not need to be any of your business once they initiate using it on their own reliably. This happens within 3-10 days of the potty training weekend.    
      3. When to TELL your child to go potty: before nap, before bedtime and before leaving the house. How you do it: Say “It’s potty time!” and go into the bathroom with him. YOU have to pee in the potty and wash hands. Young children learn through imitation. It is a very long time (maybe even a year or more) before your child will be able to be told to go potty and not need your support and company to accomplish this task on command. 
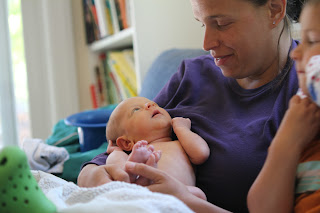
       4. Save night time training for closer to age 3 OR when your child insists that he will not wear a diaper to bed. 
       5. Get the coaching you need to make this work. In the past, one of the reasons parents were able to accomplish potty training sooner is that they had a wide network of support and lots of people to talk to about the process when it was not going so well.   
      6. Refrain from using any but the five words “Pee/poop goes in the potty!” DON'T say “It’s Ok. You’ll do it next time.” Or “Tell mommy when you have to go” or “Remember to go potty!” Little ones are young. They need LESS words and more action to make this work. 
       7. Around the time you get ten “hits” in the potty, your child will begin to initiate using the potty independently. She will still need your close attention and loving support for a few days to a week in order to have the skill fully in place.    
      8. Have fun! A sense of humor is a prerequisite for making this work.   
      9. If your child is one of the 5-15% that can’t get it when you do the weekend, give it a full ten days. If it still doesn’t work in that time frame, go back to using diapers and try again in 6-8 weeks. It always goes easier the second time around.   
      10. The amount of PRE potty training you do in advance will directly relate to the ease with which your child assimilates this new skill. The younger the child, the more time he will need in the pre potty training stage. Here is what to do for pre potty training: * Notice your own body when you pee and poop. What does it feel like? What is pushing out and what is holding in? * Encourage “Potty positive talk” in your home. Become fluent in talking about bodily processes. * Articulate your process in the bathroom in your toddler’s presence. * Dads, sit down to pee in the presence of your toddlers. Show boys how to point the penis down. Even girls will try to pee standing up. * Develop the Potty Dance in your family. * Go potty and wash hands EVERY time before YOU leave the house. * Get excited when your spouse or friends use the potty at your house successfully.

    Why Do it NOW?

      In 2 years of wearing disposable diapers, one child will produce nearly 2 tons of solid waste in the landfill. If a child wears disposables from age 2-3, he will produce an additional half ton of solid waste. It takes approximately 23-26 years for a disposable diaper to biodegrade in the landfill.    
      85% of all 23 month olds in the United States were out of diapers in 1957 and 1971. Today the average U.S. age of getting out of diapers is 39 months.   
      Children who are given the information they need to complete their potty learning process before they are 27 months old have less day time accidents and less bed wetting than those children who begin the process at age 3.  
         
      Children who learn to use the potty instead of diapers have reduced incidence of diaper rash and irritation.   Children show signs of readiness between 15-27 months of age. Not responding to their signs of readiness weakens the parent-child bond and frustrates the child.     

    Pin It

    Thursday, February 9, 2012

    Pattern Review: Dapper Dillinger Trousers by Patterns by Figgy


    These are snazzy trousers.  They have a flat front and elastic back, which means they look sharp but can come off quickly.  The contrasting fabric hidden on the inside of the pockets and waistband is a nice touch, and I love that I made pants not only with integrated pockets, but that the pocket seams are hidden from the outside.


    Following this pattern did require a bit of prior sewing knowledge, though, since the directions weren't immensely clear, and it had some proofing issues.  For example, they referred to the "Jane Dress and Blouse" three times, but nothing about this pattern had a bodice or yoke.  Also, the diagrams for one page were repeated on the next page instead of the appropriate diagrams (which was a bummer, since I would have found the cuff sewing diagrams useful).  I found the cuff sewing section a bit unclear (perhaps the lack of diagrams?), and ended up making my own way with it a bit.  


    The pattern also refers you to Figgy's website for sewing help, which I didn't find.  I needed to look up "understitching" and found a great YouTube video to help (after looking in the Figgy's glossary unsuccessfully for an explanation). But now I will use this technique again! How clever!

    I also learned another way to assemble pants when making these.  She has you put the fronts together, then the backs, then sides, then middle seam up and down.  It is really amazing how many ways there are to put pants together.

    Another drawback of this was a fault of mine~ she calls for 3/8" seams and I wasn't careful about the width of these. Mine were probably closer to 1/4".  As a result, my center front piece didn't fit properly, so I had to re-cut it to a different width.  

    It was also unclear if the very top of the pants was to be topstitched or not.  I opted against it.

    Also, they are meant to be wide-legged and they look huge.  I mean, so huge that when I held the finished pair against another of the same size, they were wider in the waist, legs, and longer. I put them in the "larger clothing" pile because I am sure they will just fall off my child.

    All in all, these are pretty cool.  They are supposed to be "advanced beginner" level and I would think they would be "intermediate," but hey, that's just me.  These were a good use of the bottom of some curtains, and I hope we get a lot of use out of them.

    Update: I made another pair of these a size smaller.  They fit better, but are still a tiny bit big in the waist.  They are cute on-- with really wide legs but nicely sized pockets and the contrast pieces are a nice touch.
    Pin It

    LinkWithin

    Related Posts Plugin for WordPress, Blogger...