Friday, February 10, 2012

Diaper Free Toddler Class Notes

      These are not my notes; this is a collection of information from a local class. I am putting them here because they are very informative and helpful, especially if you have an older child (i.e. "late start EC").


      How to Start (Late start EC/ Early Potty Training):
      Start with a three day weekend and a sense of humor, lots of potties, a potty for your car, plenty of hydrating drinks and snacks, another adult to help you through the process, the ability to be consistent, loose pants for leaving the house, a “sheepie” in the car seat for traveling.
      1. NO UNDERWEAR!! To get to underwear, here is what to do. When you and your parenting partner happen to notice that your child has been successfully independent with the potty for 2-3 weeks, make an “X” on your calendar on that date. Then count forward 3 full calendar months (for instance, if you put an “X” on August 10, count ahead to November 10) and put a “U” on that date. That is the first day you can try putting your child in underwear. Remember! Underwear feels like a diaper to your child. Fully 35% of the calls I take for coaching are from parents whose child is not being reliably dry because of wearing underwear too soon.   
      2. DO NOT ASK your child if she has to go potty. The answer from small children under 5 is “No!” This isn’t because they don’t have to go. This is their way of establishing their independence from you. Their using the potty does not need to be any of your business once they initiate using it on their own reliably. This happens within 3-10 days of the potty training weekend.    
      3. When to TELL your child to go potty: before nap, before bedtime and before leaving the house. How you do it: Say “It’s potty time!” and go into the bathroom with him. YOU have to pee in the potty and wash hands. Young children learn through imitation. It is a very long time (maybe even a year or more) before your child will be able to be told to go potty and not need your support and company to accomplish this task on command. 
       4. Save night time training for closer to age 3 OR when your child insists that he will not wear a diaper to bed. 
       5. Get the coaching you need to make this work. In the past, one of the reasons parents were able to accomplish potty training sooner is that they had a wide network of support and lots of people to talk to about the process when it was not going so well.   
      6. Refrain from using any but the five words “Pee/poop goes in the potty!” DON'T say “It’s Ok. You’ll do it next time.” Or “Tell mommy when you have to go” or “Remember to go potty!” Little ones are young. They need LESS words and more action to make this work. 
       7. Around the time you get ten “hits” in the potty, your child will begin to initiate using the potty independently. She will still need your close attention and loving support for a few days to a week in order to have the skill fully in place.    
      8. Have fun! A sense of humor is a prerequisite for making this work.   
      9. If your child is one of the 5-15% that can’t get it when you do the weekend, give it a full ten days. If it still doesn’t work in that time frame, go back to using diapers and try again in 6-8 weeks. It always goes easier the second time around.   
      10. The amount of PRE potty training you do in advance will directly relate to the ease with which your child assimilates this new skill. The younger the child, the more time he will need in the pre potty training stage. Here is what to do for pre potty training: * Notice your own body when you pee and poop. What does it feel like? What is pushing out and what is holding in? * Encourage “Potty positive talk” in your home. Become fluent in talking about bodily processes. * Articulate your process in the bathroom in your toddler’s presence. * Dads, sit down to pee in the presence of your toddlers. Show boys how to point the penis down. Even girls will try to pee standing up. * Develop the Potty Dance in your family. * Go potty and wash hands EVERY time before YOU leave the house. * Get excited when your spouse or friends use the potty at your house successfully.

    Why Do it NOW?

      In 2 years of wearing disposable diapers, one child will produce nearly 2 tons of solid waste in the landfill. If a child wears disposables from age 2-3, he will produce an additional half ton of solid waste. It takes approximately 23-26 years for a disposable diaper to biodegrade in the landfill.    
      85% of all 23 month olds in the United States were out of diapers in 1957 and 1971. Today the average U.S. age of getting out of diapers is 39 months.   
      Children who are given the information they need to complete their potty learning process before they are 27 months old have less day time accidents and less bed wetting than those children who begin the process at age 3.  
         
      Children who learn to use the potty instead of diapers have reduced incidence of diaper rash and irritation.   Children show signs of readiness between 15-27 months of age. Not responding to their signs of readiness weakens the parent-child bond and frustrates the child.     

    Pin It

    Thursday, February 9, 2012

    Pattern Review: Dapper Dillinger Trousers by Patterns by Figgy


    These are snazzy trousers.  They have a flat front and elastic back, which means they look sharp but can come off quickly.  The contrasting fabric hidden on the inside of the pockets and waistband is a nice touch, and I love that I made pants not only with integrated pockets, but that the pocket seams are hidden from the outside.


    Following this pattern did require a bit of prior sewing knowledge, though, since the directions weren't immensely clear, and it had some proofing issues.  For example, they referred to the "Jane Dress and Blouse" three times, but nothing about this pattern had a bodice or yoke.  Also, the diagrams for one page were repeated on the next page instead of the appropriate diagrams (which was a bummer, since I would have found the cuff sewing diagrams useful).  I found the cuff sewing section a bit unclear (perhaps the lack of diagrams?), and ended up making my own way with it a bit.  


    The pattern also refers you to Figgy's website for sewing help, which I didn't find.  I needed to look up "understitching" and found a great YouTube video to help (after looking in the Figgy's glossary unsuccessfully for an explanation). But now I will use this technique again! How clever!

    I also learned another way to assemble pants when making these.  She has you put the fronts together, then the backs, then sides, then middle seam up and down.  It is really amazing how many ways there are to put pants together.

    Another drawback of this was a fault of mine~ she calls for 3/8" seams and I wasn't careful about the width of these. Mine were probably closer to 1/4".  As a result, my center front piece didn't fit properly, so I had to re-cut it to a different width.  

    It was also unclear if the very top of the pants was to be topstitched or not.  I opted against it.

    Also, they are meant to be wide-legged and they look huge.  I mean, so huge that when I held the finished pair against another of the same size, they were wider in the waist, legs, and longer. I put them in the "larger clothing" pile because I am sure they will just fall off my child.

    All in all, these are pretty cool.  They are supposed to be "advanced beginner" level and I would think they would be "intermediate," but hey, that's just me.  These were a good use of the bottom of some curtains, and I hope we get a lot of use out of them.

    Update: I made another pair of these a size smaller.  They fit better, but are still a tiny bit big in the waist.  They are cute on-- with really wide legs but nicely sized pockets and the contrast pieces are a nice touch.
    Pin It

    Wednesday, February 8, 2012

    Baby's First Yogurt

    Age 7 mo 3 wks

    Posted by Picasa
    Pin It

    Tuesday, February 7, 2012

    Baby Food Ideas (NOT Baby Led Weaning) - GAPS

    If I was not going to do Baby-led weaning, then I think I would introduce foods in the order recommended by the GAPS book (as an aside, here is another article in support of Baby-Led Weaning).

    If you aren't familiar with GAPS, it is a way of eating which is meant to heal your gut and strengthen your entire system.  It is fairly revolutionary and the book itself is full of information and knowledge far beyond the scope of any other nutrition or diet book I have seen.


    She recommends:

    1. Broth
    2. Fresh juice - carrot/ warm water - cabbage, celery, lettuce
    3. Add probiotic to stock (if whey is ok, add yogurt)
    4. Vegetable soup or puree - carrot, zucchini, squash, leek, onion, garlic, broccoli, cauliflower - broth + fat + vegetable + yogurt or whey
    5. Boiled meats (+ skin + liver) - include fish and fish skin
    6. Avocado
    7. Egg yolk
    8. Cooked apple with fat
    9. Nut butter pancakes (squash and eggs fried in coconut oil or butter)
    10. Raw vegetables- lettuce, cucumber, carrot, celery, cabbage
    11. Scrambled egg
    12. Raw apple, ripe banana
    13. Almond bread
    14. Salt
    She also says to use a spoon and give baby a spoon-- good advice all around!


    Pin It

    Monday, February 6, 2012

    Baby Food: Raspberries and Watermelon

    We are getting closer to summer fruits!  Another reason to love Baby-Led Weaning!
    Pin It

    Sunday, February 5, 2012

    Recipe: Vanilla Ice Cream


    This vanilla ice cream is delicious and we all love it... even my husband!  It is from Nourishing Traditions (but we increase the vanilla and use a bit less cream~ but only because we buy it by the pint and don't want extra sitting around).  We are considering replacing the maple syrup with honey because of the strong maple flavor of the syrup.


    Vanilla Ice Cream

    2 cups raw cream
    1 cup raw milk
    3 egg yolks (from pastured hens, if possible)
    1/2 cup maple syrup
    1 T arrowroot powder
    2 T vanilla

    Mix in stand mixer.  Refrigerate for a few hours.  Turn on ice cream maker.  Slowly pour into ice cream maker, continuing to churn.  Enjoy!
    Posted by Picasa
    Pin It

    Saturday, February 4, 2012

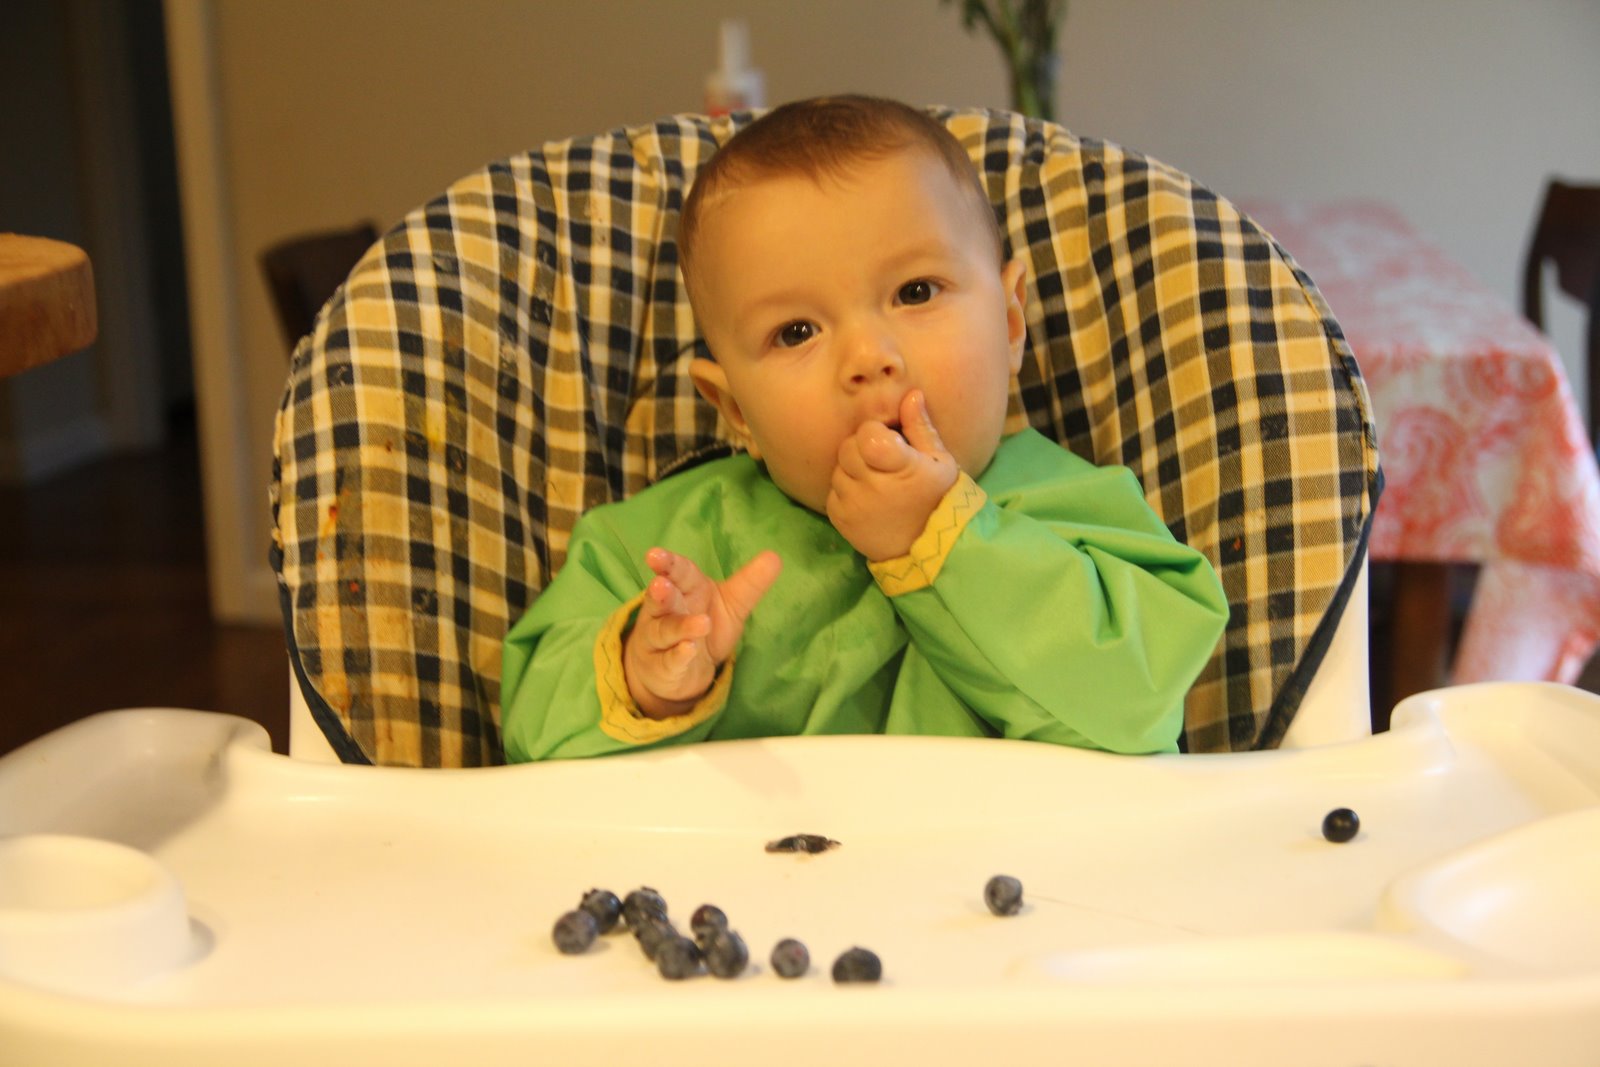
    Baby Food: Blueberries

    We love Baby-led weaning!  So does our baby!
    Pin It

    Friday, February 3, 2012

    Pattern Review: Indygo Junction In-Style Suitcase Bag IJ913

    I was so excited about this bag.  The photos of it make it look so cute and sharp.  I was so excited that I actually bought the specified size of the D rings (I usually just find something that is similar in my stash).  I also bought buckram to use in place of the polyester foam, and I actually bought medium-weight interfacing (I have a bunch of lightweight interfacing I usually use).

    But this was an awful project.  I think I would be less annoyed if it were a tutorial, but I spent $10 for the pattern.  I would think that a paid pattern would be better than this, and I am sorely disappointed.

    Why did I hate this project?


     1. The raw seams are exposed inside.  They are serged or zig-zagged, but still... exposed seams in a lined purse? C'mon.

    2. The pieces are all cut using eighths of an inch.  Really?  Can't we work in fourths or halves of an inch?  Must we be that precise?

    3. You had me buy a really long zipper then cut off a third of it (inches on each side).  Why not just specify the size of the opening?

    4. The inner pockets look bad.  It is actually clever in theory how they are attached.  They are lined up with the sides and bottom on each side, then your seams to attach the straps on the outside double for the inner pockets.  But why waste the inch on each seam of usable pocket space? Why not just do a bag lining with proper pockets?

    5. The instructions are too brief.  I am not one for over-explaining, but they are hard to understand.  The diagrams aren't marked with right side up and down, and the two versions of the bag are marked by the colors of the example bags rather than their redeeming features (i.e. just call one version a single exterior pocket bag and the other version a double exterior pocket bag instead of "green" and "purple").


    6. The handles have exposed seams.  They are tucked under and serged or zig-zagged, but still-- I want to make a polished bag.  The roughness looks bad.

    The construction method of the top zipper area was actually pretty cool: they have you put in the zipper, hidden between the exterior and interior layers, then cut the whole panel to size.

    I also found how they have you use the medium interfacing on the pockets to be unusual.  To make the pockets, they have you fold a large piece in half long-ways.  Then a piece of interfacing is ironed onto the fold, with about 2 inches on each side.  This adds a nice amount of crispness to the edge.

    I ended up trying to "save" the inner look of the bag by covering all my seams with fold-over elastic (FOE) I happened to have in the same color.  Before I did this, my inner lining was fraying like crazy-- even through my zig-zags.   I couldn't imagine using the bag and getting yellow fuzz every time.

    So (no surprise here), if you are considering this bag, I'd say give it a skip.
    Posted by Picasa
    Pin It

    Thursday, February 2, 2012

    Recipe: Milk- Making Cookies (Gluten Free, Refined Sugar Free)

    What better excuse to eat cookies?  Oh- they are helping me lactate.  Brilliant!

    I saw them here and was inspired.  Her key ingredients are flax, brewer's yeast, and oats.  I took one of her recipes and modified it to make it without refined sugar or gluten.  Here is what I came up with.  They are pretty tasty.  Toddlers even like them.


    3/4 cup almond butter
    1/2 cup butter, softened
    1 cup flax
    3 T. Brewer's Yeast
    1/3 cup stock
    1 t. cinnamon
    1/4 c. maple syrup
    1 banana
    2 t. almond extract
    3 eggs

    1 1/2 cups oat flour
    1 t. baking soda
    1 t. sea salt

    1 cup nuts
    2 cups oats

    Preheat oven to 350 degrees.

    In a stand mixer, combine almond butter, butter, flax, brewer's yeast, stock, cinnamon, maple syrup, banana, and almond extract.  Add eggs and mix again.  Gradually add flour, baking soda, and salt.  Mix in nuts.  Add oats last.

    Place balls onto cookie sheet.  Bake for 12 minutes.

    Option: Make one big tray of cookie bars; double cook time.

    Pin It

    Wednesday, February 1, 2012

    10 Tips for Beginning Seamstresses

    1. The better you cut, the better your project will be.
    2. Push out all corners with a tool.  It will make your edges sharp.
    3. Topstitch wherever possible. It makes projects look more finished.
    4. Change your sewing machine needle often.
    5. Buy fabric you like when you see it; the projects can come later (think of it like eating with seasonal vegetables).
    6. Iron your fabric.
    7. If you make a mistake, pluck it out as soon as you notice it.  No sense in going further then getting it out later. It will just take longer and make a bigger mess.
    8. Clip threads as you go.  As soon as you finish a seam, clip both sides of the seam tight to the fabric.  If you don't, there will be way too many at the end of the project and you are bound to miss one.
    9. When you are winding a bobbin, wind two (or more).  It takes longer to re-thread the machine than to wind extra and keep them waiting.
    10. If your machine is acting odd, re-thread it on top and take out the bobbin and put it back in.  If that doesn't work, then open it up and clean up the lint down below.  If that doesn't work, change the needle.  Next, try the upper tension.
    Pin It

    LinkWithin

    Related Posts Plugin for WordPress, Blogger...