Tuesday, October 28, 2014

Xtracycle Rain Cover and Sun Shade using Hooptie and Upside Down Kitchen Cart

There is a rumor that it rains in Northern California in the winter, and we actually witnessed the rain last week.  On that day, we decided it was time to make the rain cover we have been talking about forever.

It turns out that a rolling cart I had in the garage from The Container Store was nearly the same size as the Hooptie.

I took the wheels and middle racks off, flipped over the  upper rack, zip tied it onto the hooptie, and we were in business.

I happened to have a small bit of the same fabric left that I made the cushions and side bag out of (an Amy Butler Laminated Cotton), so I laid it on top and hand stitched it on.  


The boys liked it.  Then my taller boy said it was a bit short with his helmet on, so he wedged the cart frame up, and added more zip ties.  I am thinking of buying a clear vinyl and making roll-up sides and front and back to protect them more from the weather.

Stay tuned.


+++++++++++++++++++++++++++++
UPDATE: I hate it!  It slows me down and makes the kids feel squished.  BUT- it was useful one day when I had to bring a booster seat to school.  We tied it on top.


Pin It

Monday, October 27, 2014

Happy Halloween!


We are almost ready to carve them!


Three for $12. How could I resist?  

There is one in each cargo bag and one on top.

.....

Pin It

Saturday, October 18, 2014

Recipe: Roasted Pumpkin Seeds

One of my favorite memories from growing up is Halloween.  Not the costumes, but the pumpkin carving.  Every year, we would carve pumpkins and my mom would soak the seeds and bake them for us with some salt. Not only are they delicious, but these seeds are high in zinc and magnesium, as well as being a decent protein source.


Roasted Pumpkin Seeds

pumpkin seeds
sea salt
optional: curry powder, lemon pepper, etc.

Place the seeds aside when carving your pumpkins.  Soak them in water with a sprinkle of salt for 30 minutes to overnight (this makes them easier to separate from the pulp and increases the nutrient availability to your body).  Separate the seeds from the pulp.

Preheat your oven to 325.  Lay the seeds on a cookie sheet.  You can oil the sheet, or use parchment paper or a silicon sheet if you wish.  Sprinkle with sea salt to taste.  As an option, you can experiment with other flavors like pepper, curry powder, lemon pepper, or anything you like.  You could even do parts of the sheet in different flavors.  Make sure the seeds are in a single layer.

Bake for 30 minutes, turning halfway through.  


Pin It

Sunday, October 12, 2014

Bee Sting Natural Remedies

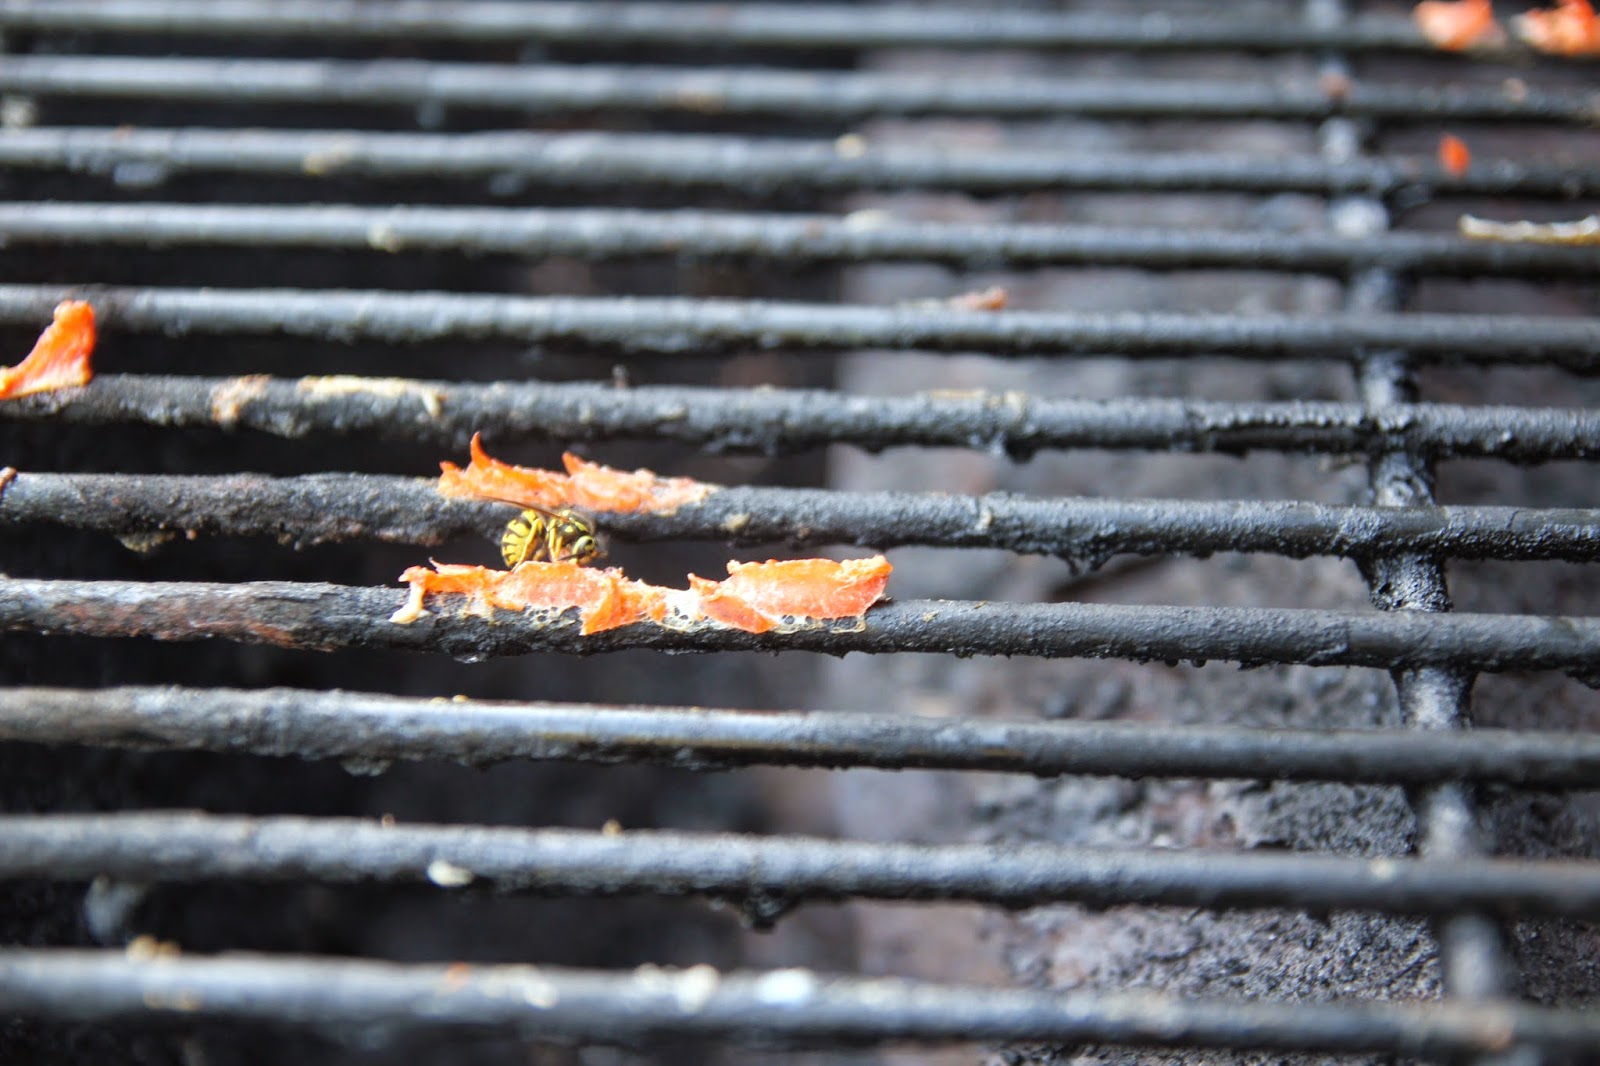
This is a yellow jacket.  I was stung by a bee.  I was so shocked that I didn't take a photo.  One minute, I was sitting on the edge of the pool having a conversation.  The next moment, I looked at my inner arm and a bee had stung me and was flying away.  OUCH!  I took the stinger out right away, then doused the area with white vinegar.  It hurt, but nothing fabulous.  I have been stung before, and done this, then totally forgotten about the incident.

The next morning-- OUCH!  And itch!  And tight.  And red.  And it now covered an area about 8" long and 5" wide.  And it was swollen.  


I put some lavender and maleluca (tea tree) oils on it.  I went to my Bikram Yoga class and the sweat took my mind off of it, but it was still angry after class.  Later in the day, the itching got worse, so I tried the baking soda compress a yoga buddy suggested.  This was the first relieving thing I had done.  

But then the water dried out of the baking soda and it flaked off and I was still swollen and itchy.  It was hot, too.  I spent the rest of the evening with my cold pack and frozen popsicles, which were highly satisfying.  Another friend told me I must use Bendryl because I was having a severe reaction.  I continued with the ice and a Benadryl backup plan if it grew or if I got short of breath or dizzy. Then I finally tried peppermint oil, and only because I was sitting at a table with a bottle of it on the table and the label said, "cooling" and my arm was HOT.   Ahhhhh... It was really cooling.

I woke up the next day and it was still hot and swollen and I iced and used peppermint oil.  I saw a friend at school pickup who works in an ER I showed it to him and asked if I was okay.  He told me if I was breathing, I was okay, but should probably take Benadryl or call my doctor if I was concerned.  Someone else had suggested Purify by doTerra, which I happened to have because I had made a great bug repellent with it this summer (I forgot to post about it- here are some similar posts).  It is a mix of lemon, lime, pine, citronella, malaleuca and cilantro.  I spent the afternoon with Purify and Peppermint on my arm and the tingle and smell were so cooling and soothing to me that I stopped icing and the redness started to dwindle, as did the swelling and pain.  Right before bed, I iced it and put some aloe on it, which had been my cure-all for skin items in the past, and I seemed to have forgotten to do.

The next day is today and I woke up itchy and iced it and re-applied the Purify and Peppermint .  I have been using the Purify and Peppermint all day and have been watching it get smaller and less red.  It is down to less than 2" by 2" and is slightly annoying rather than totally consuming.


Pin It

Saturday, October 11, 2014

Essential Oils "Lice Away," "Focus Blend," and "Cootie Spray" by Nurse Freckles


This is information written by Nurse Freckles HERE. I am re-posting so I don't forget the recipes!!


Lice Stay Away Spray: I am sure at some point we have all received that letter that a child in school or day care has lice and you instantly start itching, my legs are tingling right now thinking about it! AHHHHHHHHH
    IMG_1755


Focus Blend:
Focus for any child at any age is important; we want those little sponges to soak up as much as they can while they are at school.  You can make a very simple mixture in a roller bottle to help them wake up and keep them focused while at school and after school for homework.
 IMG_1754


Cootie Spray:
Every time I send my kids to school or child care they almost always come home with a runny nose at some point.  Playing with other kids who sneeze and cough all over each other, putting random toys in their mouth that every other kid in the place has been sucking on already OR my kids favorite pass time picking their noses, any way you slice it, it is a cesspool of germs that they are carrying right back into our house! So for everyone’s health this is a really easy and non toxic hand sanitizer to make!
  IMG_1756
Good luck out there my peeps fighting the good fight from cooties and lice!
If you are looking to read about the differences in grades of essential oils go here, and safety here.
Disclaimer: This product does not intend to diagnose, treat, cure or prevent  any diseases.
Pin It

Friday, October 10, 2014

Kids' Art Idea: Painting Pumpkins!

If your kids are anything like mine, the moment they see a pumpkin at a store, it is game on.  They want pumpkins everywhere.  Trader Joe's? Pumpkin.  Farmer's Market? Pumpkin.  Target? Pumpkin.  Orchard Nursery? Pumpkin. I can't seem to go anywhere without a pumpkin display.

BUT-- it is also Indian Summer in Northern California.  That means you can't actually carve a pumpkin until a week out, at the most, from Halloween. It is (usually) in the 80's and 90's through late October so you never know what the weather is going to be on Halloween.  


So-- to keep those pumpkins fun (and not rotting from being carved too early), one good activity is painting.

Yes!  Paint those pumpkins.  You can paint them plain, or with faces, or dots, or multi-colored, or???

Pin It

Thursday, October 9, 2014

Recipe: Kim Chee

1 head napa cabbage, shredded
2 bunches red radishes or 1 large daikon radish, diced
4 carrots, diced
1 red onion or a bunch of spring onions with greens, diced
1 head garlic, peeled and smashed
1 small hand fresh garlic, peeled and diced small
3-6 fresh or dried red chilies, diced small
2 T red boat fish sauce
4 T sea salt or pickling salt

Combine ingredients.  Pound.  I like to use a meat mallet straight up and down, but you can use whatever works (there is actually a cabbage tamper made for this job).  You are trying to allow the salt to help the cabbage release its juices.

Let sit with a clean dish rag over the bowl for 1-3 hours.  Pound again.

Move into a fermenting crock or wide mouth mason jars.  This recipe fits a one gallon crock or two quart sized mason jars.  Fit a plate over the veggies in the crock, or a glass jar weight in the mason jars, then weigh it down with crock weights (or homemade crock rocks) in the crock, or a ziploc bag filled with brine (1T salt to 2 c water, dissolved) in the mason jar.  You need a weight because the veggies need to stay completely submerged in the liquid.  The plate then weight keeps them all tucked in.  You use a brine bag in the mason jar because it is hard to find a weight that fits (though you could find a rock, I'm sure, and clean it) and the bag could break so you would want brine, not water, to enter your fermenting food, if this were the case.

Move to an out-of-the-way spot in the kitchen (the cupboard or counter is fine) and cover with a clean cloth.  You can check it every so often (daily or less) to make sure the veggies are still submerged.  Taste it after a week to two weeks and move it into the refrigerator when the taste is satisfactory.  When moving it, change it into two mason jars with closed lids.

Will keep in the fridge for a year.

Pin It

Wednesday, October 1, 2014

Kids' Book Review: It's So Amazing!

This book, It's So Amazing, is so amazing!

It says the book is for ages seven and older, and has sister books for younger and older kids.  I read it to my older son when I was pregnant beginning when he was just under two and a half years old.  My younger son is now three years and three months old, and he is interested and engaged in the book (which is not the case for every book, as it was for my older son at this age).  I chose this book instead of the book for younger kids because I wanted more detail to answer their questions.  I also use the drawings as a jumping point for me to explain things, rather than reading all of the words.

This is a great book because it talks about how boys and girls are different, and what our body parts are called, and how they change throughout our lives.  I think it is important to give kids the words for the things they notice and are curious about and to normalize them.

It also discusses love and sex, and what eggs and sperm are, and what happens as and after they meet.  The kids love the real-size images of a fetus and fetus to-be.  The page with the actual birth description has nice images for explaining how a baby comes out of a mommy.  It even touches on the different gestation periods of different mammals, multiple births, adoptions, preemies, and "not-nice" touches.

Both boys, 3 and 6, are interested in this book.  The younger one thinks it is interesting that boys won't have babies inside them, and that they will always have a penis, and never a vagina.  The placenta, umbilical cord, and birth process are also interesting.  He wanted to see his baby pictures after reading it, then his brother's, then mine and his daddy's.

My older son likes the differences between the gestation periods of different animals, and loves the page with the fetus (and fetus to-be) at different stages and sizes.  Both enjoy learning that they will hit puberty someday, and seeing how their bodies will change.

This is an excellent staple for a young child's library.  It has given us a great framework for many discussions and helps the boys understand human bodies a little better.

Pin It

LinkWithin

Related Posts Plugin for WordPress, Blogger...