Peggy Orenstein has done it again. Her analysis of the "princess" and "pink" culture of girls is thought-provoking and shows depth but is also very personal-- to both her, and she makes the reader want to make changes in their own lives.
Each chapter starts with a theme, and Orenstein analyzes the theme by looking at its past, present, and perhaps the future implications for our daughters. For example, she discusses little girls and the internet. She talks about when they first started online, then the progression to tweeny sites and Facebook, and the teen implications of this exposure (i.e. all of your "friends" can see everything about you and you create a persona online -- i.e. what you LOOK like-- instead of exploring who you FEEL like as you are developing). This chapter actually made me want to reconsider my own exposure to Facebook and other online sites!
She explores her own journey to motherhood, and her own decision-making colors the book. Her major themes all touch back on the color pink and princesses and how these quite possibly (and quite likely) are stunting the creativity of our budding girls at best, and at worst making them only think of their exterior image and introducing them to such things as eating disorders and early sexuality on a grander scale than ever before.
This is a must-read if you have any interest in the subject. It is also a page-turner, and she makes her points as a researcher and mom (and woman) with alarming frequency.
Pin It
Monday, February 28, 2011
Innovating the KAM Snap Press

It comes with a screw that is flush with the die on the top. To change the dies, you must use a metric allen wrench
To save time and not to need to keep the allen wrench on my desk (i.e. close to prying hands), my husband has innovated the press. He got me that long screw instead of the tiny one. To do this, he took the tiny one to Home Depot and found another that was longer and would fit. Now I can hand-tighten and un-tighten and it makes snapping a lot quicker and easier.
Amazing! Thanks, honey. Pin It
Thursday, February 17, 2011
Pattern Review: Hip Mama Diaper Bag
I just finished making what I think will become my favorite diaper bag. It is called the Hip Mama Diaper Bag. Here is the tutorial. I love the look of the bag and that it looks like a "normal" bag (ok, a normal BIG bag), and can be worn cross-chest or over one shoulder. I love all the pockets, and I love the wipe-ability of the lining. I also like the weight of it, and think the bulkier fabric coupled with the use of interfacing is key to feeling like a bag has substance.
 |
| To make it, I used the Ikea heavy cotton fabrics on the outside and Amy Butler laminated cotton |

There are a ton of exterior pockets: one on each side (which snap closed), two which snap closed on the front, and one that zips closed on the back. I love how she lines the back zipped pocket with the interior lining. It is really roomy and looks cute when opened. My zipper ended up a bit squished, so I will give it more space at one end next time. I also like the look of a bulkier zipper that I saw in some of the links in her comments section, and will use one of these next time.
I had some trouble with the front double pocket instructions, and turned and topstitched them where I didn't need to have them closed on the outside edges before stitching them to the main body piece. My main snaps which close the flap to the body also don't line up perfectly, and I think it is because of this issue.
Interesting aside: In the comments section of the tutorial, one woman posted a change to the front pocket that I am trying to figure out how she did (I closed the window and can't seem to find it again! Sorry!!). She made the front pocket into three instead of two, and made the middle one open into the bag with an opening that fit a plastic wipes container with the wipes coming out the front. Then she could use the wipes all the time and not even have to open the bag. It seems quite clever, except that you'd have some space taken up by the case/ wipes in the middle (I guess you'd use the space anyway for that purpose if you were used to carrying a hard portable wipes case). Also, you'd have to open the bag to get the diapers, so why not open it for the wipes, too; and, it limits the uses of the bag after the kids stop needing wipes.

There are also a LOT of interior pockets. One side has three elasticized pockets and one side has two. These will make nice built-in wet bags for carrying soiled cloth diapering materials around, or for food or sippy cups. I was put off a bit that they aren't lined on the inside of the pockets, and that you can see the backside of the lining fabric. Come to think of it, this may make them not that great for messy items, since I didn't use straight up vinyl like she suggested.
In the interior, I added a zipper pocket using jcaroline creative's Hobo Bag instructions on the side that I put on the back. I really need diaper bags to also act as a purse, and give me someplace secure to put my wallet (or at least ID and money). On that same side, I added the key clip . You could use the same clip for a pacifier and add another if you wanted.
In the comments section after the tutorial, one woman posted that she added elastic on the sides of the interior for sippy cups. I may try that next time, but with two pieces on each side to make sure it stays steady.

In putting the bag together, I had some trouble with her description of how to stitch the corners. She showed a photo of the pinned corners, but I wanted a bit more detail. I also didn't like the idea of turning the whole bag, thinking it would be too bulky. Instead, I turned the edges under and pinned the tops, then topstitched it together. I am glad I did this, because I saw the missing flap piece sitting next to me as I got it together. Its entry into the finished bag was missing. I ended up stitching it to the back, then continuing on with my pinning.
All in all, I think this is a great bag and I was able to make it using the tutorial. If it ends up being too big for every day use, then it will be good to travel with (since the components of a good travel diaper bag are having a flap to close, and a lot of space but a lot of pockets so you can carry a lot of toys and food and clothes and be able to find it all quickly when retrieving it from under the seat just when your kid needs it and the flight attendant tells you it is time to have everything stowed). It is cute and will be functional at some point. I hope I find an excuse to make another one of these!
Pin It
Kids Art Idea: T-Shirt Painting

Hey! How about giving your kid some fabric paint
Have fun!

Monday, February 14, 2011
Baby Food: Soup, Deconstructed

How fancy, I know... to make the baby a gourmet meal by deconstructing a classic.
Sunday, February 13, 2011
In the Henhouse: A Brief Intro to Raising your own Chickens
Having pets that give back makes caring for them a lot easier. Except that we intentionally didn't name them, and spend time with our toddler counting eggs instead of chickens. This is because we weren't sure how many of the chicks would make it to maturity, either because they turned out to be roosters instead of hens, and because of the chance that they would become another animal's lunch or dinner.
We got six chicks last spring, and raised them in a cardboard box with a heat light over it for a few weeks. Then we moved them outside to the coop with the heat light, and only let them out while supervised. We now have five chickens (we lost one to a neighborhood cat when it was about 10 weeks old and we left them unattended in the back yard). We had wanted four, but five is nice because we usually have eggs to give away. And these are tasty, nutritious eggs. The yolks are more orange and they taste richer. We get about four eggs per day. Hens are supposed to slow production through the winter, but that wasn't the case for ours this year. You can trick their body clocks into thinking the days are longer with artificial lighting, but we chose not to do this.
 |
| After the chicks were moved into the coop, but still young enough to use the heat lamp and the chick feeder and waterer. They were just starting to feather out. |
But chickens typically only lay this much for a year or two, so we haven't been faced with the question of what to do with them when their production slows. Chickens can live up to 10 or 12 years if treated properly. Most are only allowed to live for two to three years, and their owners start raising the next batch of chicks about six months before the anticipated slowdown so as not to be without eggs. Some chicken owners "harvest" their hens and make a slow cooked, home grown meal, and others try to find them a good home elsewhere. On many of the commercial operations, hens only live for a year, in small cages with artificial lighting, since their production is highest their first year.

We also give the hens all of our scraps (except avocado, which is bad for bird livers over time), so we feel like we are using our scraps again before they become compost. Another benefit is their poop, which we "harvest" into our compost to age it before feeding it to the veggies. As a result, our veggies grow better with the help of the balanced compost. We like thinking that our lives are a bit more sustainable with the help from our chickens.
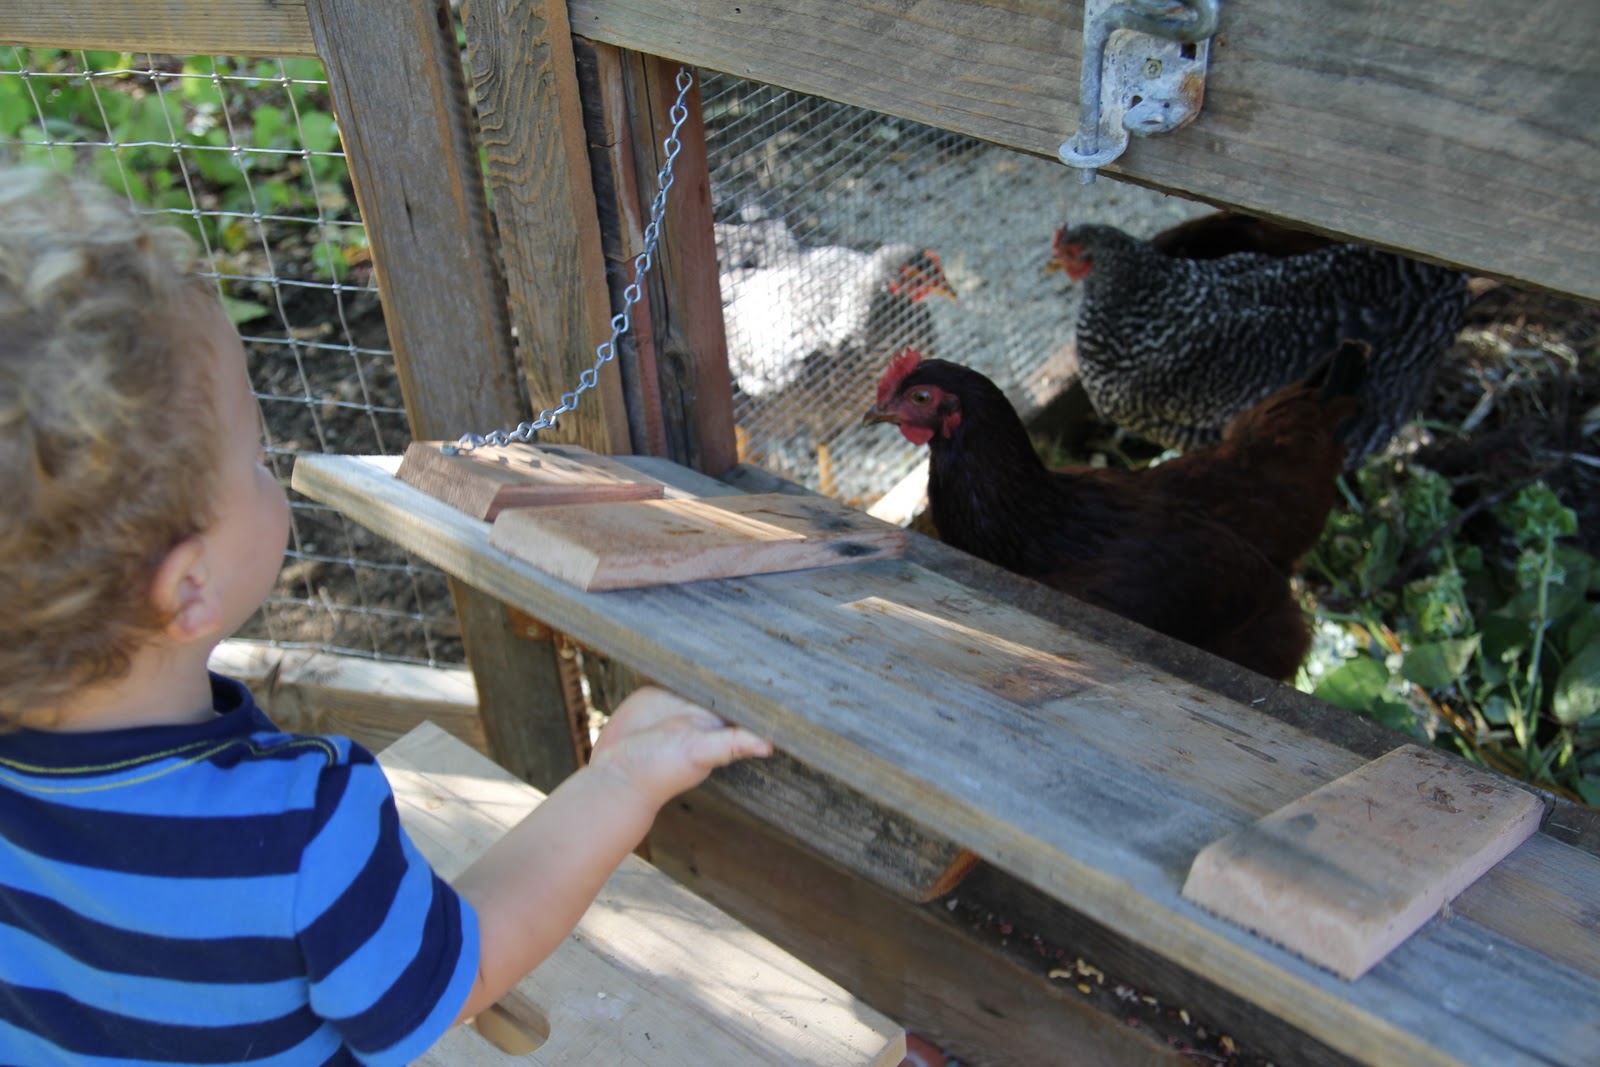
Our toddler LOVES feeding and watching the chickens, as do his buddies. Taking care of them is part of our daily routine, and we like to think it is helping to teach him responsibility. He also likes to pet them. Kids of friends of ours with chickens like to hold and carry their chickens around. The more that chicks are handled when they are little, the more they are used to it and grow up more like traditional domesticated pets.
Daily chores include carrying scraps to the hens, checking their nesting boxes for eggs and to make sure they are free of poop, and letting the chickens out of the coop and into the yard for the day. We recently moved (so we have had two chicken set-ups over the course of the year), and our old coop had a run attached. We didn't let them out daily, although we let them out on occasion. As they got bigger, they were let out less frequently as they started to eat our veggies and roost (and poop) on the patio furniture. In the new house, they have a coop and smaller run, but we also fenced off a small portion of the yard so that they can roam more and we can choose to join them or not. I think that chicken interest in vegetation differs by what you have growing in the yard. They can fly up to five or six feet up, and across a bit. We usually check for eggs again mid-day, then in the evening they put themselves to bed in the coop, and we go out after sunset to close the coop door. You could easily skip the mid-day egg check. It is important to clear the eggs out regularly, though, lest the hens get "broody," meaning they will sit on the eggs instead of eating bugs and laying an egg per day.
 |
| This hen is wondering what we are doing in her area. |
Weekly chores include filling their water and food. Monthly, we "harvest" the poop from under the roost bars and make sure the nesting boxes have enough hay in them. Twice per year, we clean the coop more thoroughly. Depending on coop design, some also use an annual scrub-down.
Coop design is essential to living happily with chickens in the yard. We found that all parts of the coop and run must be accessible for cleaning, and tall enough to stand in while cleaning. The roost bars need to be at least a foot away from the nesting boxes, or else the hens will poop in them as they are asleep at night on the roosting bars. The nesting boxes need to have an egg door that is accessible without going into the run or yard (imagine going out in your slippers in the morning to fetch breakfast). The entire thing needs to be predator-proof (who needs a fox slipping into the hen house at night for a meal?).
 |
| Looking through the food scrap deposit door, you can see the ramp for the hens to get up into the roosting area. |
The area under the roost bars can be solid or mesh. Our first was solid with wood shavings and our current coop is mesh. Our work load has diminished incredibly with this one change. Having a mesh floor allows the poop to fall through to the ground, so we only need to clean one area instead of two. We also give them scraps just below the roosting area, which means they are turning our compost as they scratch around. It also means that we only need to clean that area semi-annually. We were cleaning the area with the wood shavings weekly to try and keep flies at bay. Another useful addition in our current coop is to have an easy-open door to put our daily scraps into that the chickens don't try and get out of at the same time. The old coop had me constantly keeping them away with one foot while trying to feed them with one hand and to hold the baby with the other hand. Here, I can open a waist-high small door, drop the food in, and be on my way.
 |
| The new coop. The door on the left is the gate to the chicken yard. The little guy is looking into the compost deposit door. The lower door is the clean-out for the compost area. The door to the whole coop and enclosed run are inside the yard area. |
 |
| The old chicken coop. Notice the run is too short to get into to clean while standing, and the coop door (on right) opens onto a plywood floor with vinyl and wood mulch. |
When deciding on a chicken breed, size, personality, egg color, and egg-laying frequency are all considerations. Some are also known as heritage breeds, or have a distinct look to them. Bantams are small chickens, and the rest are known as standard. Chickens are also bred to be good layers, good for eating, or dual-purpose.
We chose two each of Rhode Island Reds, Barred Rock, and Aracuna. We chose Rhode Island Red because we wanted heavy layers. They started laying first, and are lay daily and are quite savvy (i.e. they find all the treats we throw to the chickens like slugs and tomatoes first). The Barred Rock were supposedly friendly and lay well, and we found this to be the case. They are the ones who like to follow us around, and want our toddler to pet them. The Aracuna lay different colored eggs-- they are also known as "Easter Eggers." Each hen always lays the same color egg, but each hen of this breed can lay a different color. This is the type of chick we lost one of as a juvenile. The one who remains lays green eggs, and is at the bottom of the pecking order. She seems to be the least savvy of the bunch.
In addition to the ones we chose, Buff Orpingtons and Australorps are very popular for people with small children, as they are known to be extremely gentle and reliable layers. Other considerations include if you want your hens to be able to raise their own young, or if you intend to brood successive batches of chicks every few years in a brooding box (the cardboard box with heat lamp that we kept indoors that I mentioned earlier).
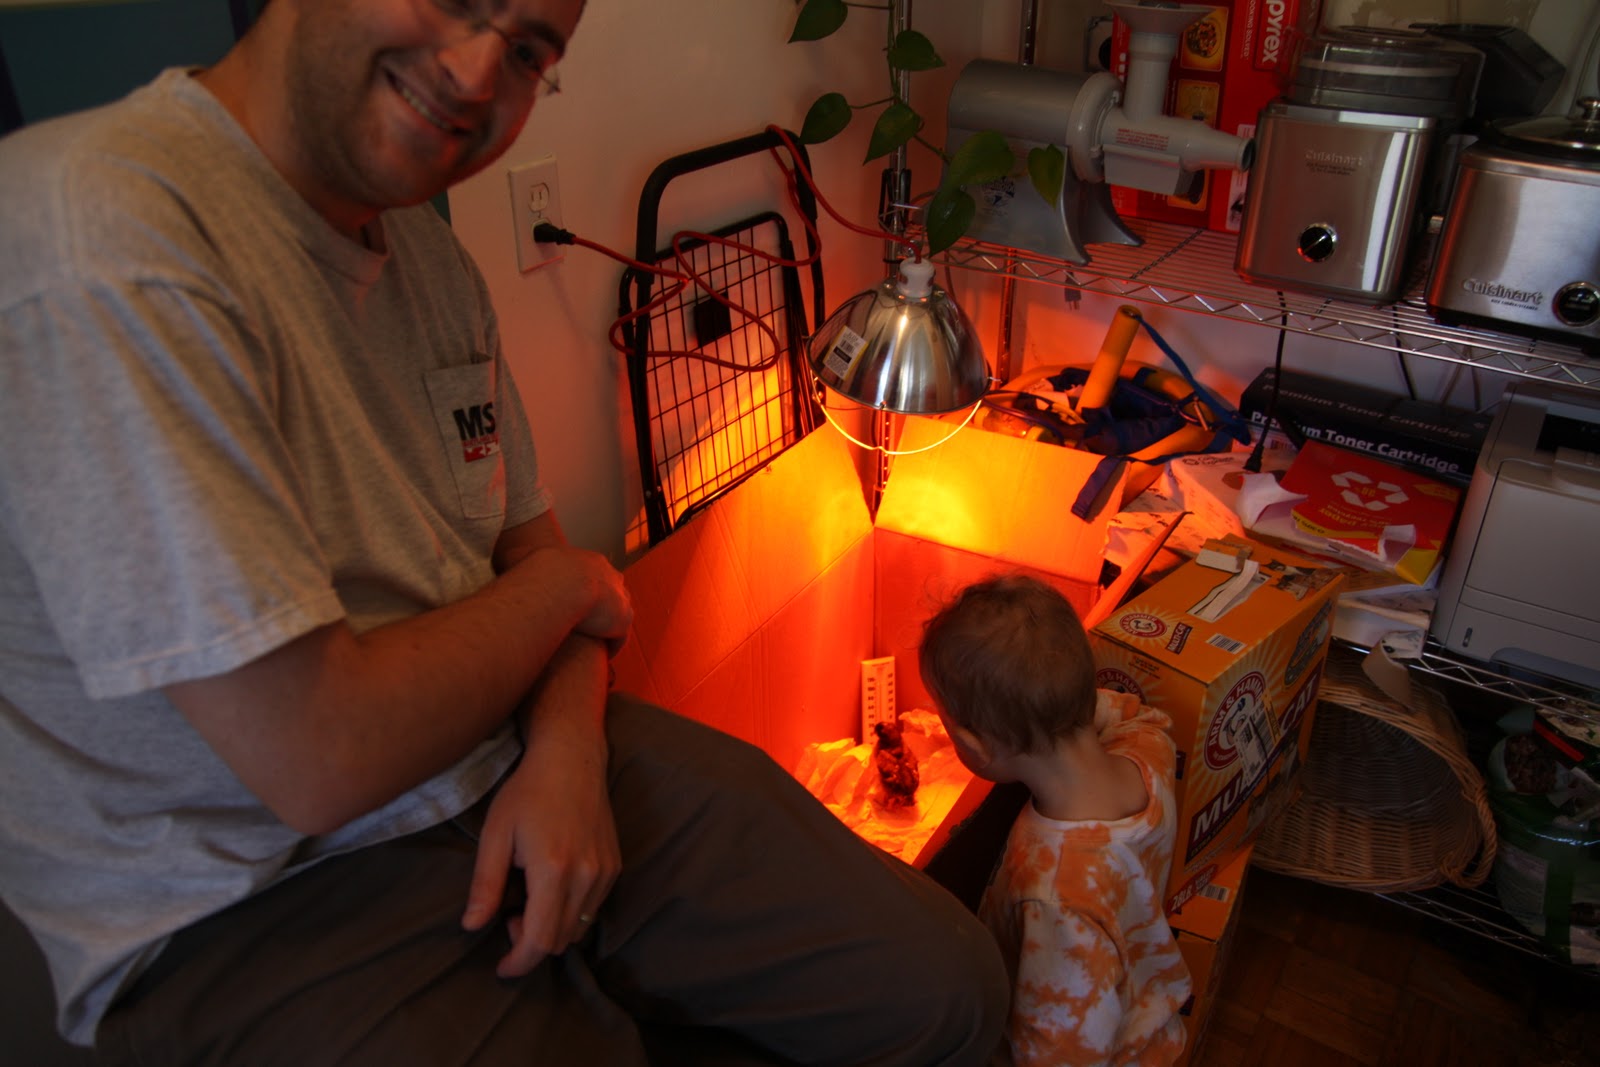 |
| Checking out the new arrivals. |
Brooding chicks is easy, but they lose their cute factor fairly quickly, as they feather out within a few weeks. And they don't start laying for six months. To brood them, all you need is a cardboard box and heat lamp. We lined the box with a scrap of vinyl flooring to make it easier to clean. We used shredded newspaper to line the box. You could also use wood shavings. We also had a thin dowel across the sides to help them learn to roost. They eat special chick food out of a small feeder
  and drink regular water out of a small watering dish
 . After a week or so, they can have greens and be let out onto the lawn for supervised "field trips." We found them to flock together and go as a group everywhere together, as chickens don't like to be alone, so plan on having a few chickens, not just one. After a few months, you can move them outdoors, and gradually increase their outside and unsupervised time.
 |
| A supervised outing early on. |
Local ordinances vary. In Lafayette, CA, you are allowed "approximately four chickens." According to municipal code, the coop must be located in the rear yard of the principal structure, and be set back not less than 60 feet from the front property line and from any street line and shall be not less than 55 feet from any point on an adjoining parcel of land, at which point the exterior wall of a dwelling unit either exists or could legally be constructed. Fenced pasture or coop shall not be located nearer than ten feet to any property line. The same coop rules extend to Moraga, CA, although variance permits may be granted. In Orinda, CA you may only keep chickens on residential lots of 20,000 feet or greater in size. Coops shall be set back not less than sixty feet from the front property line or any street line, and shall be at least forty feet from any side or rear property line.
Walnut Creek, CA permits chickens in certain areas only. They are allowed in the R-40 District subject to the following conditions, and in the R-8, R-8.5, R-10, R-12, R-15, and R-20 Districts, they are conditionally permitted with the granting of a Minor Use Permit, subject to the following conditions: Land must be at least 40,000 square feet, unless the parcel is immediately adjacent to public open space, and contains at least 20,000 square feet; one animal is allowed for each 20,000 square feet of land; the coop cannot be closer than one hundred feet to any public street nor closer than fifty feet to any interior lot line; no fence or chicken coop shall be located within fifteen feet of any side or rear property line or within one hundred feet of any front property line or be located within fifty feet of any building used for human habitation; and, chickens shall be accessory to the residential use of the property. Permits may be granted to have more animals and waive the distance requirements. They also state that any permit may be revoked if any conditions are not strictly adhered to, or if the keeping of chickens is found to be detrimental to the peaceful enjoyment of property or improvements in the neighborhood.
Before deciding to get chickens, do a little legwork. Are you ready to buy a fly swatter ? Do you have 15 minutes per day, and an hour per month to spend on the task? Check and see if the local ordinances have changed at all, and feel out your neighbors. Hens are quiet, except when they are laying an egg. They sit and "bok bok" until it comes out. Do you want a rooster (you'll need to read much more if you make that decision). How many chickens do you want? Is there a place on your property that would be appropriate for a coop and run? How would you feel about them running around your yard (they don't potty train)? And mostly, are the fresh, nutritious, wholesome eggs worth another few additions to the family?
Resources:
Storey's Guide to Raising Chickens : Invaluable resource for in-depth knowledge about coop design, chicken life cycle, and eggs.
Alamo Hay and Grain: Sells baby chicks for $2.50 and they always have a tub of chicks the kids can play with. They also sell all the necessary supplies, including organic feed, hay for the nesting boxes, and the appropriate feeders and such. Their staff is knowledgeable and will load your car. 3196 Danville Blvd. in Alamo (925) 837-4994
www.mypetchicken.com: Online store and knowledge base. They also sell the Eglu coop.
My Urban Farm: Local contractors to help you plan then will build you a coop. Michael and Dana Yares (707) 338-8967 or michaelyares@myurbanfarm.net
[Note: This article is for the local paper... edited to add some more photos and links]
[Note: This article is for the local paper... edited to add some more photos and links]
Saturday, February 12, 2011
Moda Bake Shop Fat Quarter Idea: Cloth Napkins

One of the best things I've done so far with it has been to let my 2-year old throw them around the room and then "organize" them back together, which is actually quite a good activity. He likes to sort them by pattern then color. He also likes to point out the letters on the one pattern that has "MODA" written all over it.
Another great use has been to make us new cloth napkins. These were SUPER easy. They are just hemmed and the corners are folded. But I love the pattern and how it is obviously a set but not identical. Plus, it's a good size.
What else should I do with my fat quarters (unless I pick up quilting)?
Hobo Bag as Diaper Bag
How many diaper bags does a gal need? Especially when your kid is out of diapers??
Interesting question.
But I still like making them, and this new one is quite cool. I used jcaroline creative's Hobo Bag tutorial as the framework for this cute diaper bag.
I am calling it a diaper bag instead of a purse because the inside material is waterproof (Amy Butler LOVE oilcloth, to be specific). The exterior is Ikea home decor weight cotton, and I used lightweight iron-on interfacing for the body.
I modified her tutorial by changing the straps and the lining.
Instead of using rings to attach the straps, I stitched them on using a box stitch. I like this, although I could have used an extra two inches on each side of the exterior side fabric. I didn't think the bag needed to be that busy, and would be fine without the extra pieces.
I changed the lining by putting pockets on both sides. On the side opposite her zippered pocket side (which I LOVE her instructions for, by the way), I did a flat pocket in the same material as the lining. To do this, I took two pieces of material and turned and topstitched them together. Then I topstitched the top, and attached it on the other three sides. I made an extra seam in the middle of the pocket to separate it into two pockets, using my cell phone as the measuring tool for the width of one side. Above the other side, I added a key fob on a 2" x 4" piece of lining fabric which was folded twice and stitched on both sides. I attached this using a box stitch.
All in all, I really like this bag. The strap could be a little longer, but I think the extra 2" on each side would help and may only add another two to four inches to the longer strap side in the future. The strap could also be slightly thinner. I made it a little wider than her pattern to make it easier to turn, and it scrunches up a bit on my shoulder. I love the weight of it, and think the heavy canvas plus interfacing makes a nice bag weight. I also like not worrying about scuffing or dirtying the lining with snacks (hey, maybe that's why I need diaper bags) and crayons. I also really like the look of the oilcloth instead of PUL or lightweight quilter's cotton inside.
Note: It has come to my attention that the links are broken. Here are the pattern and instructions:
Hobo Bag Instructions
Hobo Bag Pattern
Pin It
Interesting question.

But
 I still like making them, and this new one is quite cool. I used jcaroline creative's Hobo Bag tutorial as the framework for this cute diaper bag.
 I am calling it a diaper bag instead of a purse because the inside material is waterproof (Amy Butler LOVE oilcloth, to be specific). The exterior is Ikea home decor weight cotton, and I used lightweight iron-on interfacing
I modified her tutorial by changing the straps and the lining.
Instead of using rings to attach the straps, I stitched them on using a box stitch. I like this, although I could have used an extra two inches on each side of the exterior side fabric. I didn't think the bag needed to be that busy, and would be fine without the extra pieces.
I changed the lining by putting pockets on both sides. On the side opposite her zippered pocket side (which I LOVE her instructions for, by the way), I did a flat pocket in the same material as the lining. To do this, I took two pieces of material and turned and topstitched them together. Then I topstitched the top, and attached it on the other three sides. I made an extra seam in the middle of the pocket to separate it into two pockets, using my cell phone as the measuring tool for the width of one side. Above the other side, I added a key fob on a 2" x 4" piece of lining fabric which was folded twice and stitched on both sides. I attached this using a box stitch.
All in all, I really like this bag. The strap could be a little longer, but I think the extra 2" on each side would help and may only add another two to four inches to the longer strap side in the future. The strap could also be slightly thinner. I made it a little wider than her pattern to make it easier to turn, and it scrunches up a bit on my shoulder.
 I love the weight of it, and think the heavy canvas plus interfacing makes a nice bag weight. I also like not worrying about scuffing or dirtying the lining with snacks (hey, maybe that's why I need diaper bags) and crayons. I also really like the look of the oilcloth instead of PUL or lightweight quilter's cotton inside.
Hobo Bag Instructions
Hobo Bag Pattern
Pin It
Friday, February 11, 2011
Valentine's Day Kids' Art Idea: Freezer Paper Stenciling
 I finally got some fabric paint
Then you paint the inside of the stencil. You can see where my helper and I went a little overboard and went outside the lines.
After letting it dry, our paint said to iron the back side to set the paint.
All done! Happy Valentine's Day!!
Tuesday, February 8, 2011
Scandi Mei Tai: Take 3 (and make 3) - with Hood Modification Tutorial


To make the hood, I cut two of these pieces, then stitched them right sides together with the shorter side left open for turning. I made sure to sandwich the two longer straps into the wider edge. I then chose which side would face out and stitched the elastic onto that inside seam allowance (exterior side facing up) using a zig-zag stitch and pulling the elastic tight wile sewing. I used Lastin. You could stitch it either side up but choosing the exterior side will help determine which way the hood will roll once completed.
I then turned it and pushed out the corners. I topstitched along the wider edge only. You could do all three sides, but I didn't want to make the elastic any less stretchy, which seems to happen when topstitching after attaching it like this. If you really want to topstitch three sides, then you could attach the elastic using a casing method instead.
I attached the hood as per her tutorial.


Pin It
Subscribe to:
Posts (Atom)