Tuesday, January 28, 2014

Xtracycle with Kids Alongside - Hop on Hop Off Cargo Biking

The kids have been wanting to be on their own bikes a bit these days.  So I have been riding alongside (at 3 and 6 mph, depending on the child) on my Edgerunner.  My thought was that if one or both decided to quit, I could pop him and his bike on my bike, and get us all home without a meltdown.

In this photo, the little one wanted to ride to pick up his big brother at school.  So we brought Big Brother's bike along so they could both ride home.  I strapped it into one of the seats and away we went.  

This went ok.  I was a bit wider than I was used to, so I had to watch for that.  

Also, Little Brother got tired so we ended up locking his bike to a tree along the route to pick it up on the way home.


In retrospect, we should have locked both bikes to the tree, because Big Brother wanted to ride for only a little bit after a long day at school, so we ended up fitting the front of his bike into one of the cargo bags and half dragging it along with us.  The bell dinged on and on, but it was otherwise fine.


The good news is that they both rode home after reaching the spot where the little guy's bike was locked up.


On another day, the little guy rode a while and wanted to ride more later.  His 12" bike with training wheels attached fits in one of the cargo bags.  In the other bag is his brother's scooter.  We had a really nice ride that day.

All in all, this is a good use of the cargo bike.  Just another reason why it is great.

Pin It

Monday, January 27, 2014

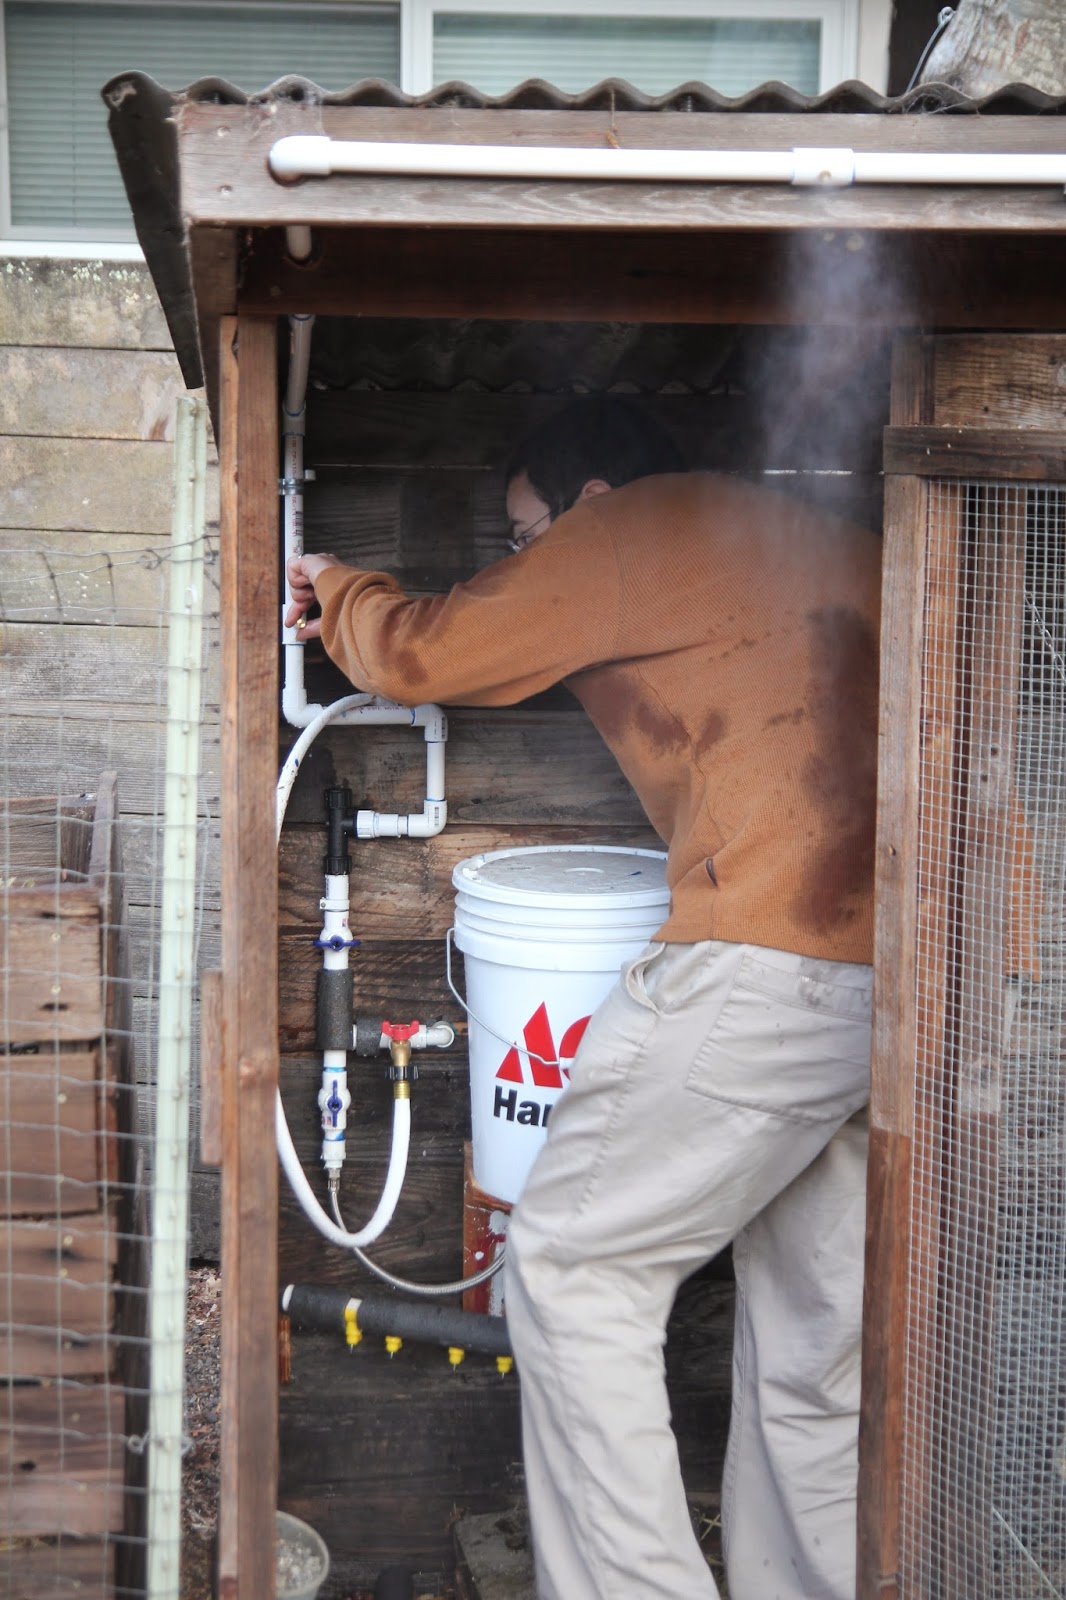
Plumbing the Chicken Coop Part 5: The Mister System

We recently plumbed the chicken coop (see posts 12, and 3). Then the chickens didn't use it, and we got them to use it because we made a chick waterer and then the chicks moved out and used it and now the chickens use it, too.

We decided to finish the coop plumbing project by doing the misting system (they were really hot last summer).  So, we bought the kit we had been eyeing and got to work.

Uh... forgot to blue glue a piece.  Oops.


Got that worked out and it looks good.  


We trailed the PVC up the back of the coop and drilled a hole through the front of the coop and put the misters out the front.  The kit is basically a bunch of couplings with brass misting pieces and a drain piece.  It's a nice kit, actually.  It's meant to be used on a hose, so we needed a piece to thread from the hose piece onto our PVC.  It also has a drainage bit so you can empty it at the end of the hot season and not burst the pipes in the winter.


Plumbing the Chicken Coop Part 1: The Line and Spigots

Plumbing the Chicken Coop Part 2: The Nipple Waterers and Bucket


Pin It

Sunday, January 26, 2014

Look, Ma! No Hands!


Pin It

Saturday, January 25, 2014

DIY Cross-Country Kid Sled from a Bike Trailer - PART 1: The tow poles and skis


We rented a ski Chariot and both my son and I were impressed by it while cross-country skiing.  He was comfortable, and it was a breeze to pull, even as a novice at cross-country skiing.  It had ample storage, and a nice waistband.  The sled nicely rotated when I would go side to side and turn.  I only felt slightly weighted down, and not pulled, even on hills.  My son loves the Burley Bee we use for the bike sometimes, and the Chariot is likewise designed with the child's riding comfort in mind.  We made it for an hour until he wanted to do something else.  That's pretty good for a 2.5 year old to sit still and watch the world go by.

On another cross-country trip, we rented a Kindershuttle and hated it- it was uncomfortable for my child (he kept sliding all over), and it tugged and pulled on me, I think because of its sled bottom instead of ski bottom.  We made it barely out and back and don't want to use it again.

They, unfortunately, don't make a kit for the Bee, so we would have to either make something or get another bike trailer to convert.  At this late stage in the child-riding-along-instead-of-participating game (ages 2.5 and 5.5), we thought it best to make something instead of shell out at least in the $300-range.

For inspiration, we looked to ye olde internet, and formed our plan.  Here was our inspiration:


Here are the kids playing with the design elements.  The skis are 130s I got from the local shop for $20.  They were last year's, and hadn't been used.  We were playing with PVC for the towing.  You can see the wheel from our jogging stroller in front.  We were debating using it instead of the bike trailer, and decided on the bike trailer because of its rain cover (ie no snow in kid's face and slightly warmer).
The kids had to spend a few days towing each other around.
My husband used a jigsaw to cut a 2x4 into the shape of the wheel, with the idea to mount it onto a ski and mount the wheel on and off the skis using a quick release of some sort.
These are 4' lengths of EMF, bent slightly upwards so as not to tip the passenger back too much while being towed at waist height.
The EMF is attached with a hold drilled in it and a carebeaner permanently attached to the side without the towing bar and the EMF pole on that side clips on and off.  It threads through a zip tie to keep it in line.  On the other side, it is attached to where the bike tow bar attaches.  We decided to use two towing poles instead of one for balance and control.
My husband had to test it out by walking.
The waist ends are attached to a fanny pack with 1/2" PVC T's.  They have a hole drilled through and a quick release snap bar (like the one that holds the Burley Bee's bike tow bar to the bike for added support) attaching the PVC to the EMF.  The other part of the T is laced through any strap on the fanny pack.  I may sew something better (than a fanny pack).
This is the 2x4 that will connect the wheel to the ski.  This is before the coats of varnish it is getting.  It needs to be varnished because it will be used in wet conditions and we don't want it to mold.  The indentations are for the snowboard bindings that we will use as quick release holds between the bike trailer and the skis.  We got them at the local ski shop for $10 each.  We wanted to use bindings like this so we could tighten them up on the fly- as the tires deflate in cold weather.
Here are the bindings with the other pieces, as a work in progress (inside shot), then (in the outdoor shot), they have been attached together.

One finished ski!  My husband used stainless steel screws of varying lengths (to correspond to their location on the wood), and sealed the bottom (ski-side) hole with candle wax- two coats.


The kids had to make their own version of a ski sled.  His PVC pieces are poles, and his skis got left behind on the lawn in the back of the photo.

Stay tuned for the continuation of this project!!!

Pin It

Friday, January 24, 2014

Sauerkraut is Done

Our sauerkraut is done! The DIY crock rocks worked great.


Sauerkraut
modified from Wild Fermentation by Sandor Katz
5 pounds cabbage
3 tablespoons sea salt


Chop or grate cabbage.  Place into 1 gallon fermentation crock (or food grade plastic bucket), sprinkling in salt by layers.  Push with fist as layering.  Cover with plate or lid that fits snugly inside crock.  Weight it down, then cover with a cloth. Press it down as often as you think of it over the next 24 hours, or until brine comes above lid.


Leave it to ferment, checking it every day or two to make sure lid is submerged and to taste it.  Should be ready in 1 to 4 weeks.  Store in refrigerator. Pin It

Monday, January 13, 2014

DIY Vanilla Extract

When faced with my husband's question of why, exactly, I was making our own vanilla, the only answer I could come up with at the time was that I could.
A better answer would have been to explain to him that I like the idea of going back as many steps as possible when making food from scratch, and that going back and making as much as possible at home increases the transparency of what is in the food and makes it simpler for your body to digest.

Hm.


Anyway, I found a few recipes (Caveman Keto and The Prairie Homestead) and they basically seemed the same.  

Slice a vanilla bean in half, put it into a glass bottle, and pour vodka or bourbon over it and let it sit.  Times vary from 6 weeks to 6 months in the recipes; I will smell mine at 6 weeks and see.  We chose bourbon because we are used to using bourbon vanilla and, if faced with any leftover, we prefer bourbon to vodka.

  Label it if you want. Shake it every so often.  

Looks like when it is ready, you can leave the used bean in there and re-fill it with alcohol and let it sit again (and re-use the bean indefinitely).  Or take the bean out and give the bean a second life in your sugar storage bin making vanilla sugar.


Pin It

Sunday, January 12, 2014

Sourdough Bagels

I saw this post on 60 Ways to Make Sourdough and was inspired to do more than the Tartine Country Loaf I have been making (and everyone has been loving).

I started with the sourdough bagel recipe.  I used my starter (there it is in the back, in the big glass jar) the night before and made the dough, then let it sit overnight.  In the morning, we shaped the bagels, boiled them, and baked them.  They were surprisingly good, and surprisingly easy.  The only modification we did was not adding sugar to the boiling water, and pushing some frozen blueberries into some of the bagels after boiling. 


Pin It

Saturday, January 11, 2014

Homemade Toothpaste


I tried making two recipes for homemade toothpaste.  I made Homemade Squeezable Toothpaste and DIY Remineralizing Toothpaste.  Another option, which I didn't make, was the Homemade Remineralizing Toothpaste. There are a ton of recipes out there, which seem to be variations of Bentonite Clay, Coconut Oil, Peppermint Oil, Baking Soda, and Salt (mostly).  I made both and put them in these BPA free tubes.

They are... ok. I keep wanting a bit more zing like I get with Ecodent tooth powder (see this post).

Want to learn more? Read Cure Tooth Decay by Ramiel Nagel. It's fabulous.  Ok, he talks about what to eat and to do oil pulling and use a waterpik, but it's a great read (and slightly on-topic).


Pin It

Friday, January 10, 2014

Fireplace Remodel Part 4: Lighting

Here is the "before" photo for the project.  Notice the lighting: two matching lamps.  Nothing special- just balanced on both sides.


Then the fireplace was finished, and the space for the lamp on one side was now taken up by a piece of furniture for the TV stuff.


So now we at least have a workable solution, though it is nothing fabulous.  We found a table lamp which looks similar to the original floor lamp.


Perhaps one day we will do something permanent with lighting in this room, like sconces or track lighting or something.
++++++++++++++++++++++++++++


++++++++++++++++++++++
Pin It

Monday, January 6, 2014

DIY Lip Balm

We decided to spend a little time making some of our own cosmetics.  First up- lip balm.


We found two recipes and assembled our ingredients and the tins/ labels. I decided to use metal tins instead of plastic containers because I would be filling them hot and didn't want plastic residue in our lip balm. I used these tins, but these also look nice.

Here is the chocolate recipe.
Here is the peppermint recipe.


Turns out that both recipes called for beeswax, coconut oil, and peppermint oil.  The chocolate recipe also called for cocoa butter and cocoa powder.  The peppermint recipe also called for honey.


Both were easy to make, but I thought the chocolate was easier, only because the honey didn't end up melting all the way and clumped into a few of the containers.  I also should have halved the peppermint recipe.

They both go on nicely, but I like the feel of the chocolate one better.  The taste is actually a bit strong for me; I think that next time I will use the cocoa butter only and skip the cocoa powder.

 
Posted by Picasa
Pin It

Sunday, January 5, 2014

Smoothie Help

 
Posted by Picasa
Pin It

Saturday, January 4, 2014

Persimmon Cubes


To keep them a bit longer, we wanted to freeze them... but in usable portions.  So we put them into the food processor.

Then I froze them in our ice cube tray.


And they are going to be stored in freezer bags so we can use them in smoothies.
 
 Or eat them plain!
 
Posted by Picasa
Pin It

Friday, January 3, 2014

DIY Crock Rocks- Fermentation Crock Weights

I saw crock rocks on amazon as a way to hold down the plate that fits inside the fermentation crock.  Brilliant!

But wait- I have rocks.


So I washed one, covered it in tin foil, and put it on the inside plate atop our newest batch of sauerkraut.
 
 
Posted by Picasa
Pin It

LinkWithin

Related Posts Plugin for WordPress, Blogger...