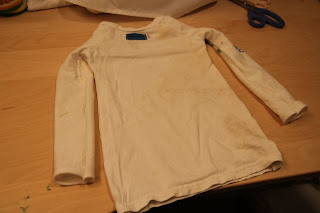
These are both made from old man's shirts. I love upcycling and haven't done much of it lately. Making the first shirt reignited my interest.

I made these both using the short sleeve raglan tee pattern from the book Sewing for Boys.

I love how the green one turned out, and the white one is cute but way too small. The blue one fits, but is a bit tight in the arms in loose in the neck.
I have modified the sizing, though, and am still working on it. I made these for my big 3 1/2 year old. The green and white are in size 2/3 with an extra 4" added to the bottom length. I chose that size and adding length to the bottom because I have made a few other projects in the book and the tops have been wide and short. My modified size was too tight in the arms and good on length. So I went up a size with the blue one and it was still too tight in the arms and the length was ok (I added 2" to the pattern) and the body was a little narrow.

The white one didn't fit over his head. The green one did, but you can see that I kept some of the original details of the green shirt. It was a biking shirt with a zipper in front and pockets in back. For the collar of the blue one, I kept the original t-shirt collar and stitched it onto the shirt. I could have (should have??) taken it in a bit, but I wanted to make sure it would fit over his head. He doesn't mind that it is a bit loose but I want to do a better/ sharper job next time.

One of my favorite parts about upcycling is keeping some details from the original shirts. I love how the upcycled aspect of the green one turned out. I kept the sleeves as sleeves, and the back bottom as the bottom, so it didn't need to be hemmed at all. The pattern actually doesn't call for hemming, which I don't like the look of, so it is convenient to use pre-finished pieces.
When making the white shirt, I wanted to keep the bottom hem as well, so the pattern of the shirt ended up on the sleeves a bit as well as the body.
In making the blue one, I also tried to keep the bottom hem, so the pattern which was originally on the front and back of the t-shirt ended up on both sleeves. I really like it there, and I like how the sleeves go to the neckline because it pulls the pattern of the original shirt up much higher.

As far as the pattern itself, other than my sizing issues, I found it easy to use. It was marked "beginner" and I found it mostly easy. I don't like exposed seams, so I did them in reverse. I found the stitching in the tunnel of the arm difficult, so I didn't do it that way. I instead reinforced my seams my finishing them in my usual way on the inside (with a zig-zag as a faux serge).
The collar is easy enough as well, which really does make this mostly a beginner-suitable project. I really wanted to make it in a smaller size for my 9-month old, and was a bit miffed it didn't go below size 2/3.
 All in all, this was a fine project. I may try it again, for lack of a better t-shirt pattern. But I do need to modify it to fit better. My next pass will have wider arms and a shorter collar. I will keep the additional 2" length.


No comments:
Post a Comment